nodes reference
introduction to nodes
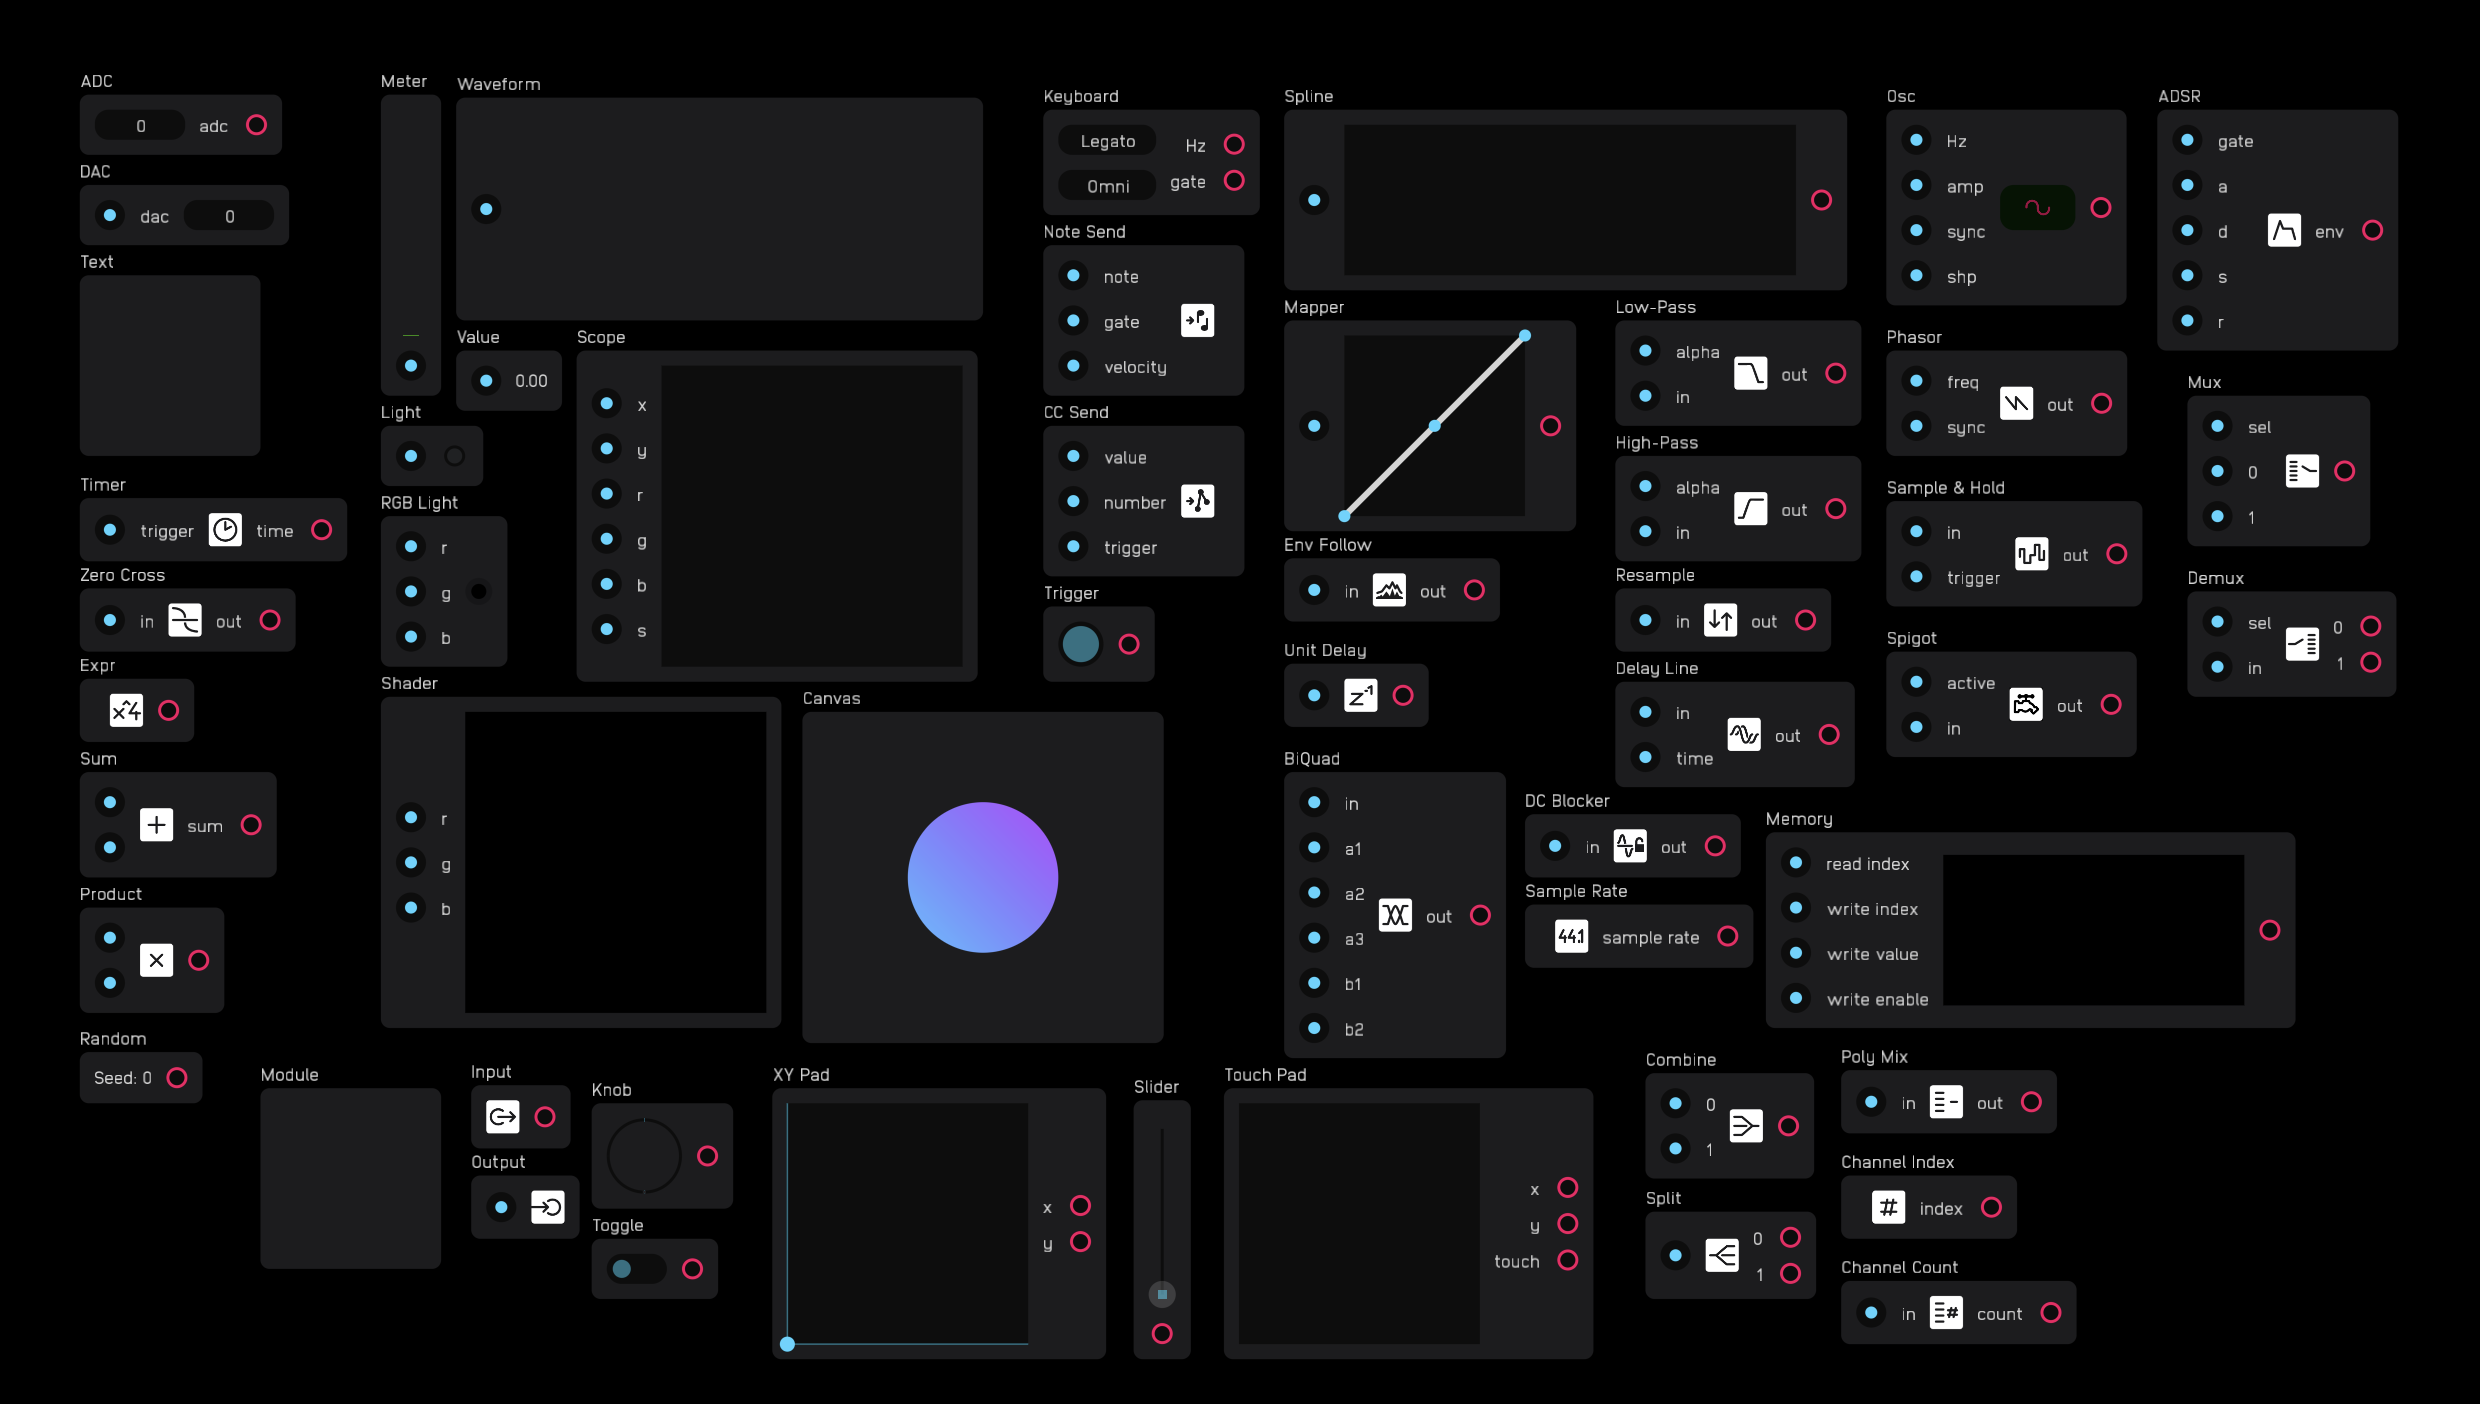
Everything in Audulus is built with nodes. There are 53 nodes in total.
Nodes are packets of code that do things. A node may have inputs, outputs, both, or none.
Inputs are on the left side of nodes and are blue. Outputs are on the right side of nodes and are red.
Nodes can be moved around the canvas, but they cannot be rotated.
You connect nodes together by dragging a wire from an output to an input. You cannot drag a wire from an input to an output. You can connect one output to as many inputs as you want.
You disconnect nodes by unhooking a wire from an input. Wires cannot be disconnected from an output. An input only accepts one wire. To connect multiple wires to one input, you must use an add node to first add the signals together.
Wires can go from any output anywhere to any input anywhere: up, down, left, or right. However, overall signal flow in Audulus is from left to right.
Nodes send and receive signals through wires. Every signal is a number. [^1] Although all signals are numbers, there are several categories of signals. These categories are defined by their range, unit, and how they are used.
[^1]: Audulus signals are signed 32-bit floats.
The table below describes every type of signal that nodes use.
| signal | range |
|---|---|
any |
any signals can be any number and type of signal |
audio |
-1 to 1[^2] |
gate |
0 or high where high is any non-zero positive 32-bit number. |
hz |
0 to sampleRate/2[^3] |
integer |
an integer value |
midi value |
integers 0 to 127 |
mod |
0 to 1 |
seconds |
0 to 2^32-1 |
[^2]: Audio signals can exceed the -1 to 1 range, but they will be clipped to that range upon output.
[^3]: Hz values above sampleRate/2 can be generated but are limited in use. Negative hz signals can be used to flip the phase of the phasor node, useful for through-zero FM.
Some nodes have attributes that are accessible in the inspector panel. Every node has an (x, y) position attribute in this panel.
Nodes can be packaged into modules and submodules. Modules are containers for nodes that allow you to create a user interface for you to interact with. Submodules are used inside of modules. They are like user-created nodes.
Some nodes are exposable, meaning they have some element that can appear on UI of a module. Some, like the knob node, are automatically exposed while others, like the text node, have an option to expose.
If a node is exposable, a node will have an (x, y) coordinate for where it is inside the module and another (x, y) coordinate for where it is on the UI of the module.
Other nodes have attributes you can change directly on the node.
There are 10 different categories of nodes. The table below lists each category and provides a short description.
| category | description |
|---|---|
util |
various utilities |
math |
use math and logic to manipulate and create signals |
meter |
displays for monitoring signals |
midi |
MIDI utilities |
level |
tools for adjusting and analyzing signal levels |
dsp |
digital signal processing tools |
synth |
essential primitive-level synthesis tools |
module |
used for creating modules and submodules |
poly |
utilities for creating and managing polyphonic signals |
switch |
tools for routing signals |
Some nodes count as outputs. Examples of outputs are value, light, and dac nodes.
If a node is not connected to an output, it will not be evaluated.
util
description
util nodes are various utilities that do some very essential things.
- The
adcanddacnodes are used to getaudioandCVin and out of Audulus. - The
textnode is used for labeling and commenting inside of patches. - The
timernode has a variety of uses including creating envelopes and driving automation. - The
zero crossnode analyzes incoming audio and outputs its frequency inhz.
adc
| output | signal |
|---|---|
adc |
audio |
| control | description |
|---|---|
channel number |
access to 1 of 16 channels indexed from 0 |
| exposable | ❌ |
|---|---|
description
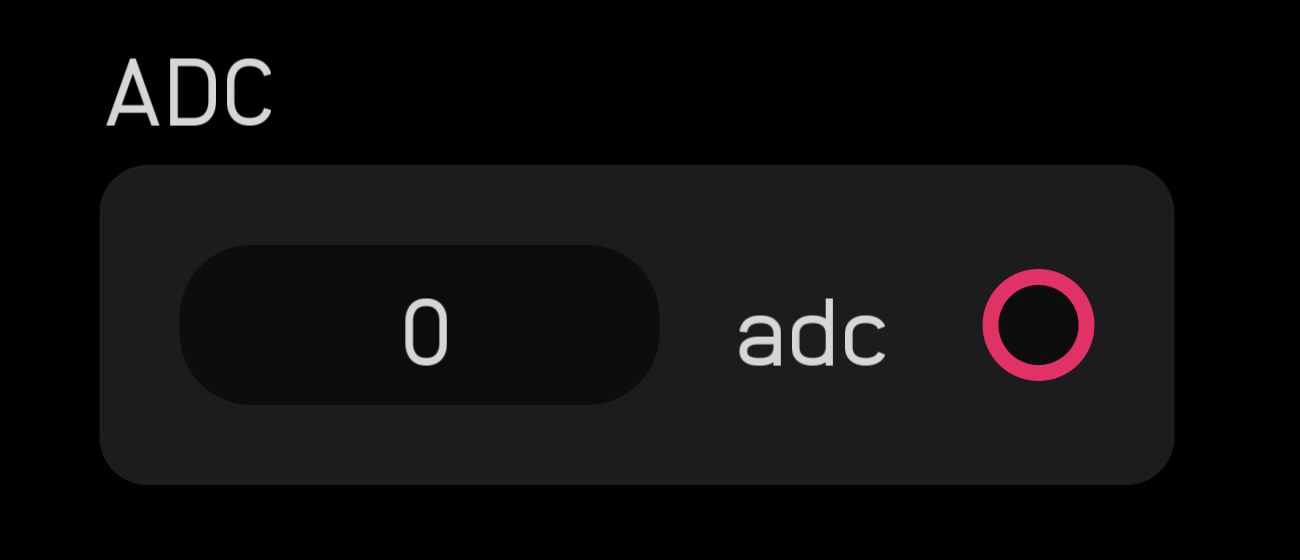
The adc node is how you get audio and CV into Audulus from an external source. An external source could be a microphone, a DAW, or a CV input from a hardware modular synth.
The adc node outputs an audio signal, but in this case, all that means is that incoming signals are clamped between -1 and 1. The adc node is often used as an audio input, but it can also be used to pass a gate signal from a modular synth.
The adc node can access the first 16 inputs of any class-compliant audio interface.
The channels are indexed from 0. Clicking or tapping on the channel number will increment it by 1 up to 15 when it will wrap around to 0 again.
In most cases, 0 is the left channel and 1 is the right channel.
dac
| input | signal |
|---|---|
dac |
audio |
| control | description |
|---|---|
channel number |
access to 1 of 16 channels indexed from 0 |
| exposable | ❌ |
|---|---|
description
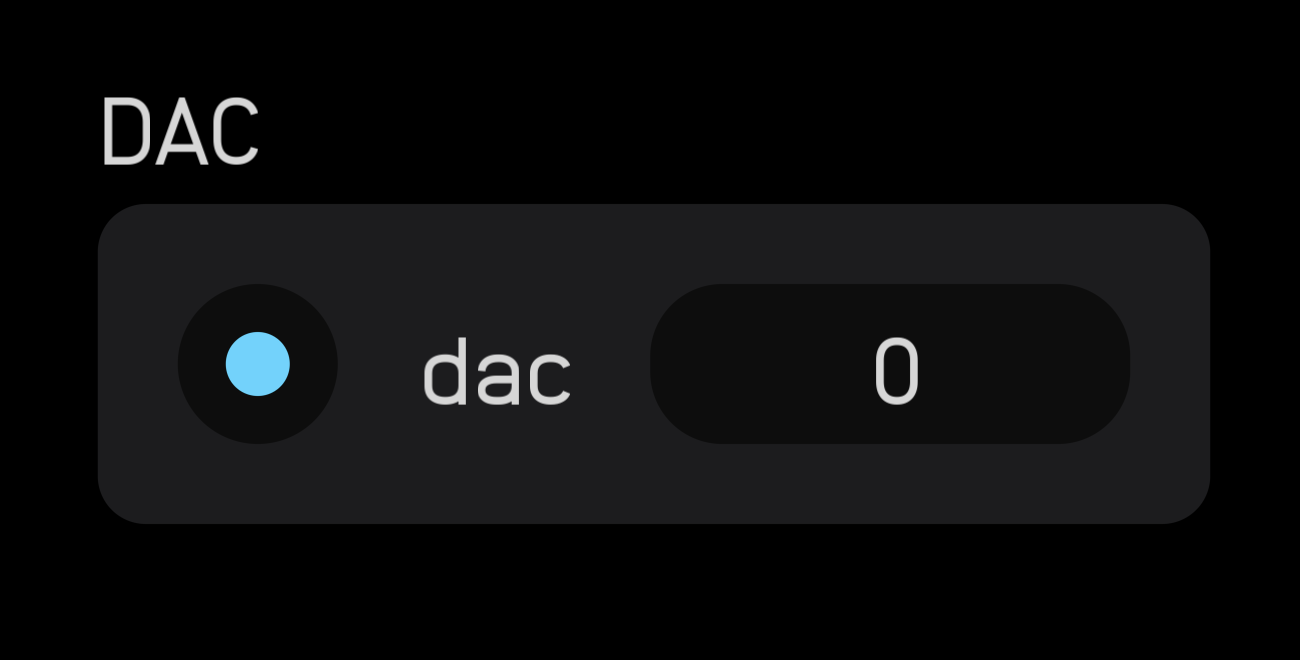
The dac node is how you get audio and CV out of Audulus and send it to an external output. An external output could be your headphones, speakers, a DAW, or a CV output to a hardware modular synth.
The dac node takes an audio signal input, but in this case, all that means is that outgoing signals are clamped between -1 and 1. The dac node is often used as an audio output, but it can also be used to pass a gate signal to a modular synth.
The dac node can access the first 16 outputs of any class-compliant audio interface.
The channels are indexed from 0. Clicking or tapping on the channel number will increment it by 1 up to 15 when it will wrap around to 0 again.
In most cases, 0 is the left channel and 1 is the right channel.
The dac node does not include any DC-offset filtering. A constant DC offset can damage speakers. Most audio interfaces will filter a DC offset, but this offset can still cause distortion by decreasing the amount of headroom you have.
It is best practice to use a dc blocker node before a dac node unless you explicitly need to send a mod or gate signal to an external instrument.
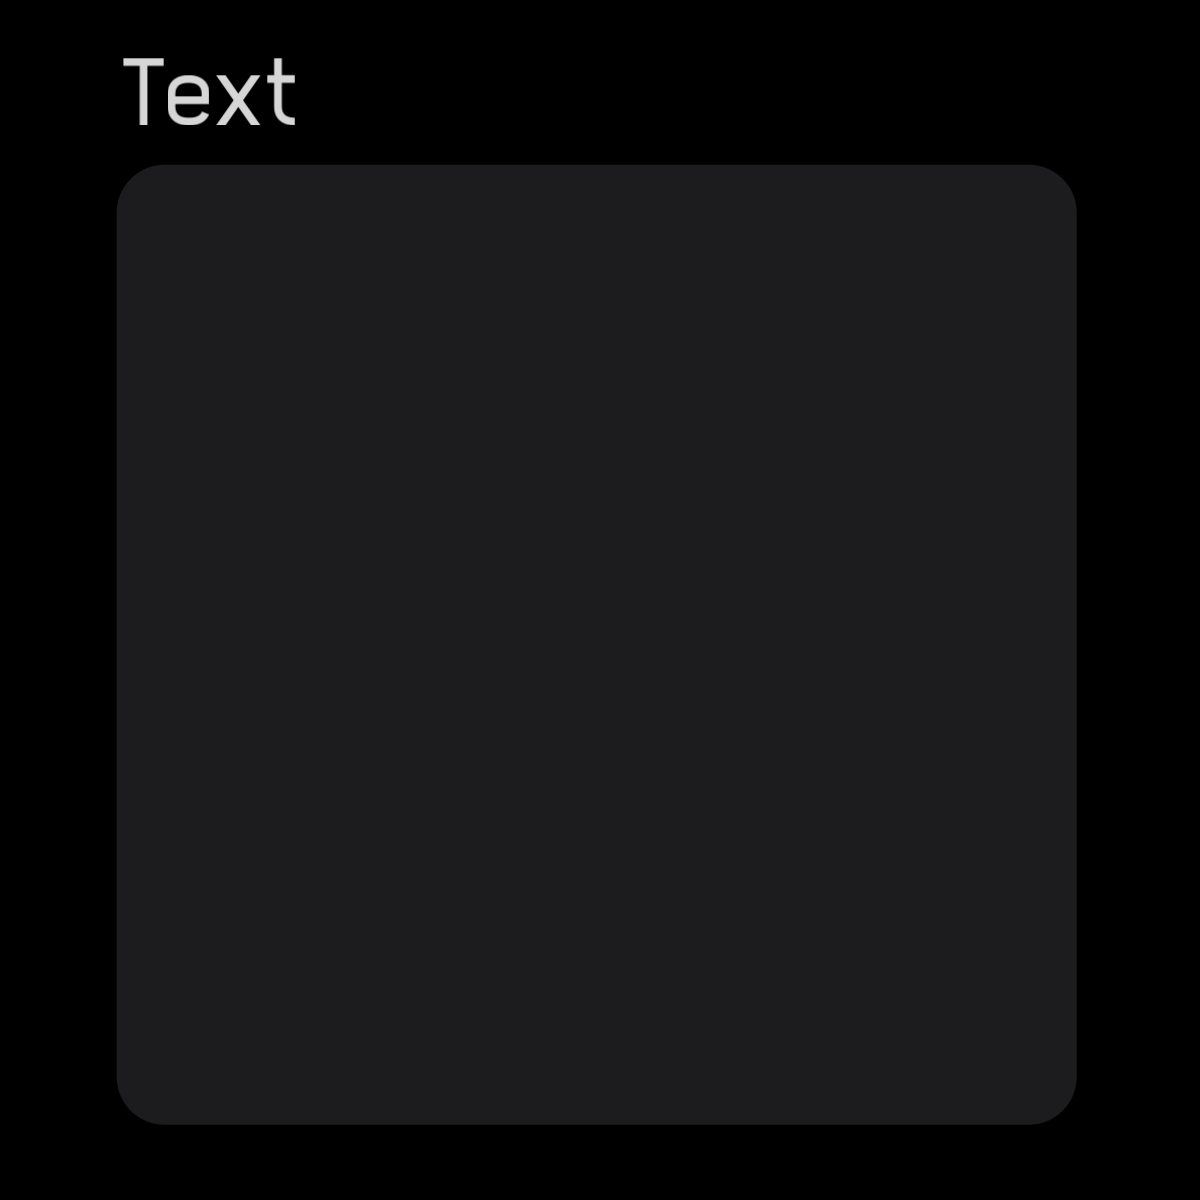
text
| exposable | ✅ |
|---|---|
description
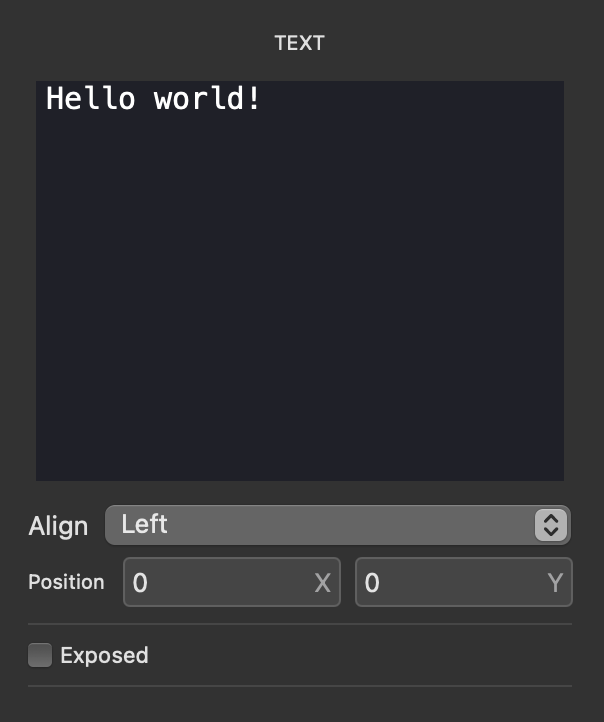
The text node has no inputs or outputs. text nodes are used for labeling and commenting inside your patches. Click or tap on the node and open the inspector panel (pictured below). You can then type in the text field and text will appear inside the node.
| option | description |
|---|---|
Align |
Choose from Left, Center, and Right aligned text |
Exposed |
Check the box to expose this node to the UI of the module it is contained within |
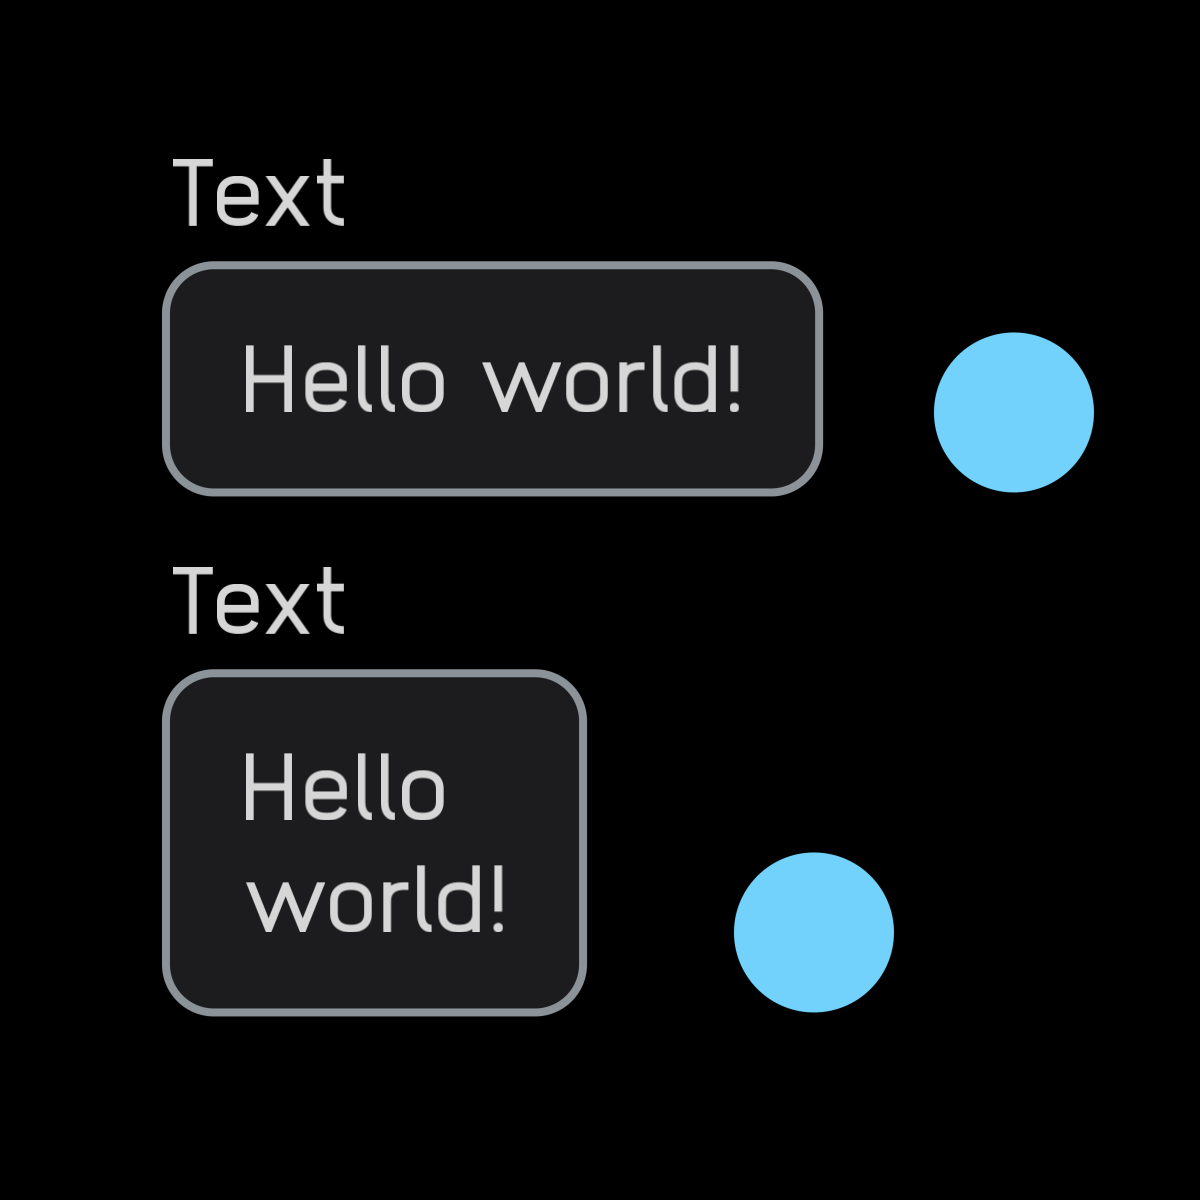
The text node can be resized by tapping or clicking on the blue ball that appears when selecting the node and dragging the ball left or right.
Below are all of the characters that will render correctly in the text node.
ABCDEFGHIJKLMNOPQRSTUVWXYZ
abcdefghijklmnopqrstuvwxyz
ÄÅÃÁÂÀÆæâäáàåãÇçÐðÊËÉÈêëéè
ÍÎÏÌïîíìÑñÖØÓÔÒÕõöóòôøÜÚÛÙ
üûúùÝýÿßþÞ
0123456789
!"#$%&'()*+,-./:;<=>?@[\]^
_`{|}~£×¿®¬½¼¡«»©¢¥¤ı¦µ¯´¬
±¾¶§÷¸°¨•
Text size cannot be changed. The canvas node can do many manipulations with text that the text node cannot.
timer

| input | signal |
|---|---|
trigger |
gate |
| output | signal |
|---|---|
time |
seconds since last reset |
| exposable | ❌ |
|---|---|
description
The timer node outputs a signal in seconds since its last reset. The node resets on the rising edge of an incoming gate signal.
The timer output increases smoothly from second to second. Its functional precision is 1/sampleRate seconds. For example: at a sample rate of 44.1kHz the precision is 1/44,100 or approximately 0.00002 seconds.
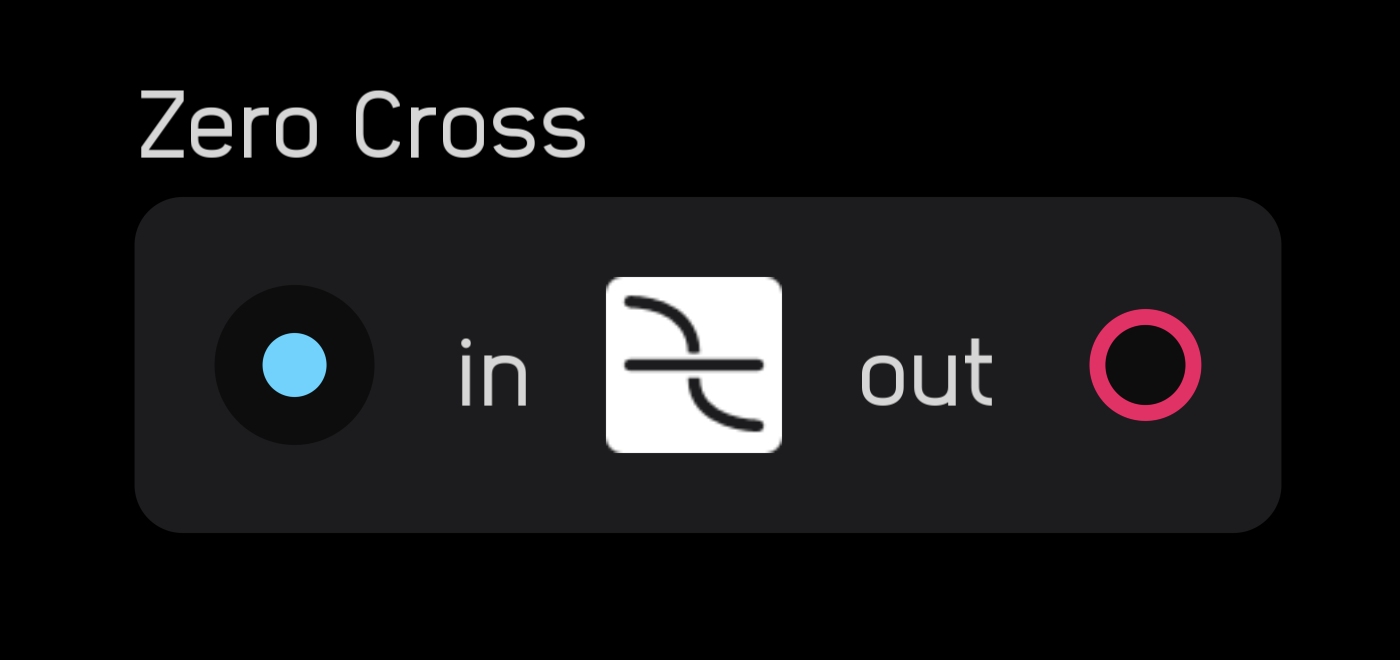
zero cross
| input | signal |
|---|---|
in |
any but it must cross through or at least touch 0 |
| output | signal |
|---|---|
out |
hz |
| exposable | ❌ |
|---|---|
description
The zero cross node counts the time between two zero-crossings and outputs that value as a hz signal. To be counted as a zero-crossing, the signal must either pass through 0 or be = 0 at some point during its cycle.
math
description
The math nodes are some of the most powerful and versatile nodes.
- The
exprnode alone has 40 operators and functions which can be combined in many ways. sumandproductare elegant ways to visually emphasize how signals are combining and can be expanded to have as many inputs as necessary.- The
randomnode has aseedinput that ensures multiple copies of the same module can produce different random results with differentseedvalues.
expr

| arithmetic operator | description |
|---|---|
x + y |
addition |
x - y |
subtraction |
x * y |
multiplication |
x / y |
division |
x^y |
exponentiation |
-x |
negation |
(x) |
parenthetical grouping |
| exponential function | description |
|---|---|
exp(x) |
e^x |
exp2(x) |
2^x |
pow(x, y) |
exponentiation x^y |
sqrt(x) |
square root[^4] |
ln(x) |
natural log |
log2(x) |
log base 2 |
log10(x) |
log base 10 |
[^4]: Cube roots and beyond are accessible like this: x^(1/y) where x = radicand and y = degree.
| boolean operator | description |
|---|---|
x == y |
x is exactly equal to y |
x != y |
x is not y |
x < y |
x is less than y |
x <= y |
x is less than or equal to y |
x > y |
x is greater than y |
x >= y |
x is greater than or equal to y |
| common function | description |
|---|---|
abs(x) |
absolute value |
floor(x) |
round down to integer |
ceil(x) |
round up to integer |
fract(x) |
x - floor(x) |
mod(x, y) |
remainder of x / y |
min(x, y) |
returns lesser of x and y |
max(x, y) |
returns greater of x and y |
clamp(x, a, b) |
restricts x to the interval [a, b] |
step(x, edge) |
1 if x > edge otherwise 0 |
smoothstep(a, b, x) |
smooth step from 0 to 1 at the interval [a, b] |
mix(x, a, b) |
0 to 1 at x smoothly transitions between the interval [a, b] |
| trigonometric function | description |
|---|---|
sin(x) |
sine |
cos(x) |
cosine |
tan(x) |
tangent |
asin(x) |
inverse sine |
acos(x) |
inverse cosine |
atan(x) |
inverse tangent |
sinh(x) |
hyper sine |
cosh(x) |
hyper cosine |
tanh(x) |
hyper tangent |
asinh(x) |
inverse hyper sine |
acosh(x) |
inverse hyper cosine |
atanh(x) |
inverse hyper tangent |
| constant | description |
|---|---|
pi |
π |
e |
Euler's number |
| exposable | ❌ |
|---|---|
description
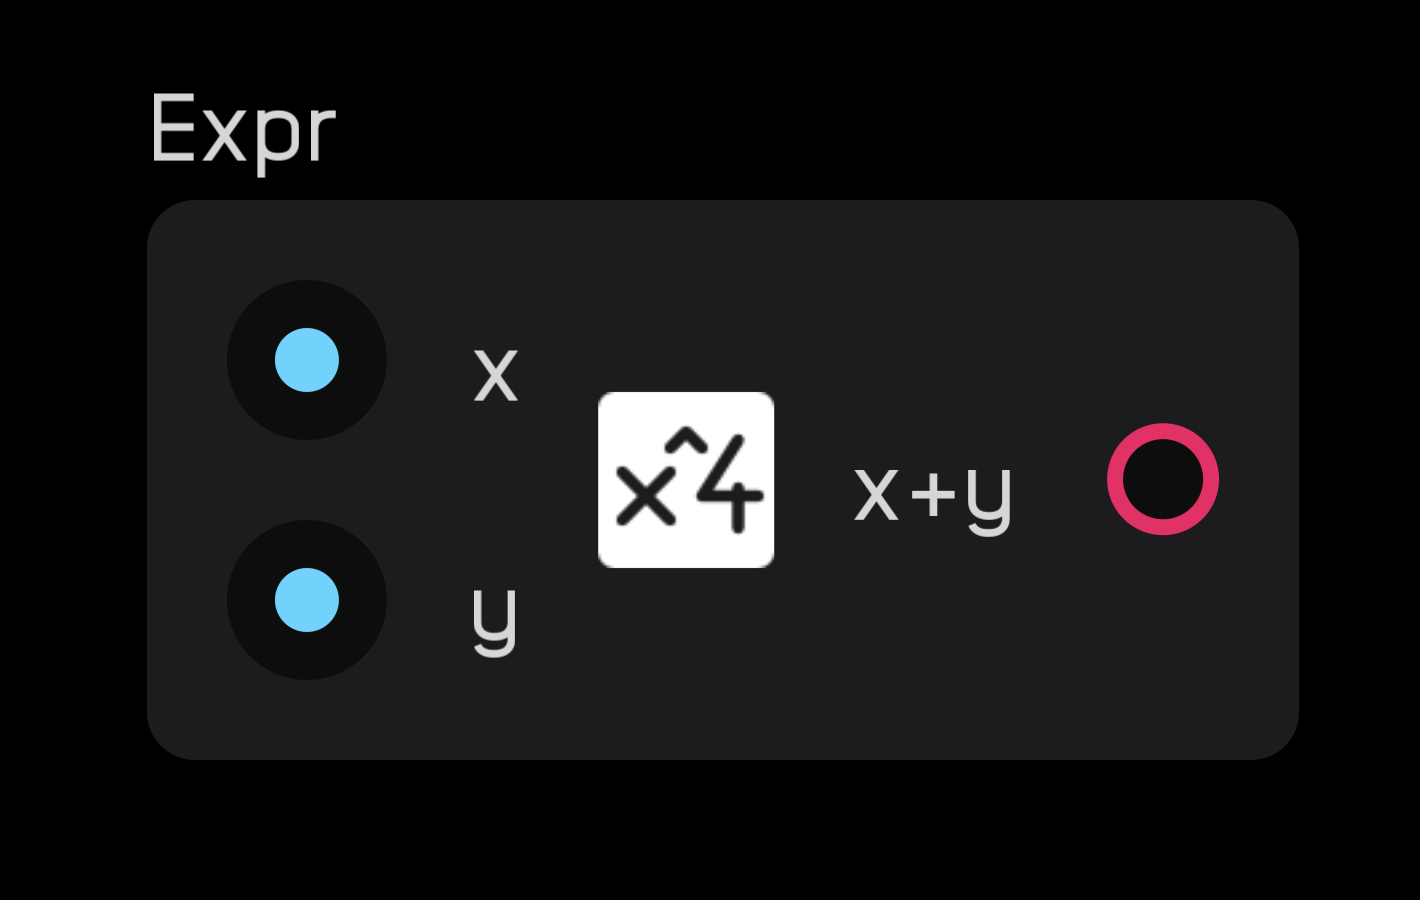
The expr node is the most versatile node. It does math and basic programming operations.
Double clicking on any input will create an expr node.
You enter equations into the inspector panel, pictured below. You do not need to add an = sign after your expression.

You can drag and drop various selected functions into the text field, or if you know their syntax, type them directly into the text box.
Entering letters or words will create variables as inputs, as pictured below.
Variables are case-sensitive, meaning x is not the same as X. Spaces and underscores are not allowed. For long variables, you can use camel case. For example: thisIsALongVariable.
Variables can contain numbers, but they must start with a letter. input1 will generate an input but 1input will not. Variables cannot contain symbols.
Certain variable names are reserved, like mod, e, and pi. If you need to use them as variables you can capitalize the first letter, like this: Mod, E, Pi.
You can call a variable multiple times within an expression, like x * x * x.
Spaces between variables and operators and within functions are optional. x*y is the same as x * y and clamp(x,0,1) is the same as clamp(x, 0, 1).
Functions can be nested within one another, like max(0, min(x, 1)).
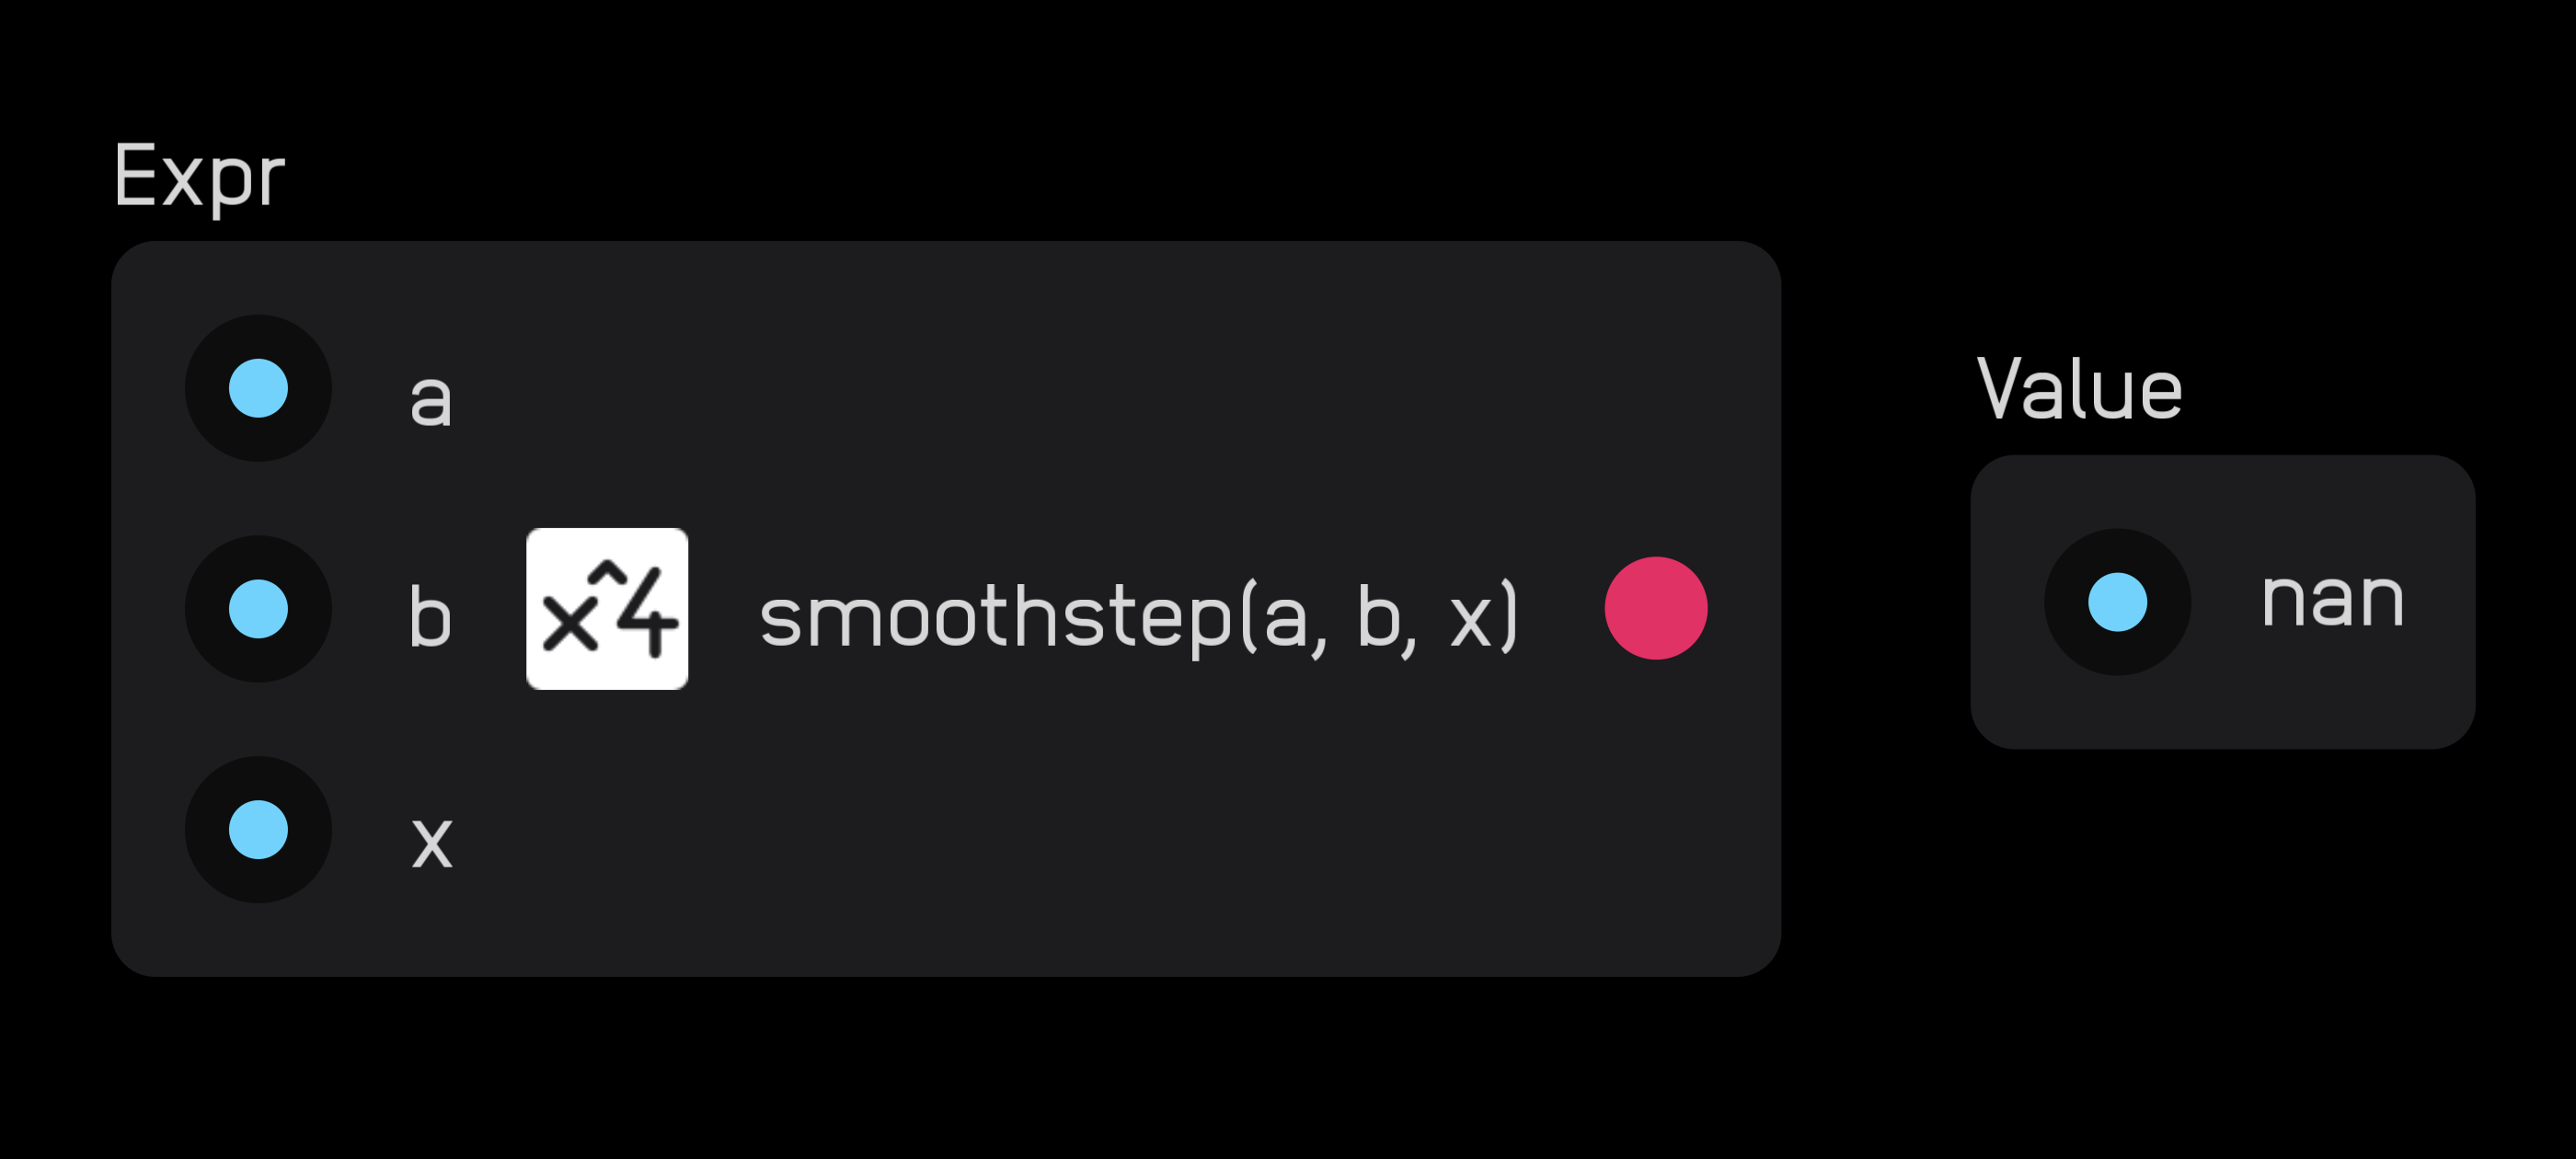
Divide-by-zero functions return a 0. In other rare cases it is possible to create an expression that outputs a nan value, or "Not a number." The node producing the nan will immediately self-disconnect from your signal chain to prevent damage to speakers. A nan will be displayed in the value node, as pictured below.
Expressions like the 1/3 in x * (1/3) are evaluated once during start-up and replaced by a float in the background of Audulus, saving some compute time.
sum
| input | signal |
|---|---|
in |
any |
in |
any |
... |
any |
| output | signal |
|---|---|
sum |
any |
| exposable | ❌ |
|---|---|
description
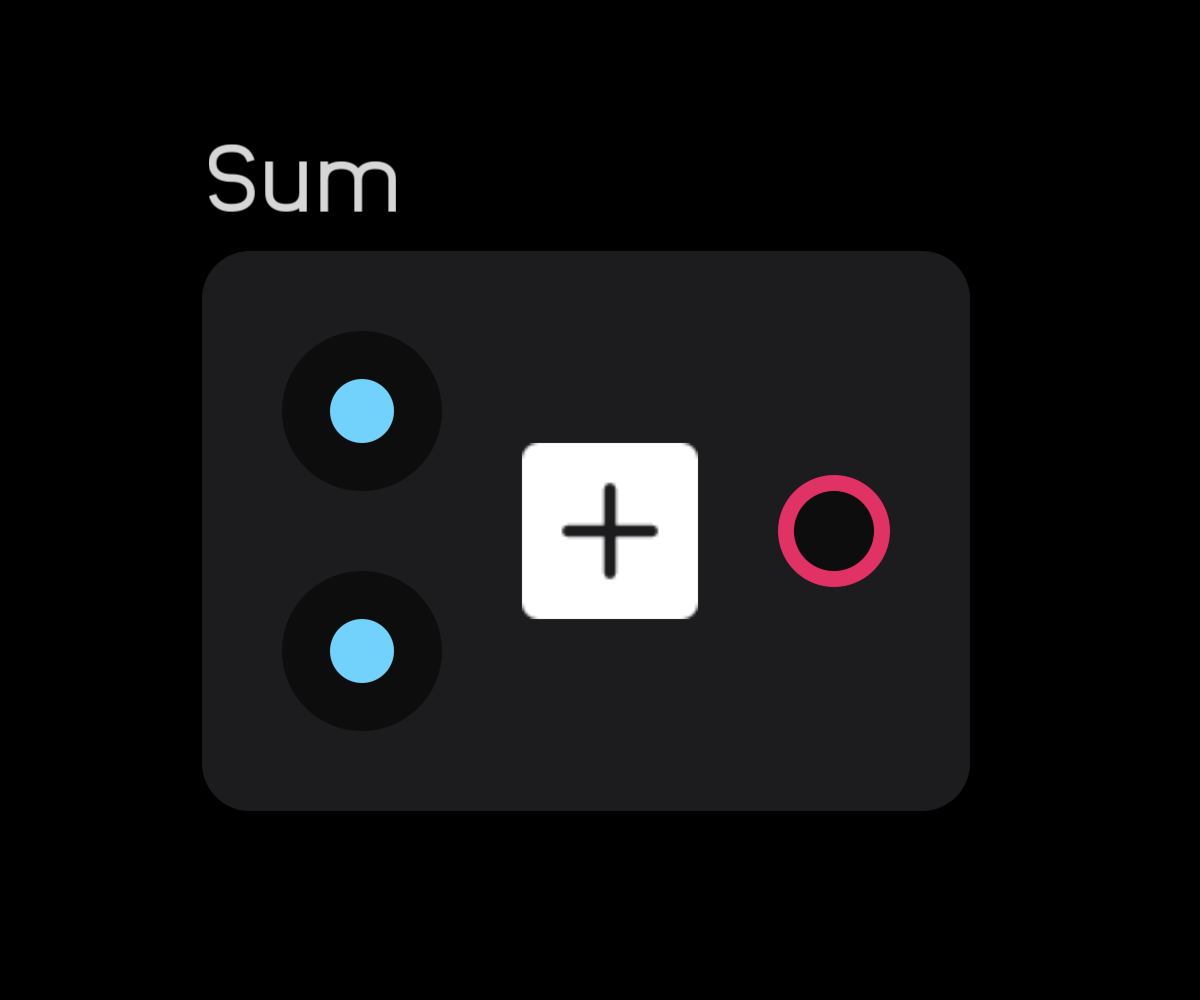
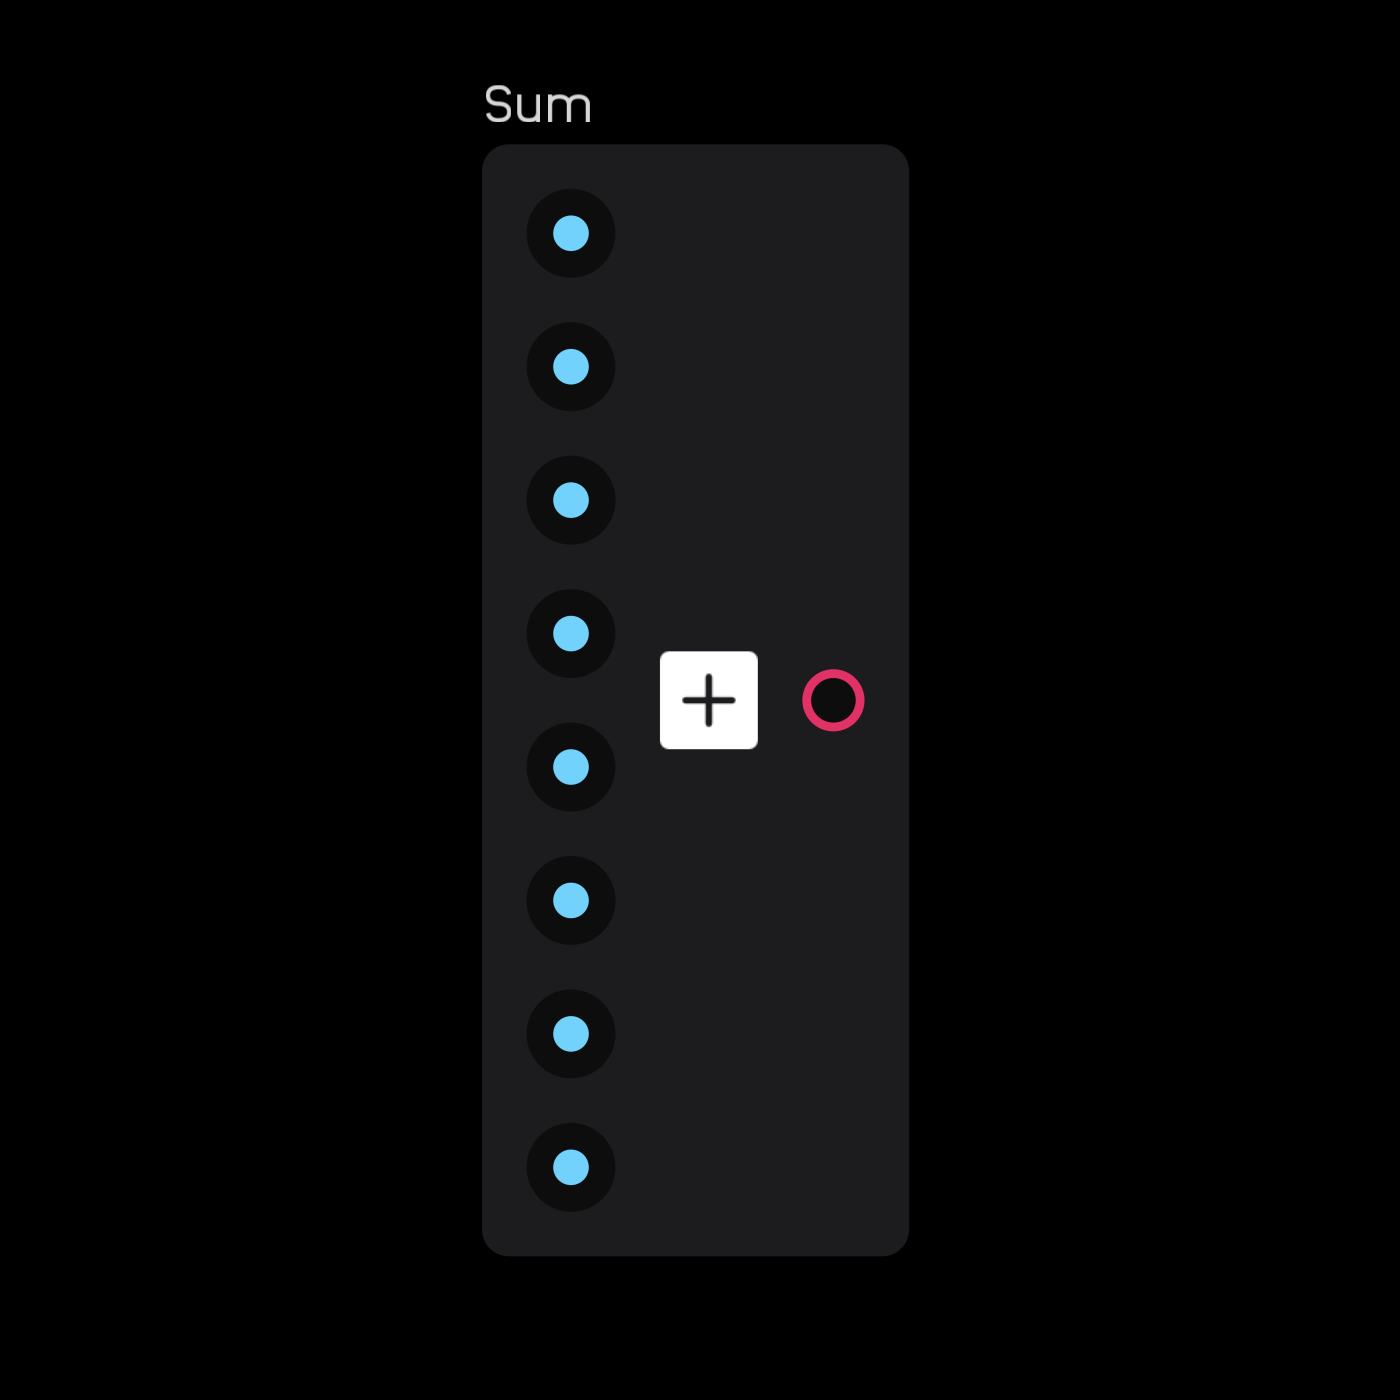
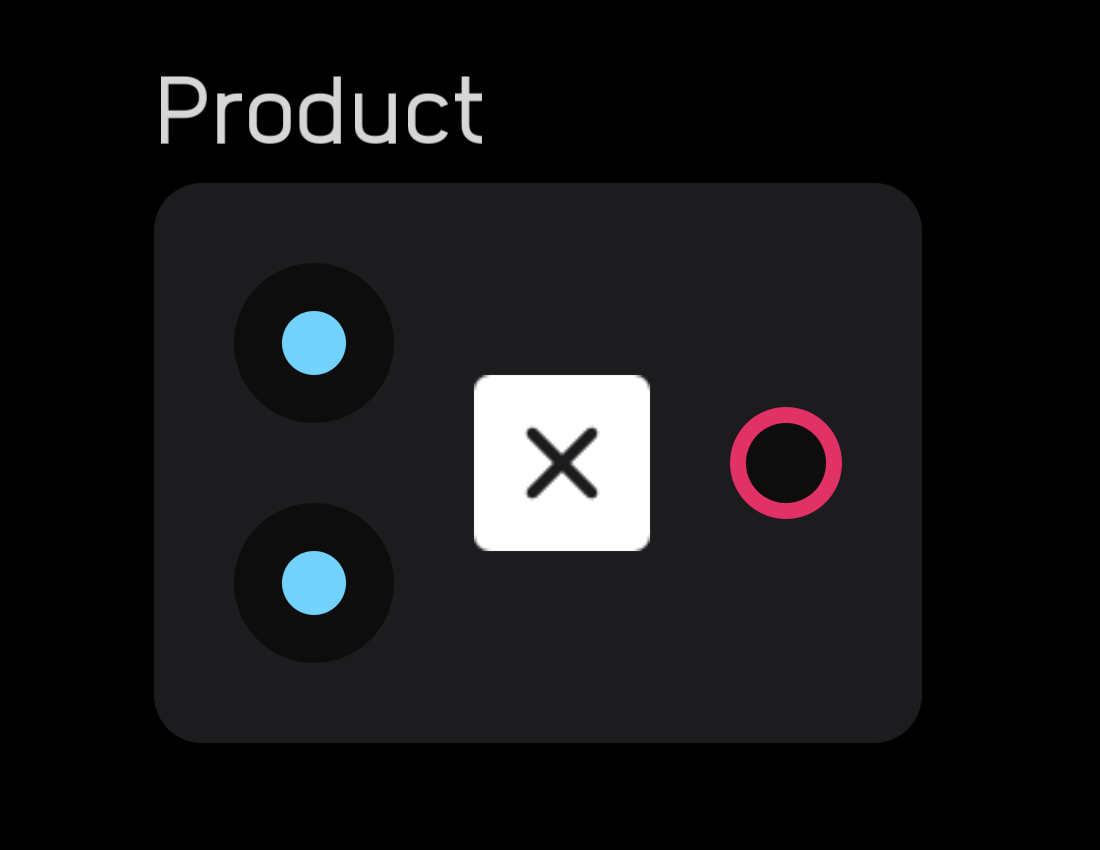
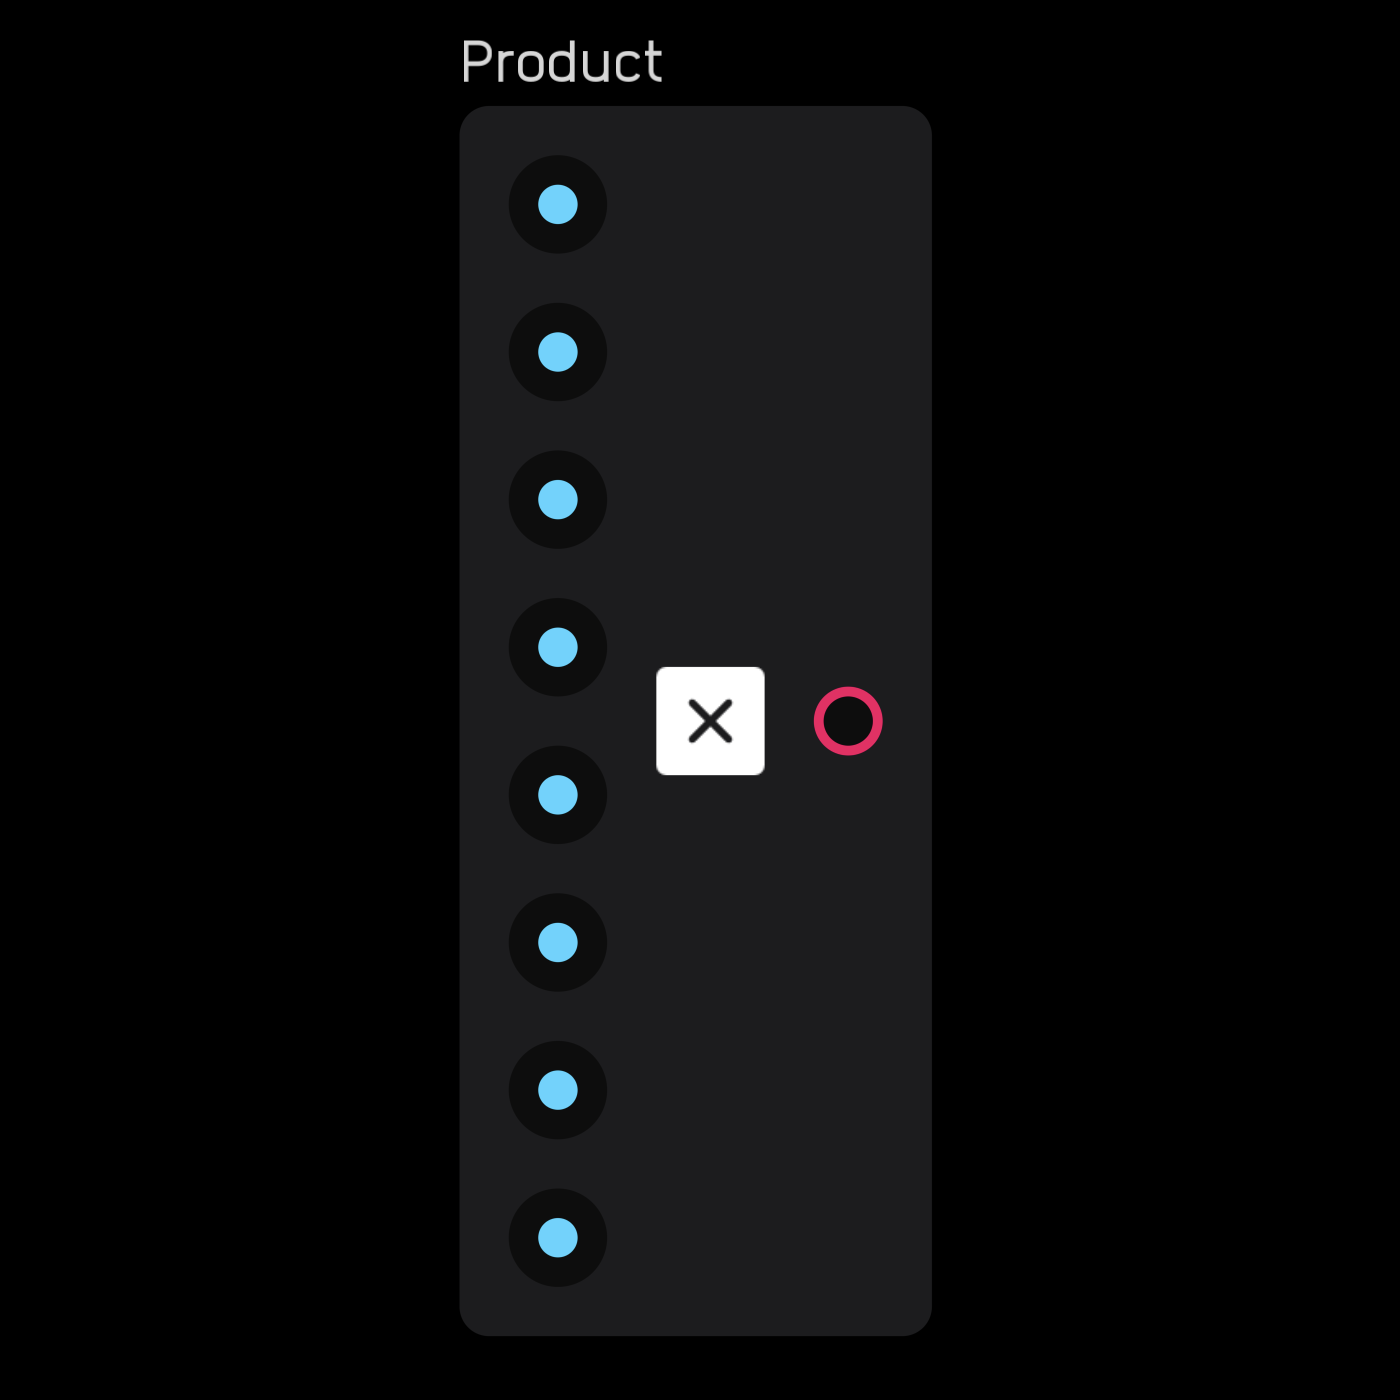
The sum node adds two or more signals together.
In the inspector panel you can specify how many channels you want to add together. The maximum is 256.

When you increase the number of channels, the number of inputs increases accordingly.
product
| input | signal |
|---|---|
in |
any |
in |
any |
... |
any |
| output | signal |
|---|---|
out |
any |
| exposable | ❌ |
|---|---|
description
The product node multiplies two or more signals together.
In the inspector panel you can specify how many channels you want to multiply together. The maximum is 256.
When you increase the number of channels, the number of inputs increases accordingly.
random
| output | signal |
|---|---|
out |
mod |
| exposable | ❌ |
|---|---|
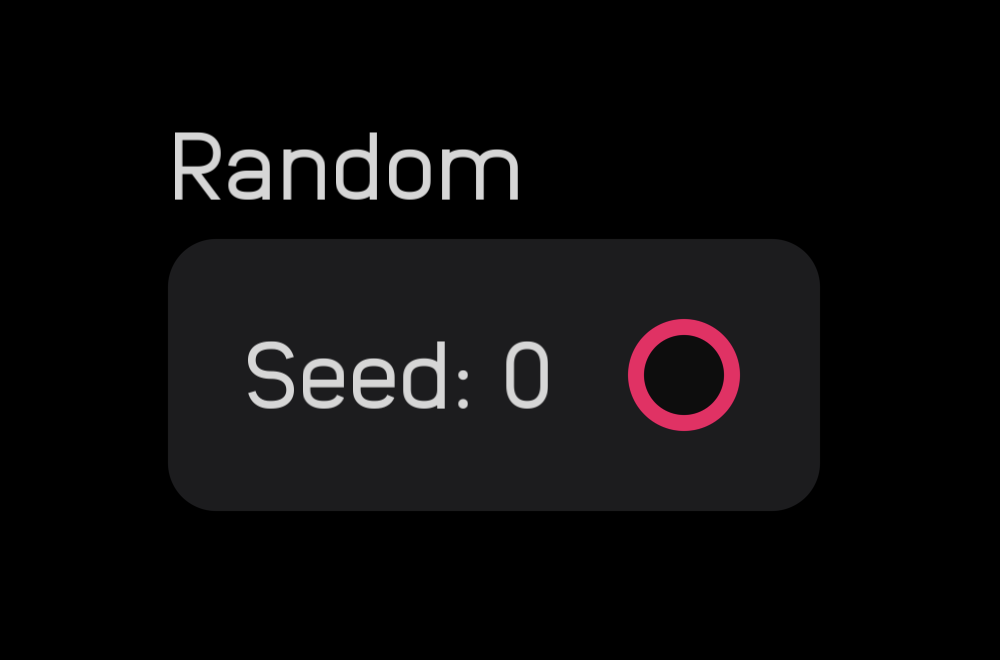
The random node outputs a new random number between 0 and 1 for every sample. In other words, it produces white noise.
The Seed value can be changed in the inspector panel, pictured below. Changing the Seed is necessary in cases where you have two or more random nodes in a patch and want them to produce a different string of random numbers.
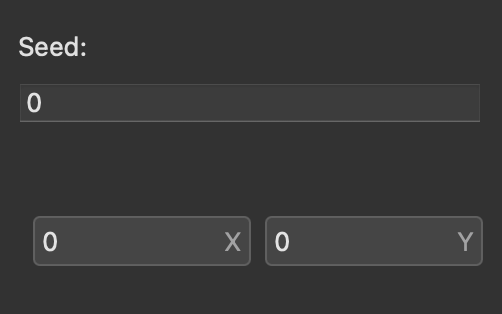
If the Seed remains the same, every time the patch is reopened, the same string of random numbers will be produced.
meter
description
The meter nodes are vital for displaying information about signals.
- The
meternode is responsive and versatile. - The
waveformnode is a simple way to see how signals change over time. - The
valuenode can help with debugging as well as displaying information on UIs. - The
lightandrgb lightnodes are great for adding visual feedback to modules. - The
scopenode is like thewaveformnode, but suited for examining audio rate signals. - With the
shaderandcanvasnodes you can use your own code to create your own beautiful custom meters, visualizers, and UI elements using GLSL and Lua.
meter
| input | signal |
|---|---|
in |
audio |
| exposable | ✅ |
|---|---|
description
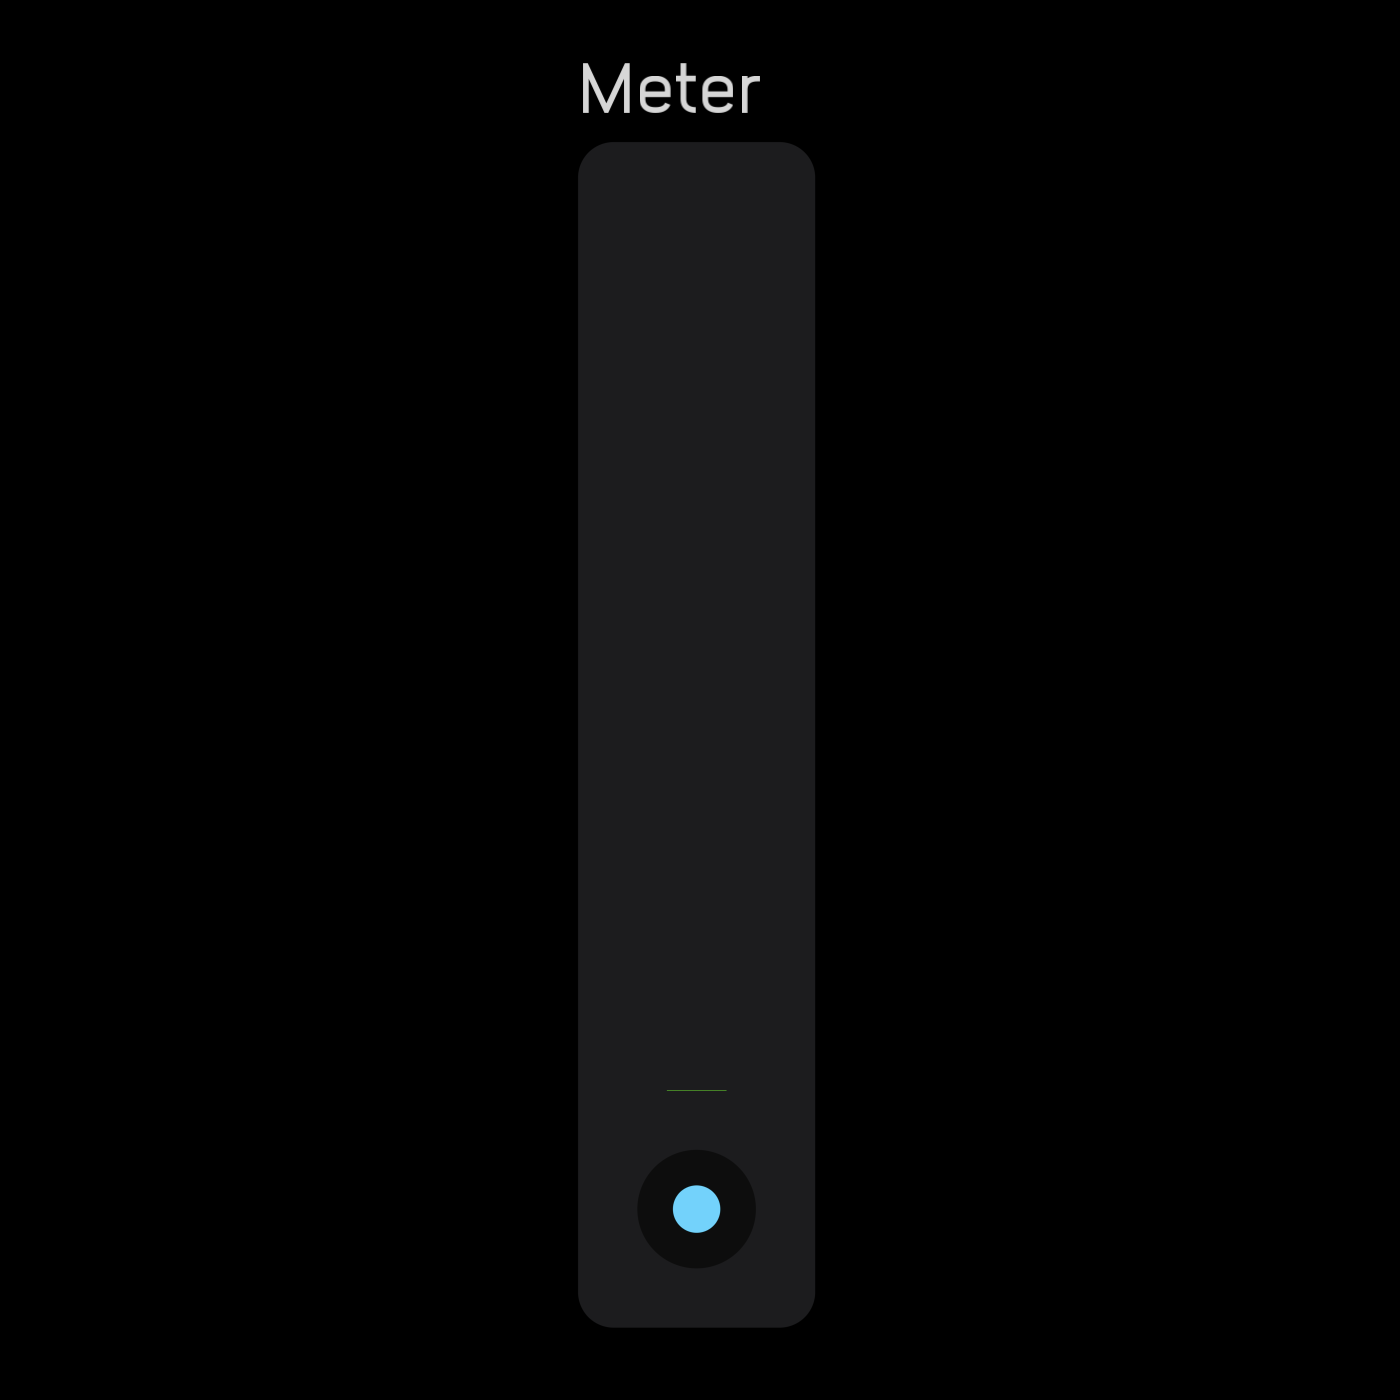
The meter node displays the amplitude of a signal. The input works in a range of -1 to 1. However, 0 to 1 will display the same as 0 to -1, as you can see below:
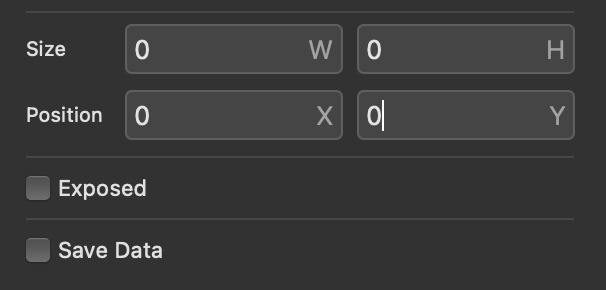
In the inspector panel the meter node can be resized by altering the height and width parameters, as seen below. It is also exposable.
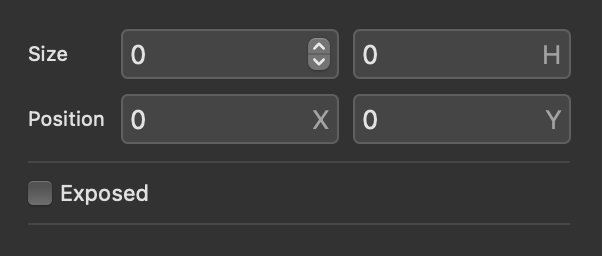
If both W and H values are 0, then the node defaults to its standard size. The node can be resized however you want, but it cannot be rotated.
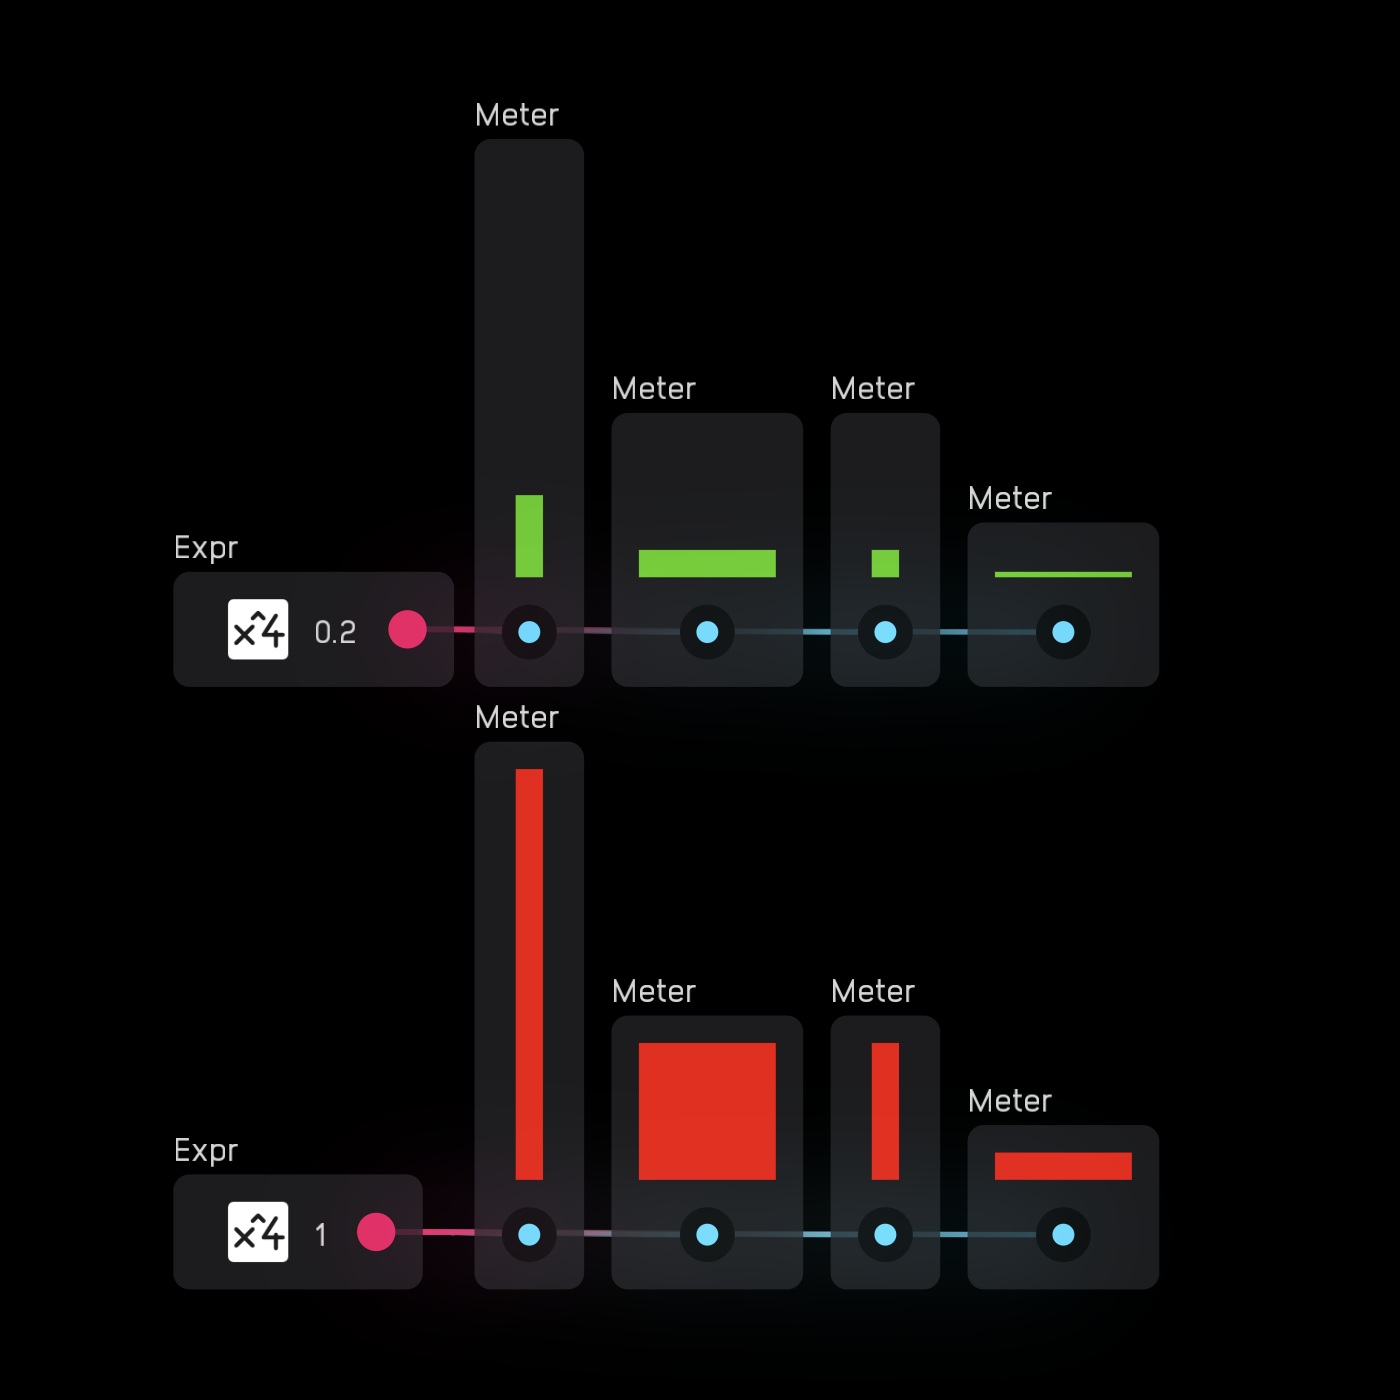
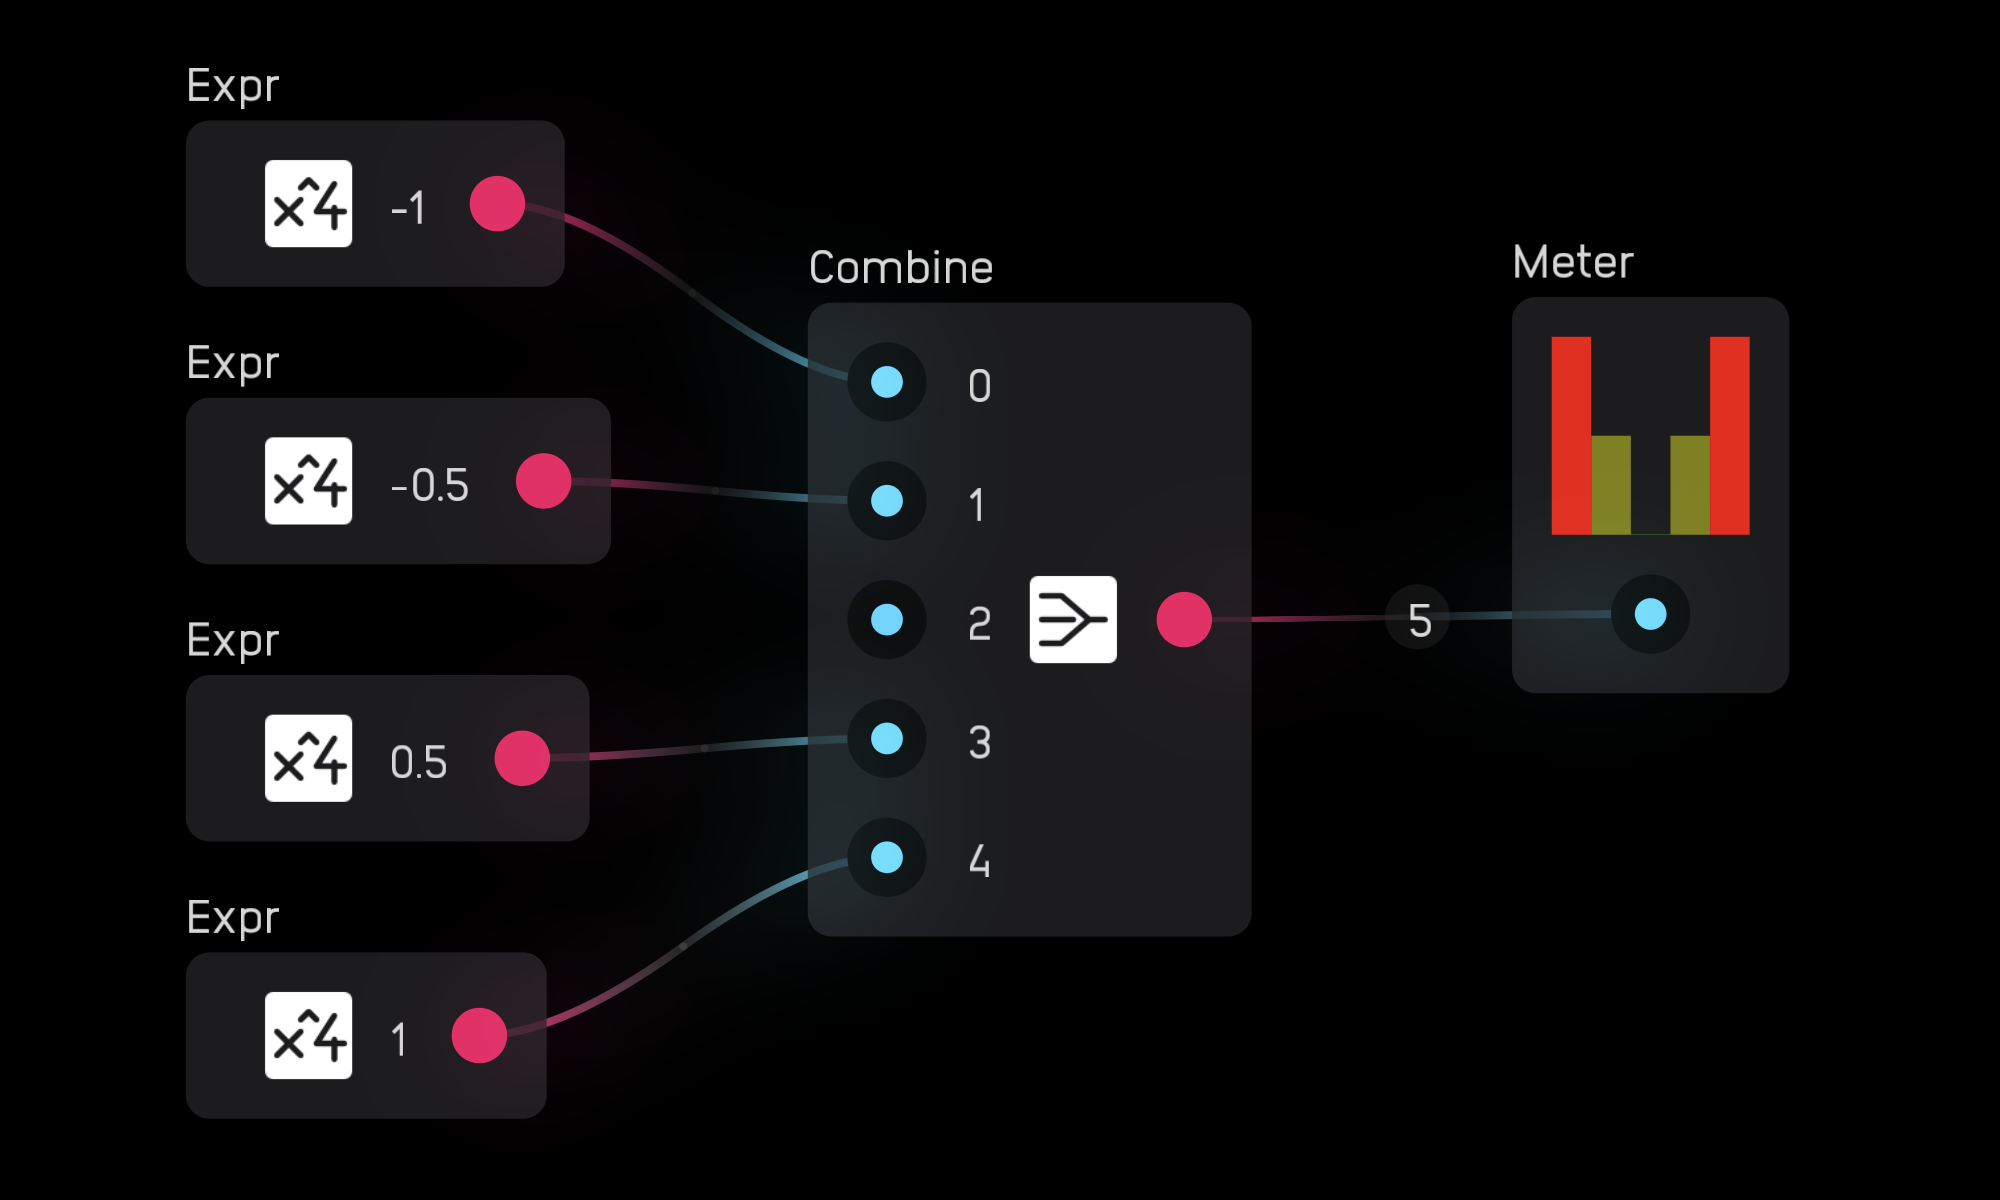
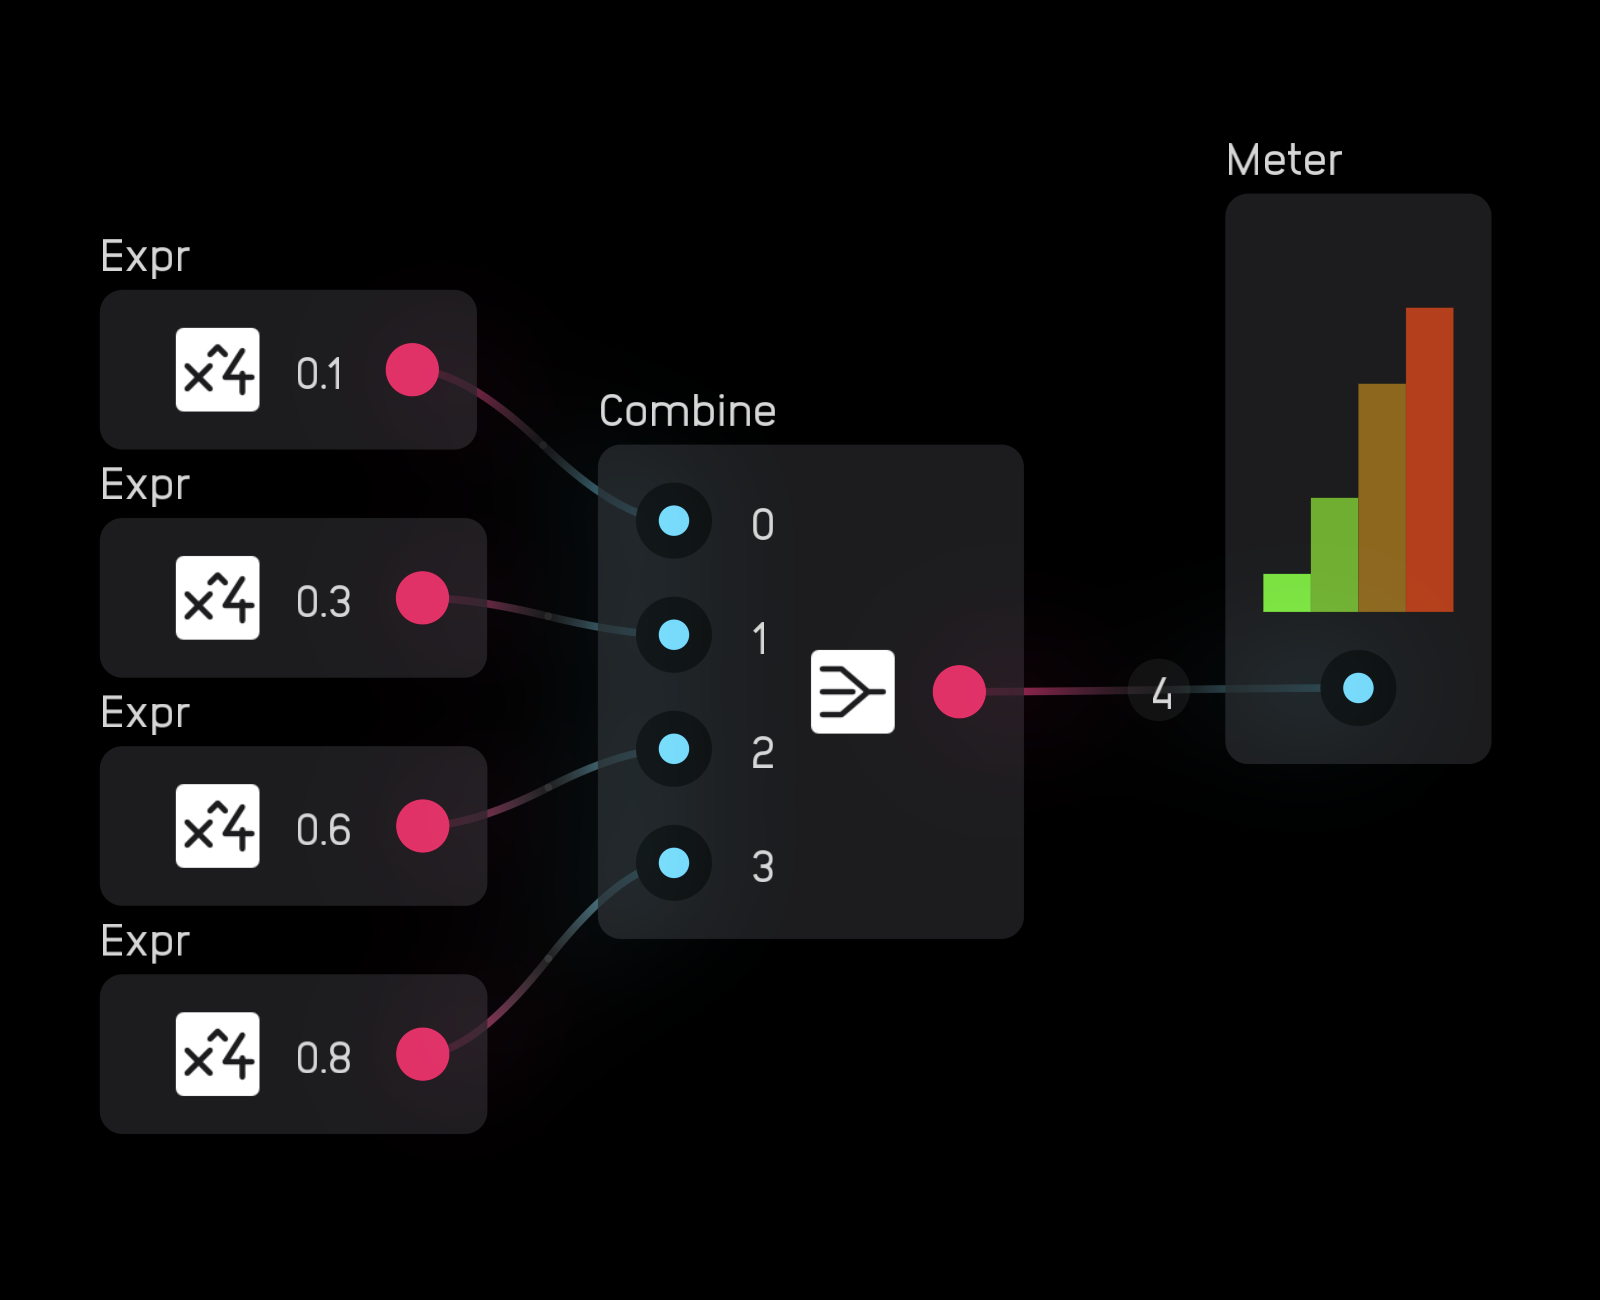
If you wire a poly signal to a meter node, it automatically creates one meter per channel.
waveform
| input | signal |
|---|---|
in |
audio |
| exposable | ✅ |
|---|---|
description
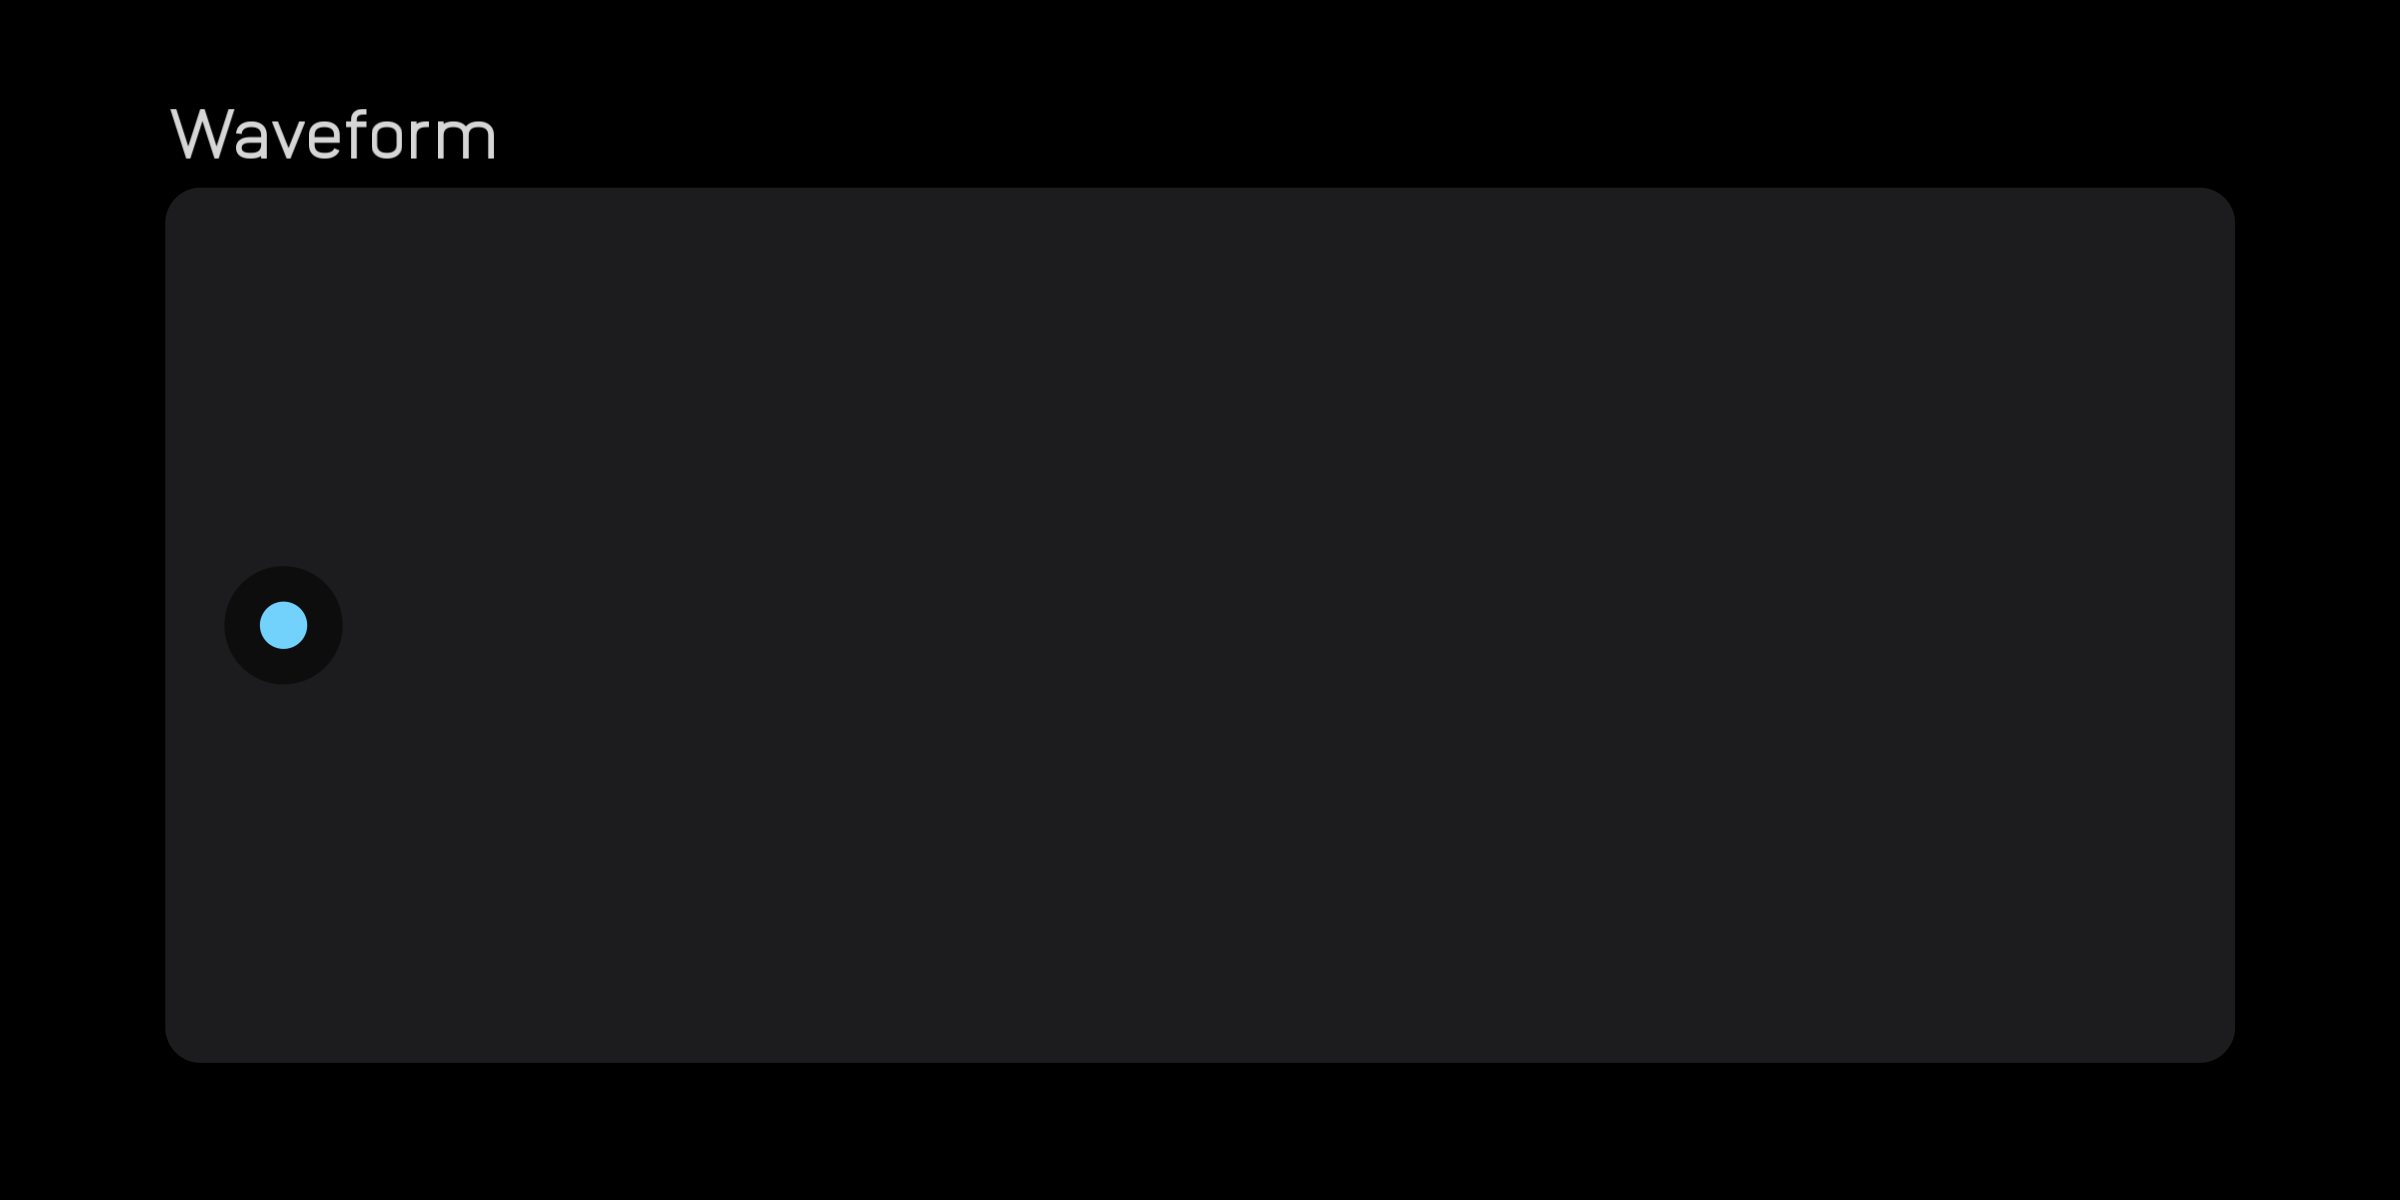
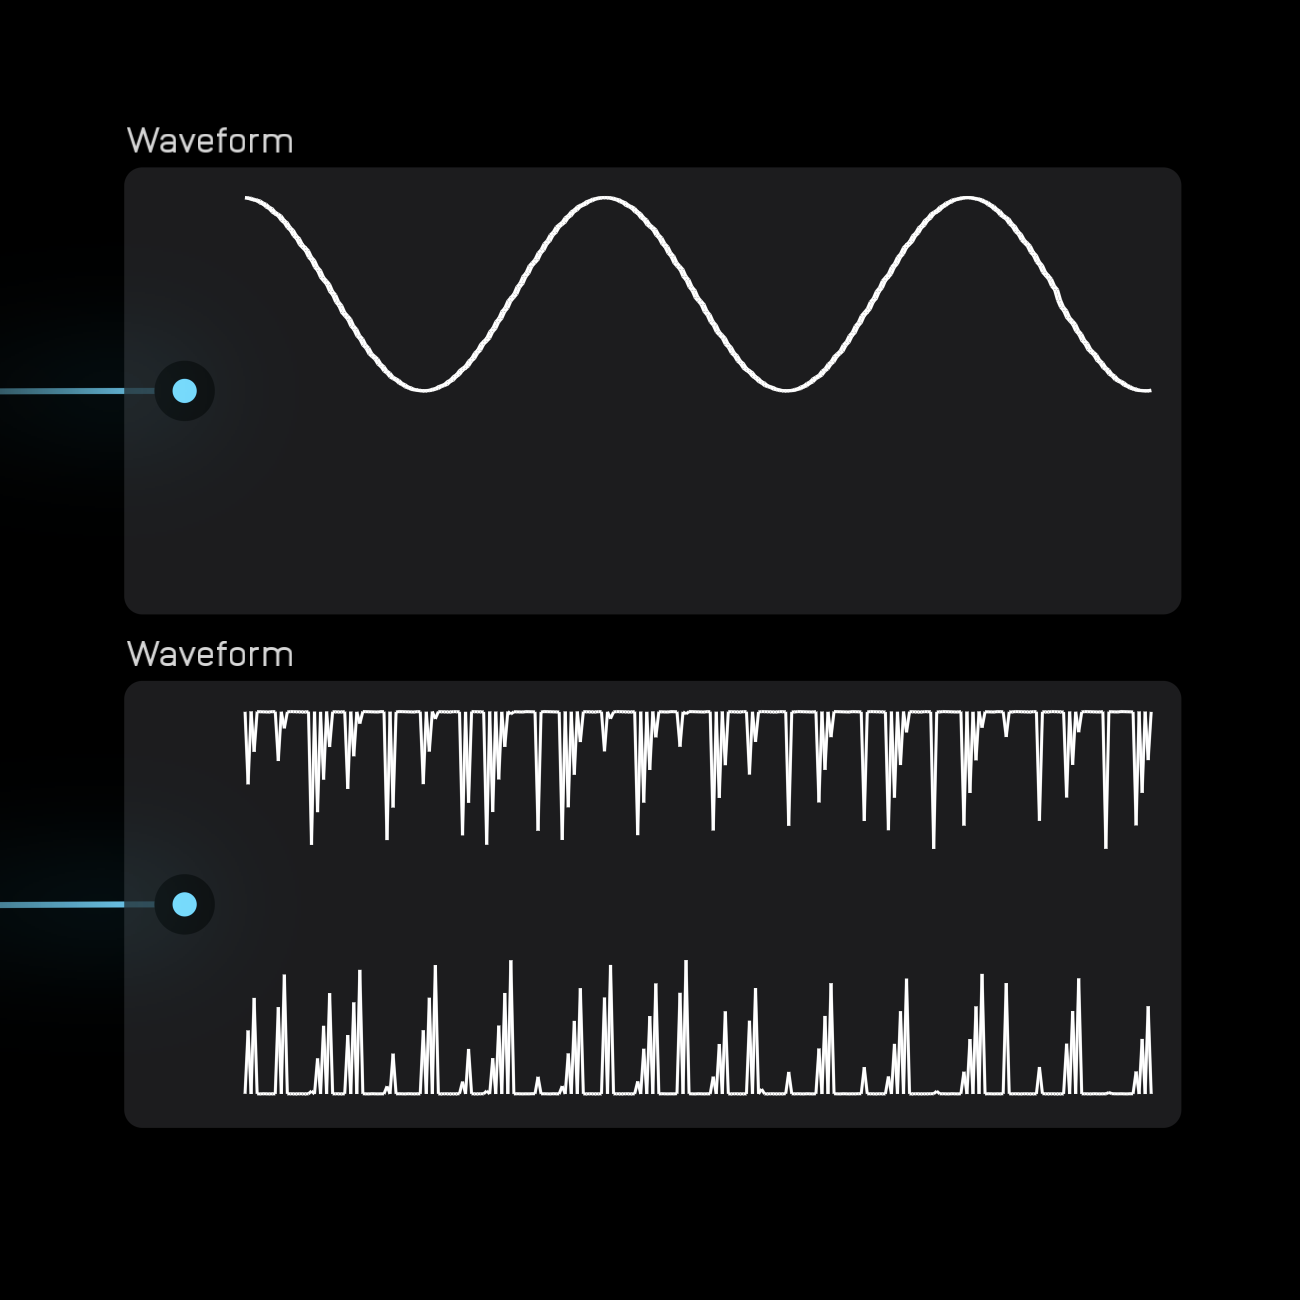
The waveform node allows you to see signals change over time. It has a fixed 5-second window and moves from left to right.
Since it works with the audio range, the top limit of the node is 1, the center is 0, and the bottom is -1.
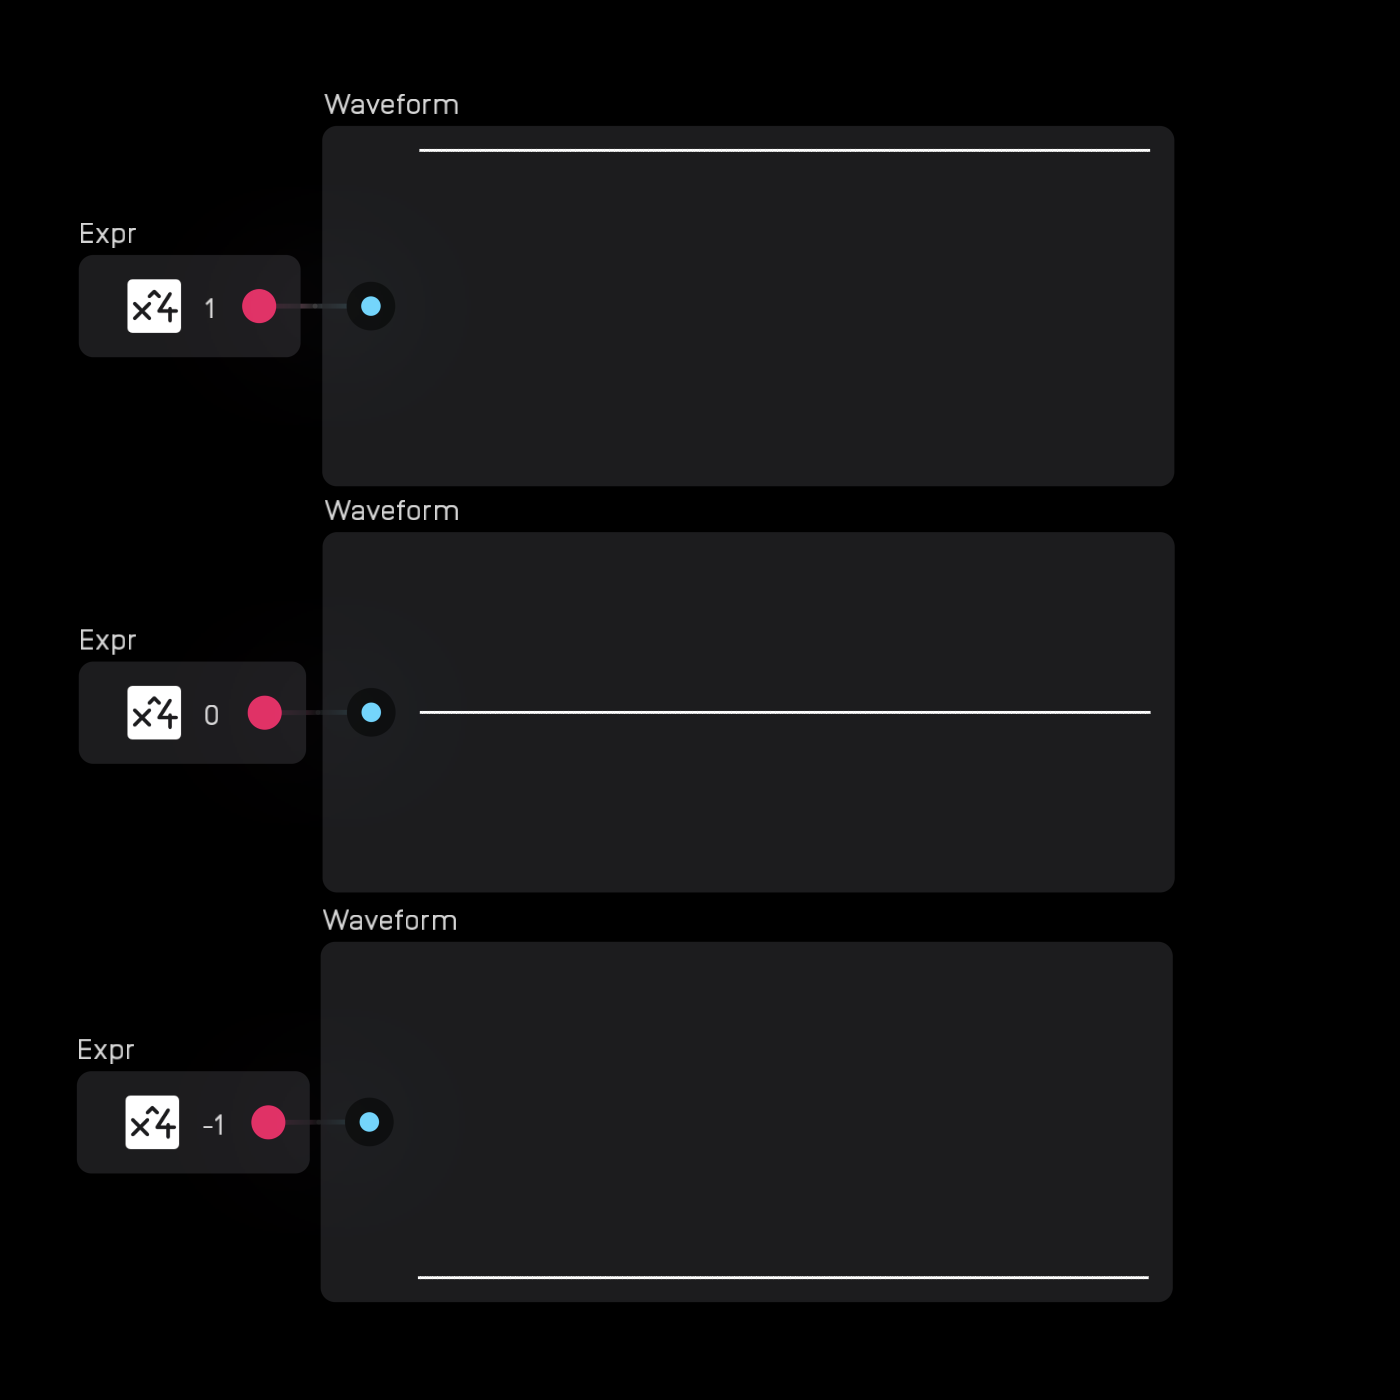
The waveform node works best with low frequency signals. If you want to examine audio-rate signals, use a scope node.
value

| input | signal |
|---|---|
in |
any |
| exposable | ✅ |
|---|---|
description
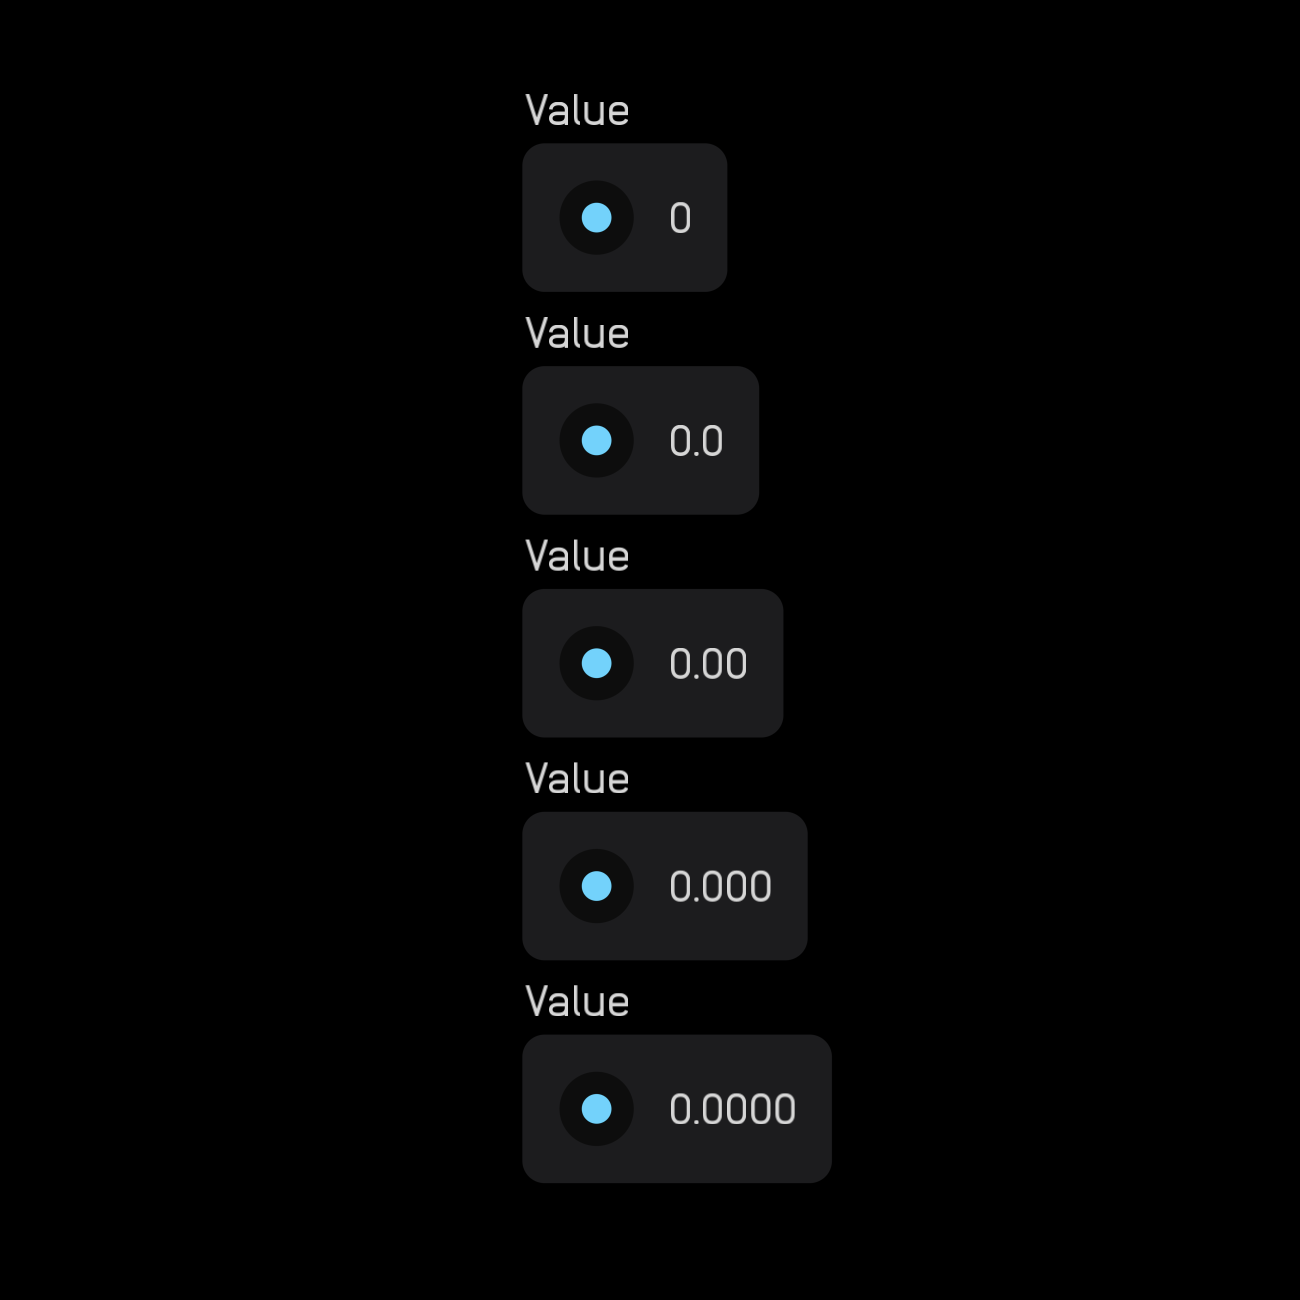
The value node displays the current value of any signal.
In the inspector panel, you can set precision from 0 to 0.0000, and an option to alight Left, Right, or Center. The value node is also exposable.

Changing precision can be useful for UI displays. For example, a sequencer's current step display should be a whole number, not a decimal.
If you wire a poly signal to a value node, it automatically creates one value display per channel.
light
| input | signal |
|---|---|
in |
gate |
| exposable | ✅ automatic |
|---|---|
description
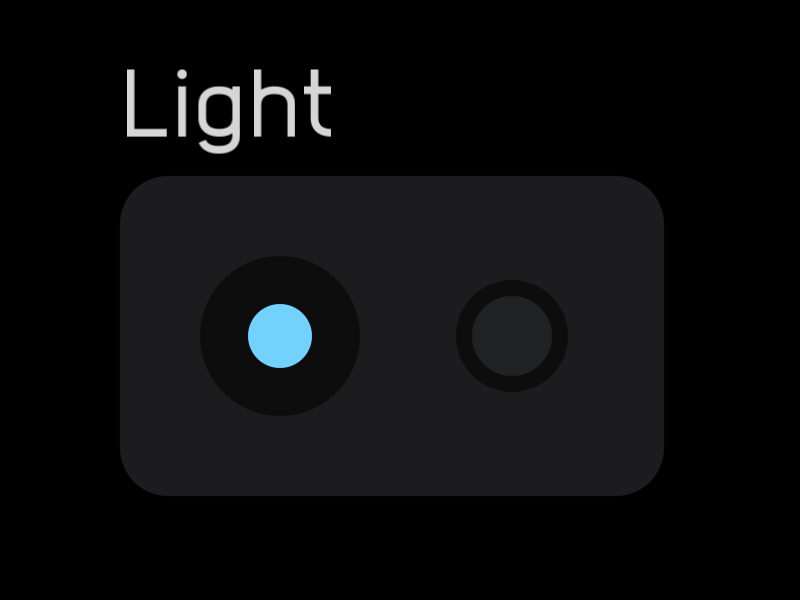
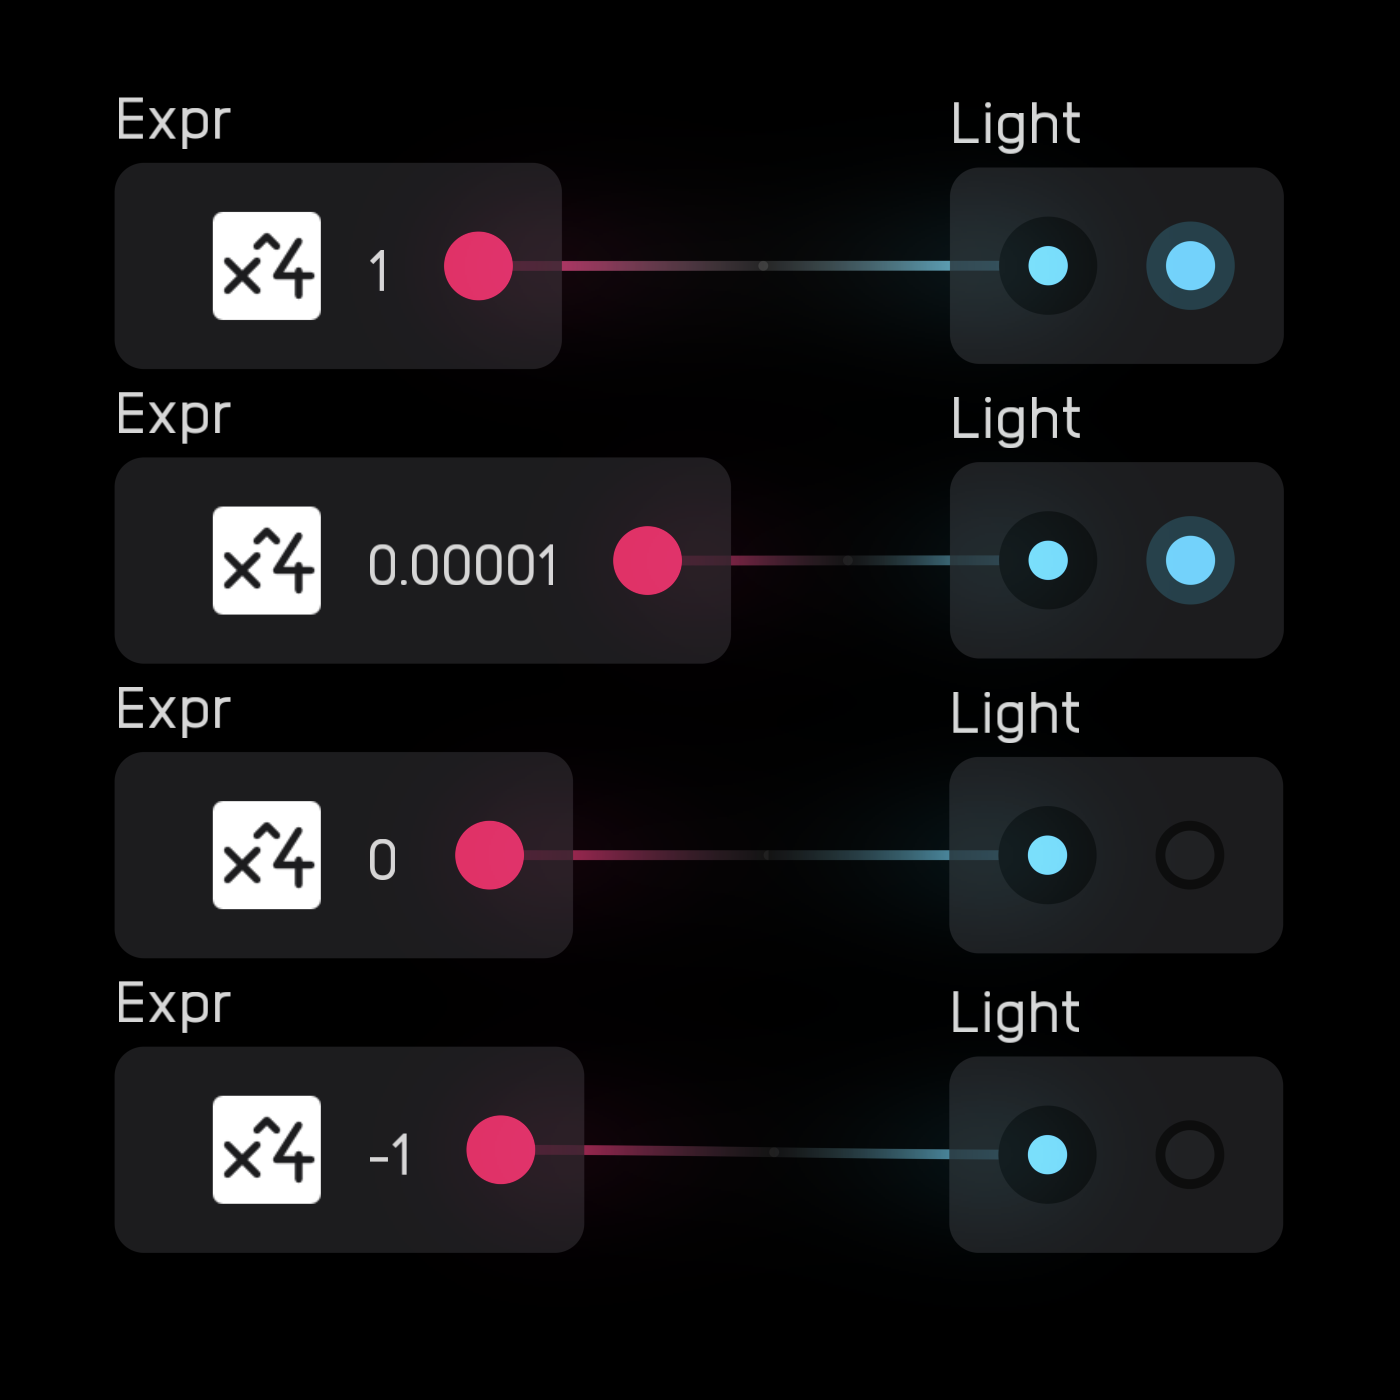
The light node turns on when the incoming signal is high (any non-zero positive number). Otherwise it stays off.
rgb light
| input | signal |
|---|---|
r |
mod |
g |
mod |
b |
mod |
| exposable | ✅ automatic |
|---|---|
description
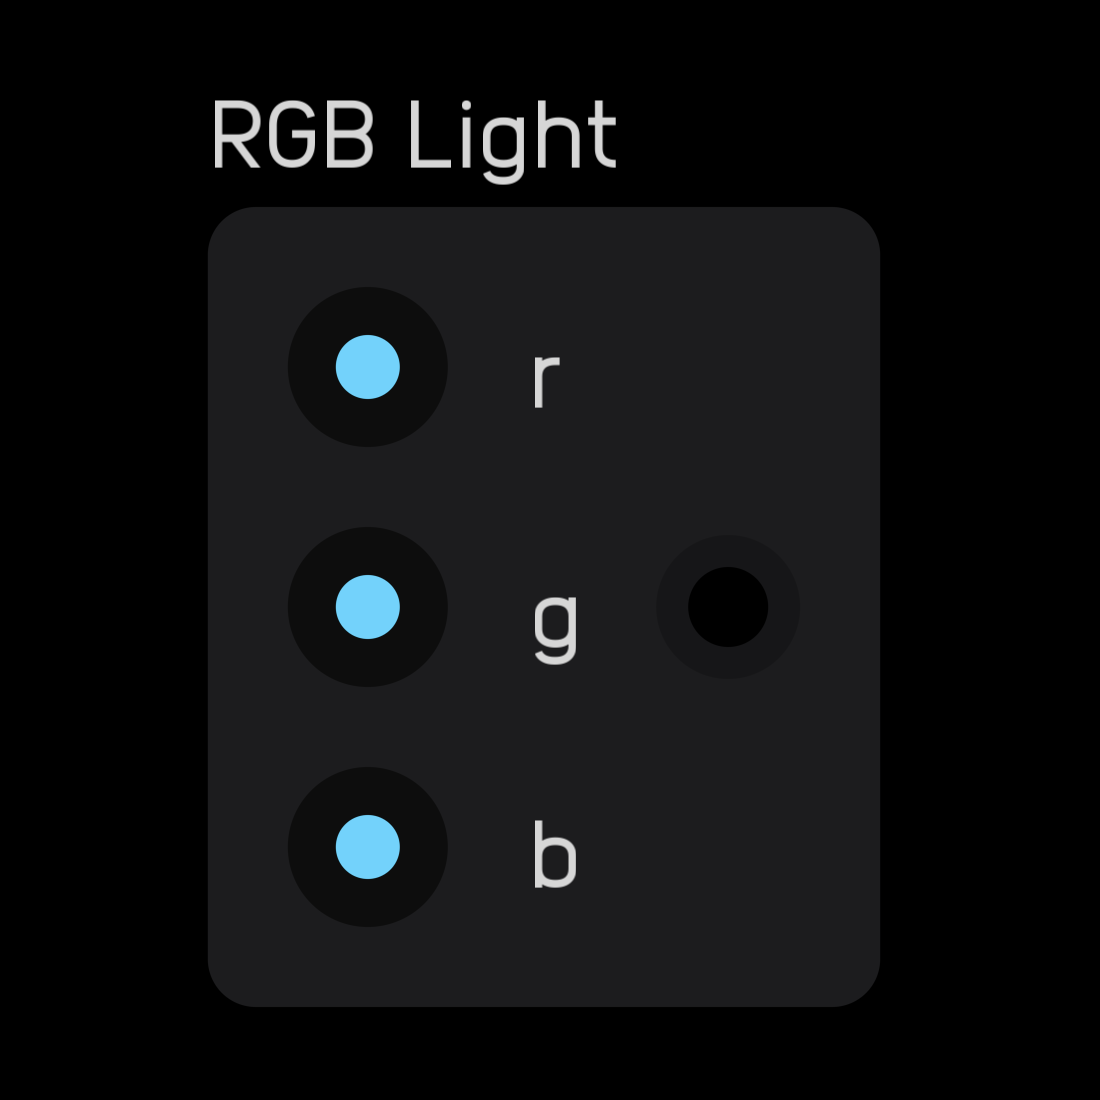
The rgb light node has 3 inputs: one for red r, one for green g, and one for blue b.

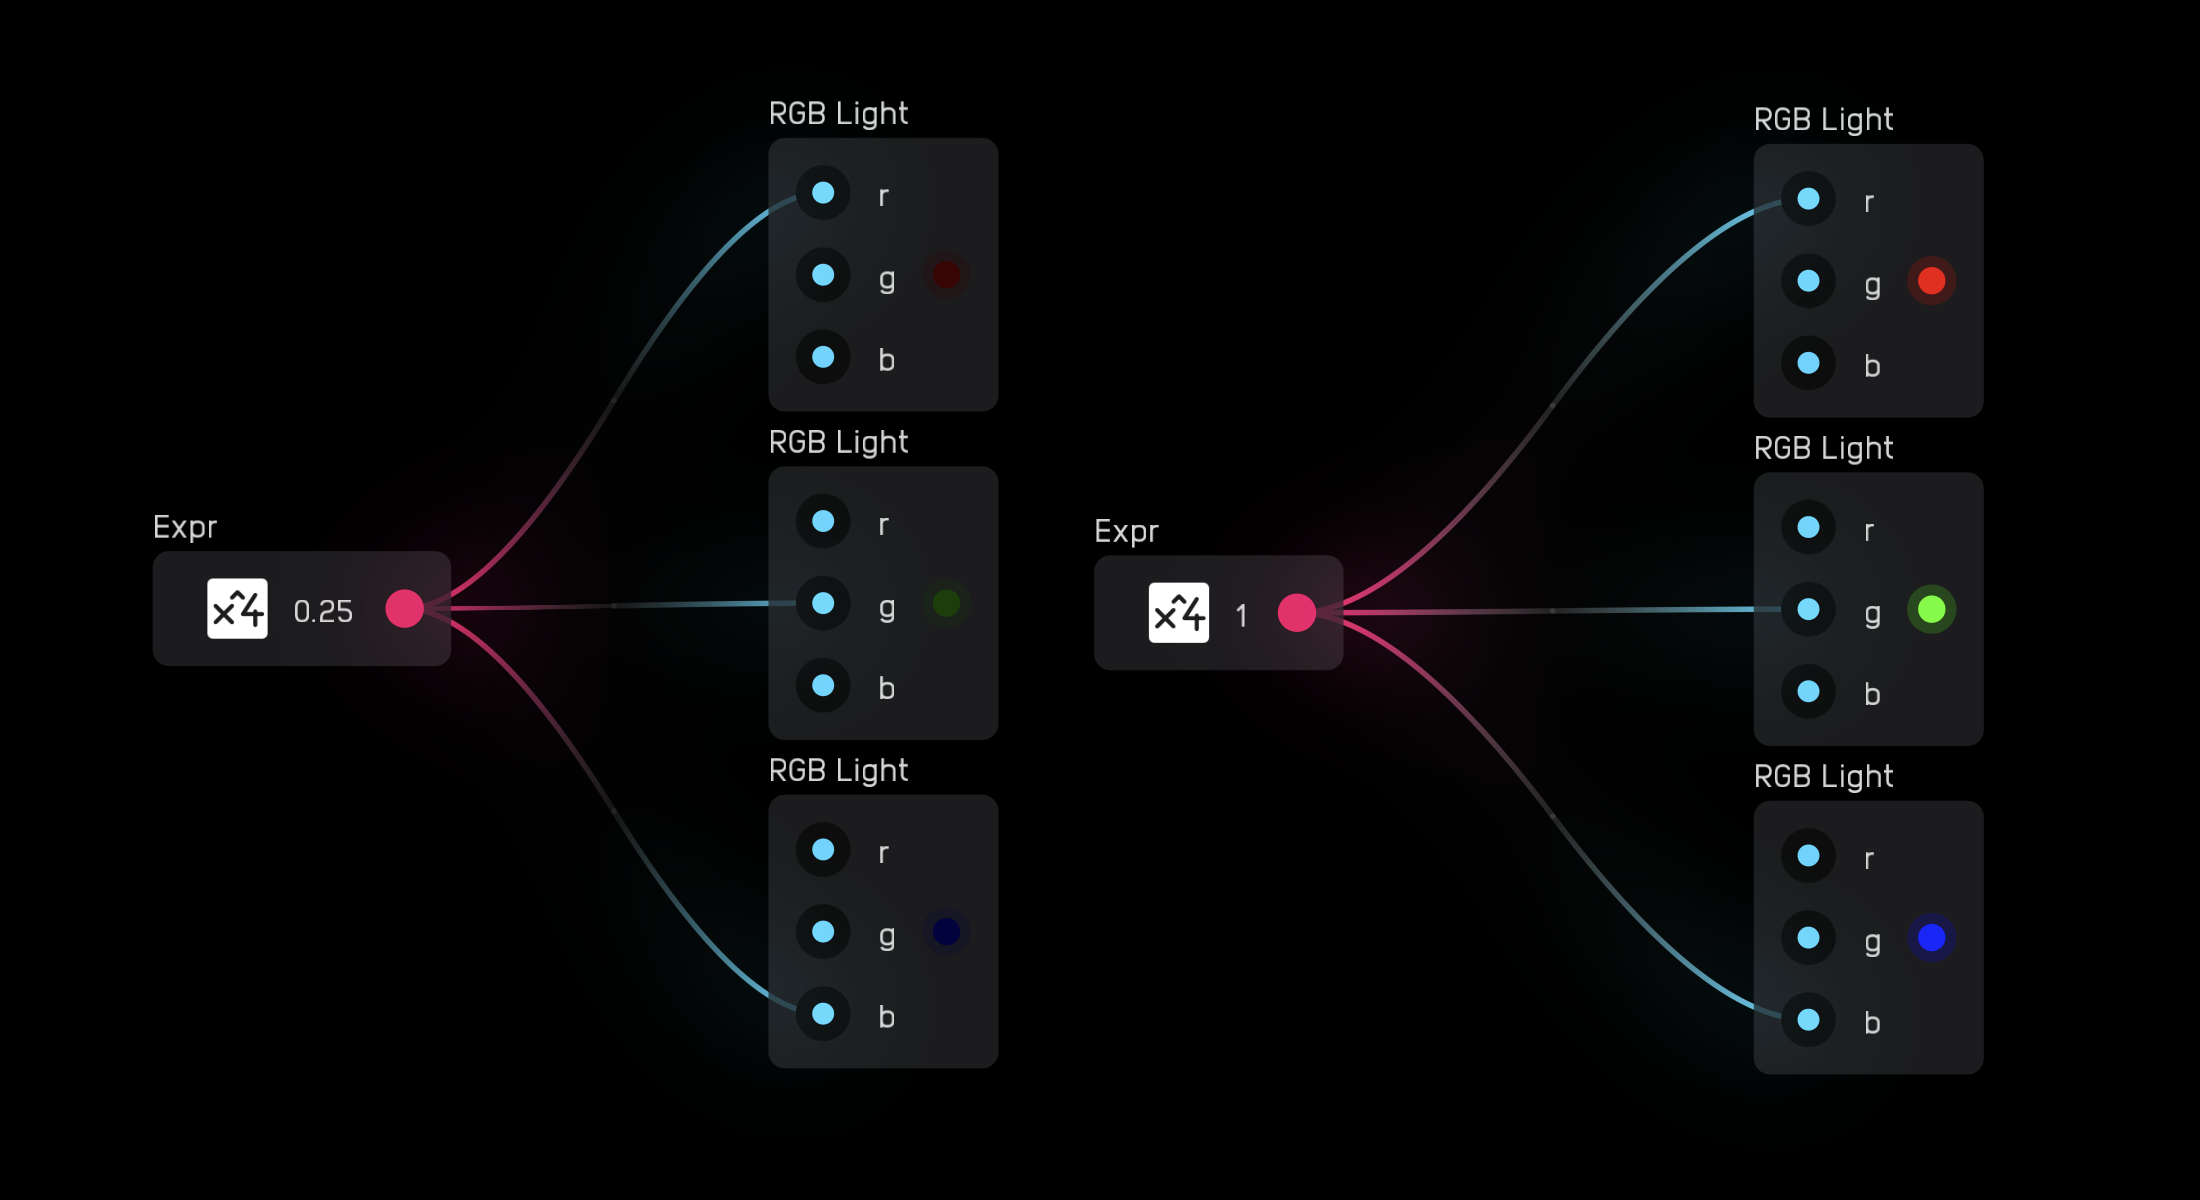
Each input works with a mod signal. When the signal is 0, the light is off. When the signal is 1, the light is fully on.
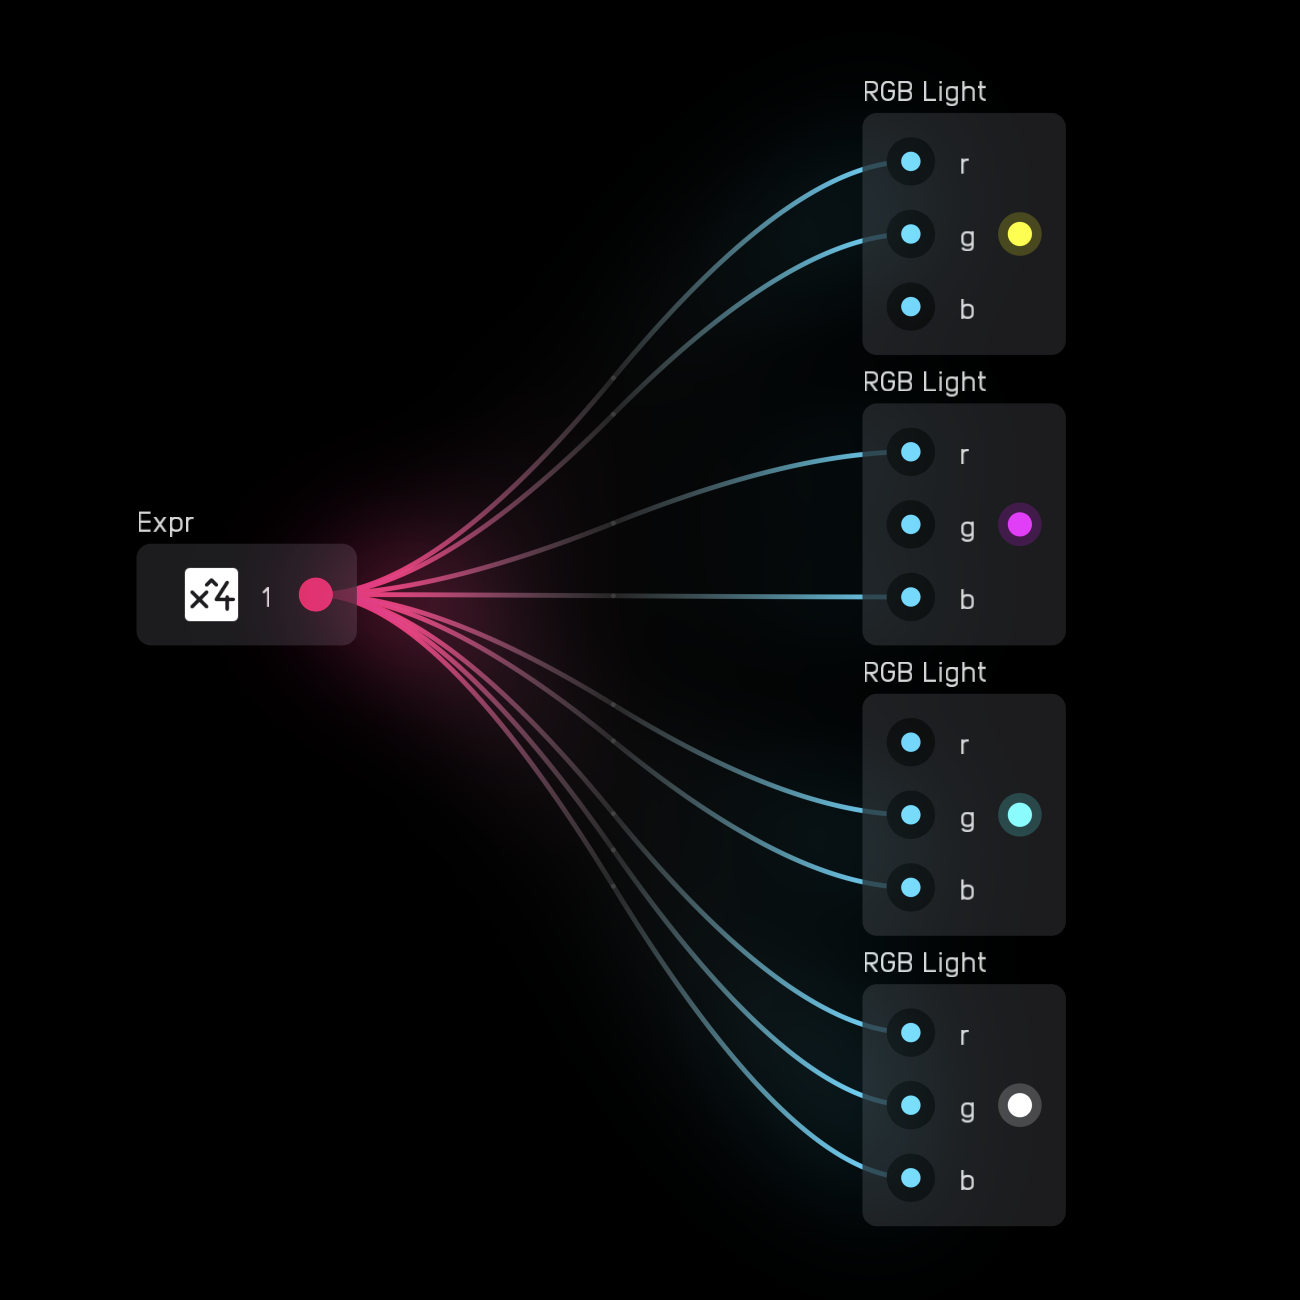
Colors can be mixed by sending different values to each input.
scope
| input | signal |
|---|---|
x |
audio |
y |
audio |
r |
mod |
g |
mod |
b |
mod |
s |
mod |
| exposable | ✅ |
|---|---|
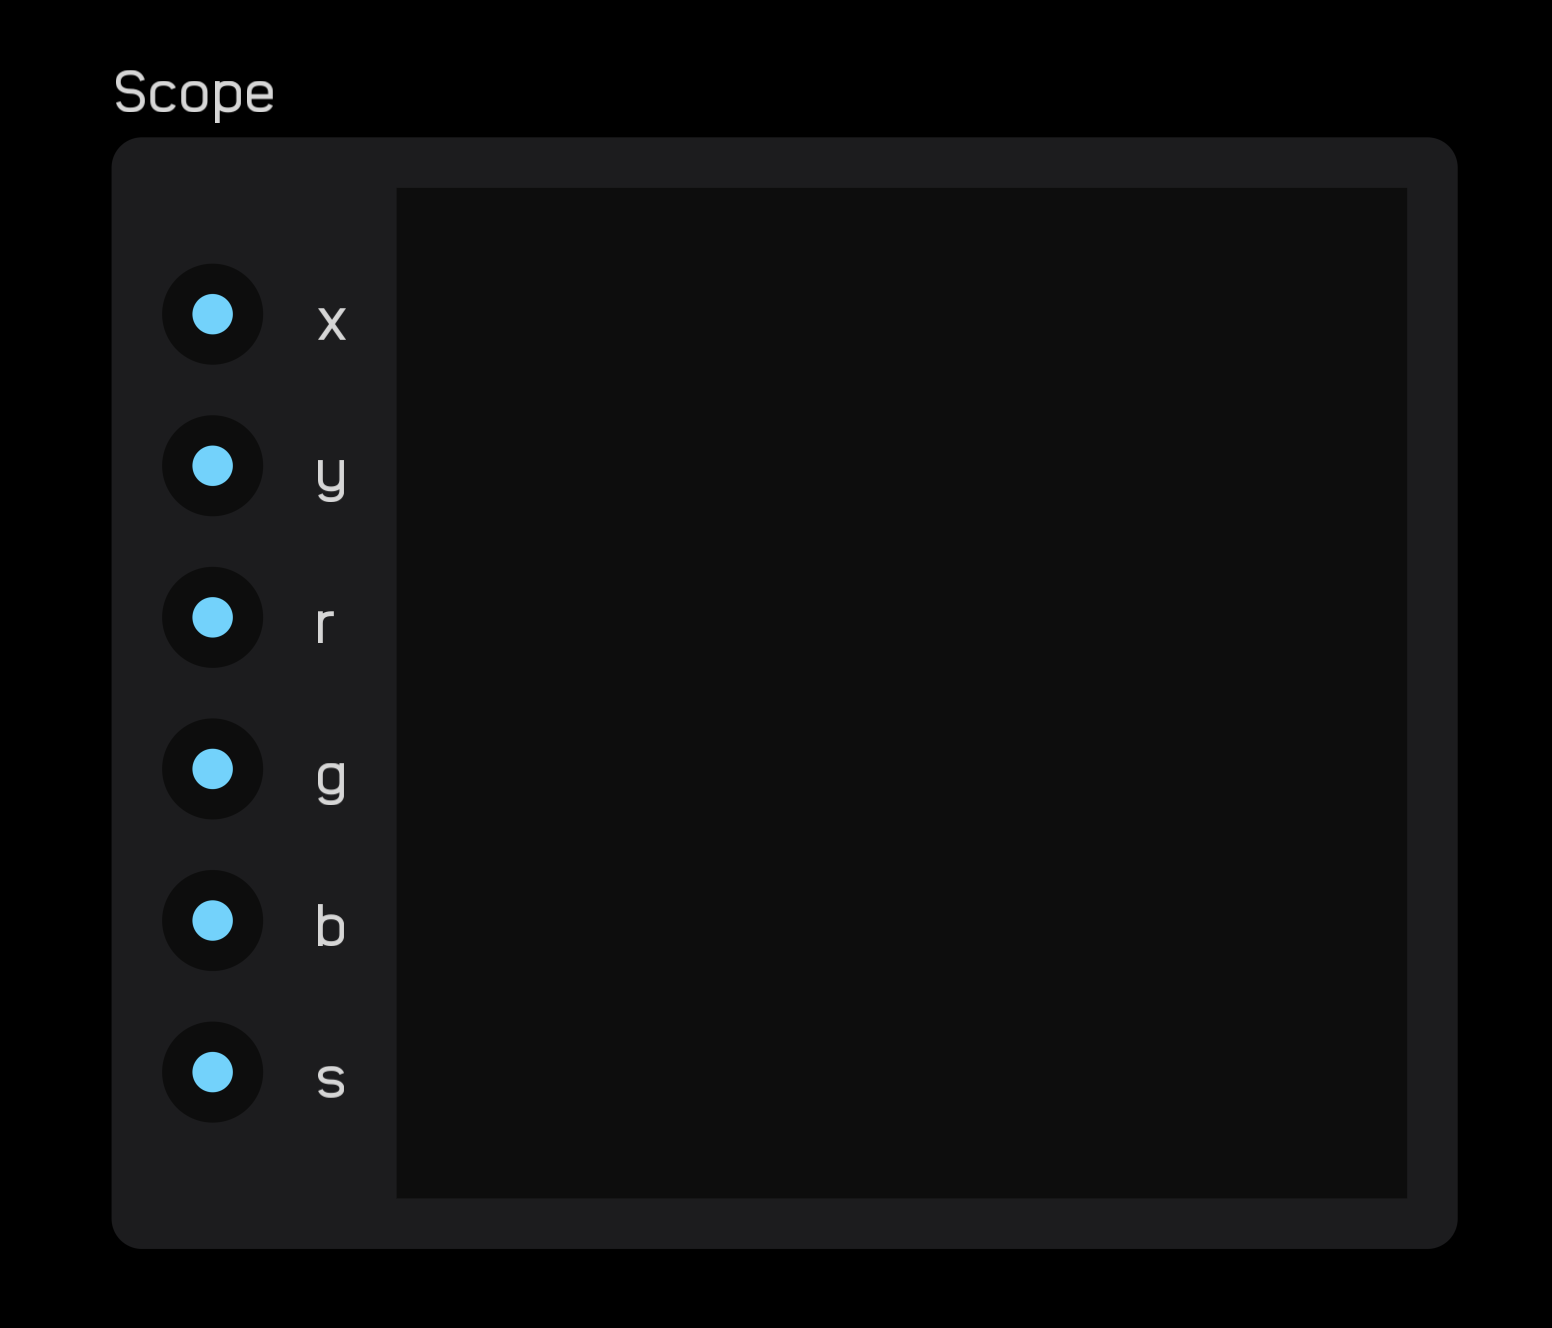
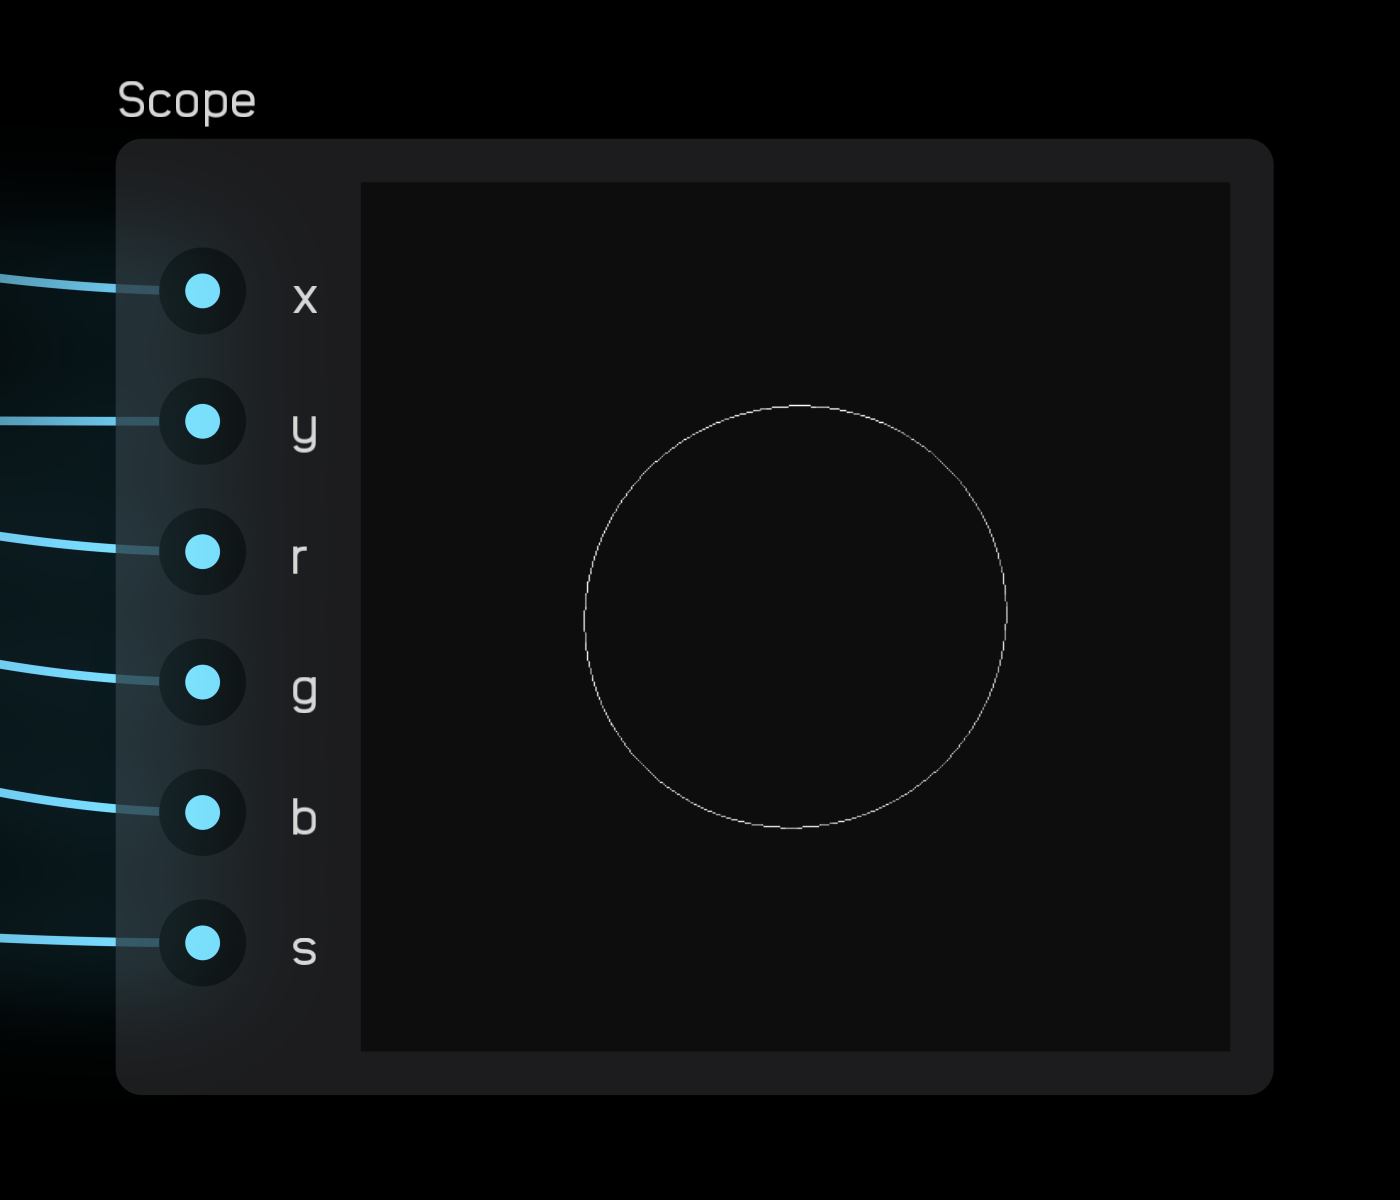
description
The scope node can visualize high frequency waveforms, phase relationships, and Lissajous curves that you otherwise could not with the waveform node.
A cursor draws a dot with a color of {r, g, b} at the coordinates (x, y) where both x and y have a range of -1 to 1. The point (0, 0) is the center of the display.
The s variable is a measure of the persistence of the line drawn where 0 means only the current position of the cursor is shown and 1 means the cursor will draw a line that persists infinitely. s values between 0 and 1 will cause the line to fade quickly or gradually over time.
There can be a large difference between what an s value of 0.9, 0.99, and 0.999 look like, so experiment with what works best for your use.
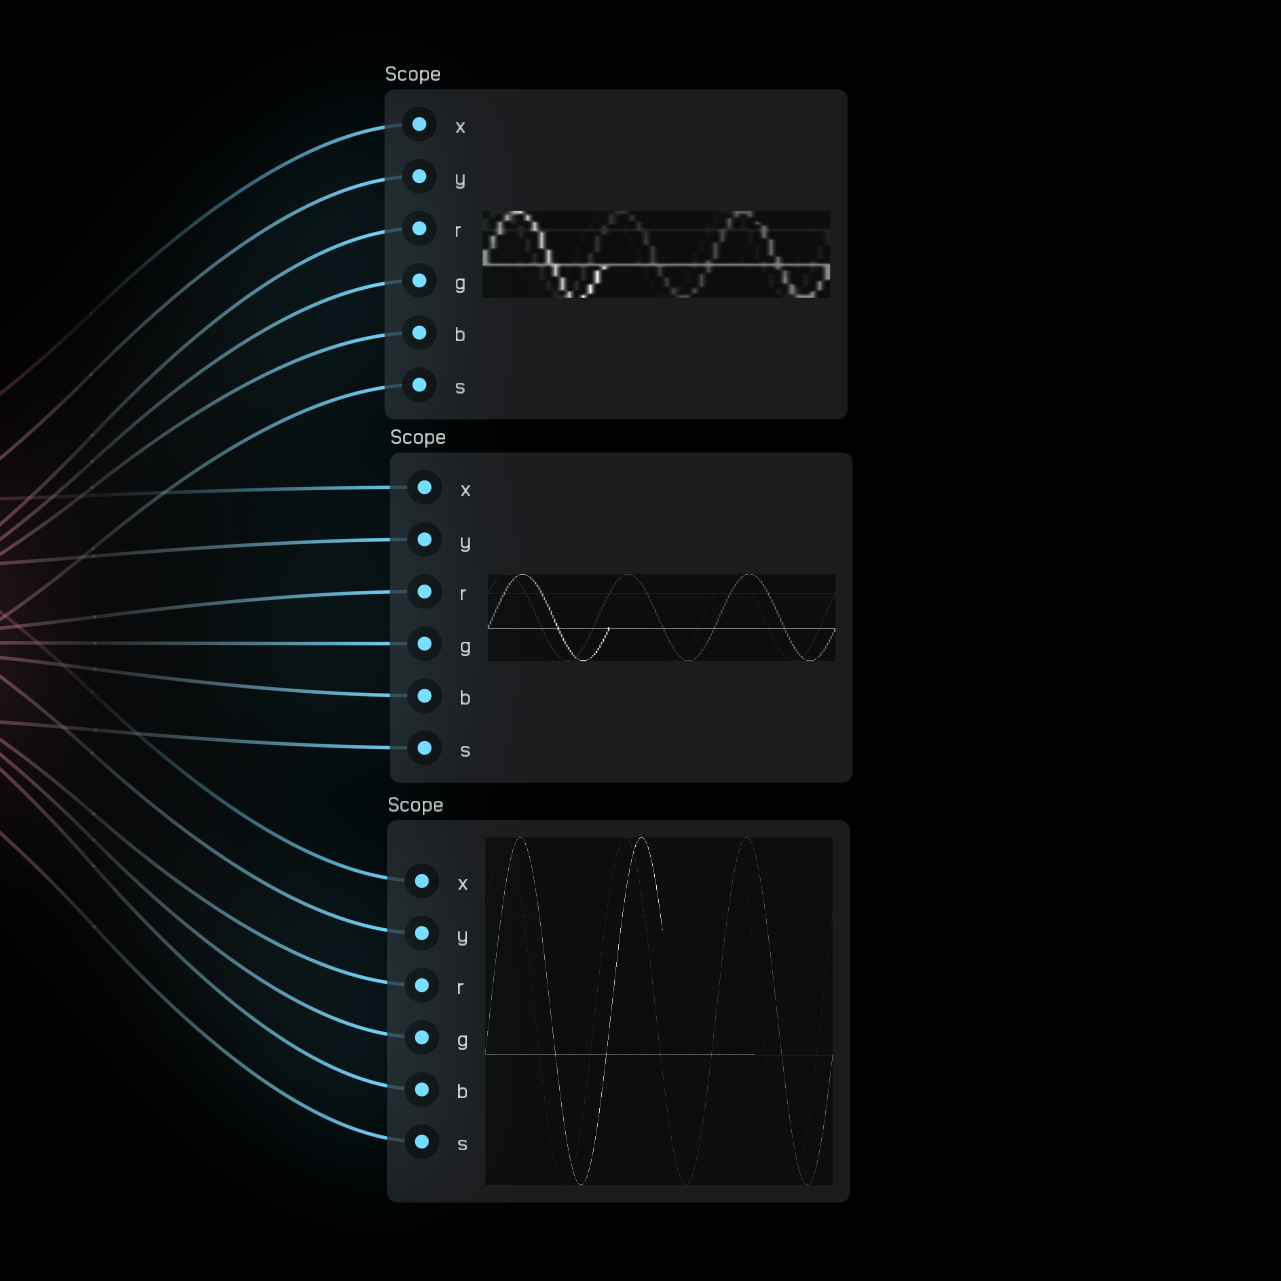
In the scope node's inspector panel there are options to change both the Size and resolution (Image Size) of the scope.
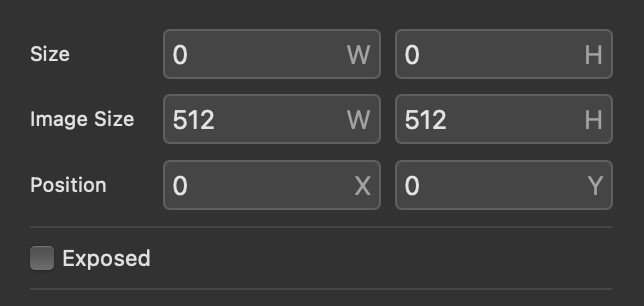
The default size is W = 200 and H = 200 with an image size of W = 512 and H = 512.
For a crisp, clean-looking line, the Image Size should be at least double the Size parameter. For a more digital-looking, stair-stepped size, the Image Size should be the same or smaller than the Size.
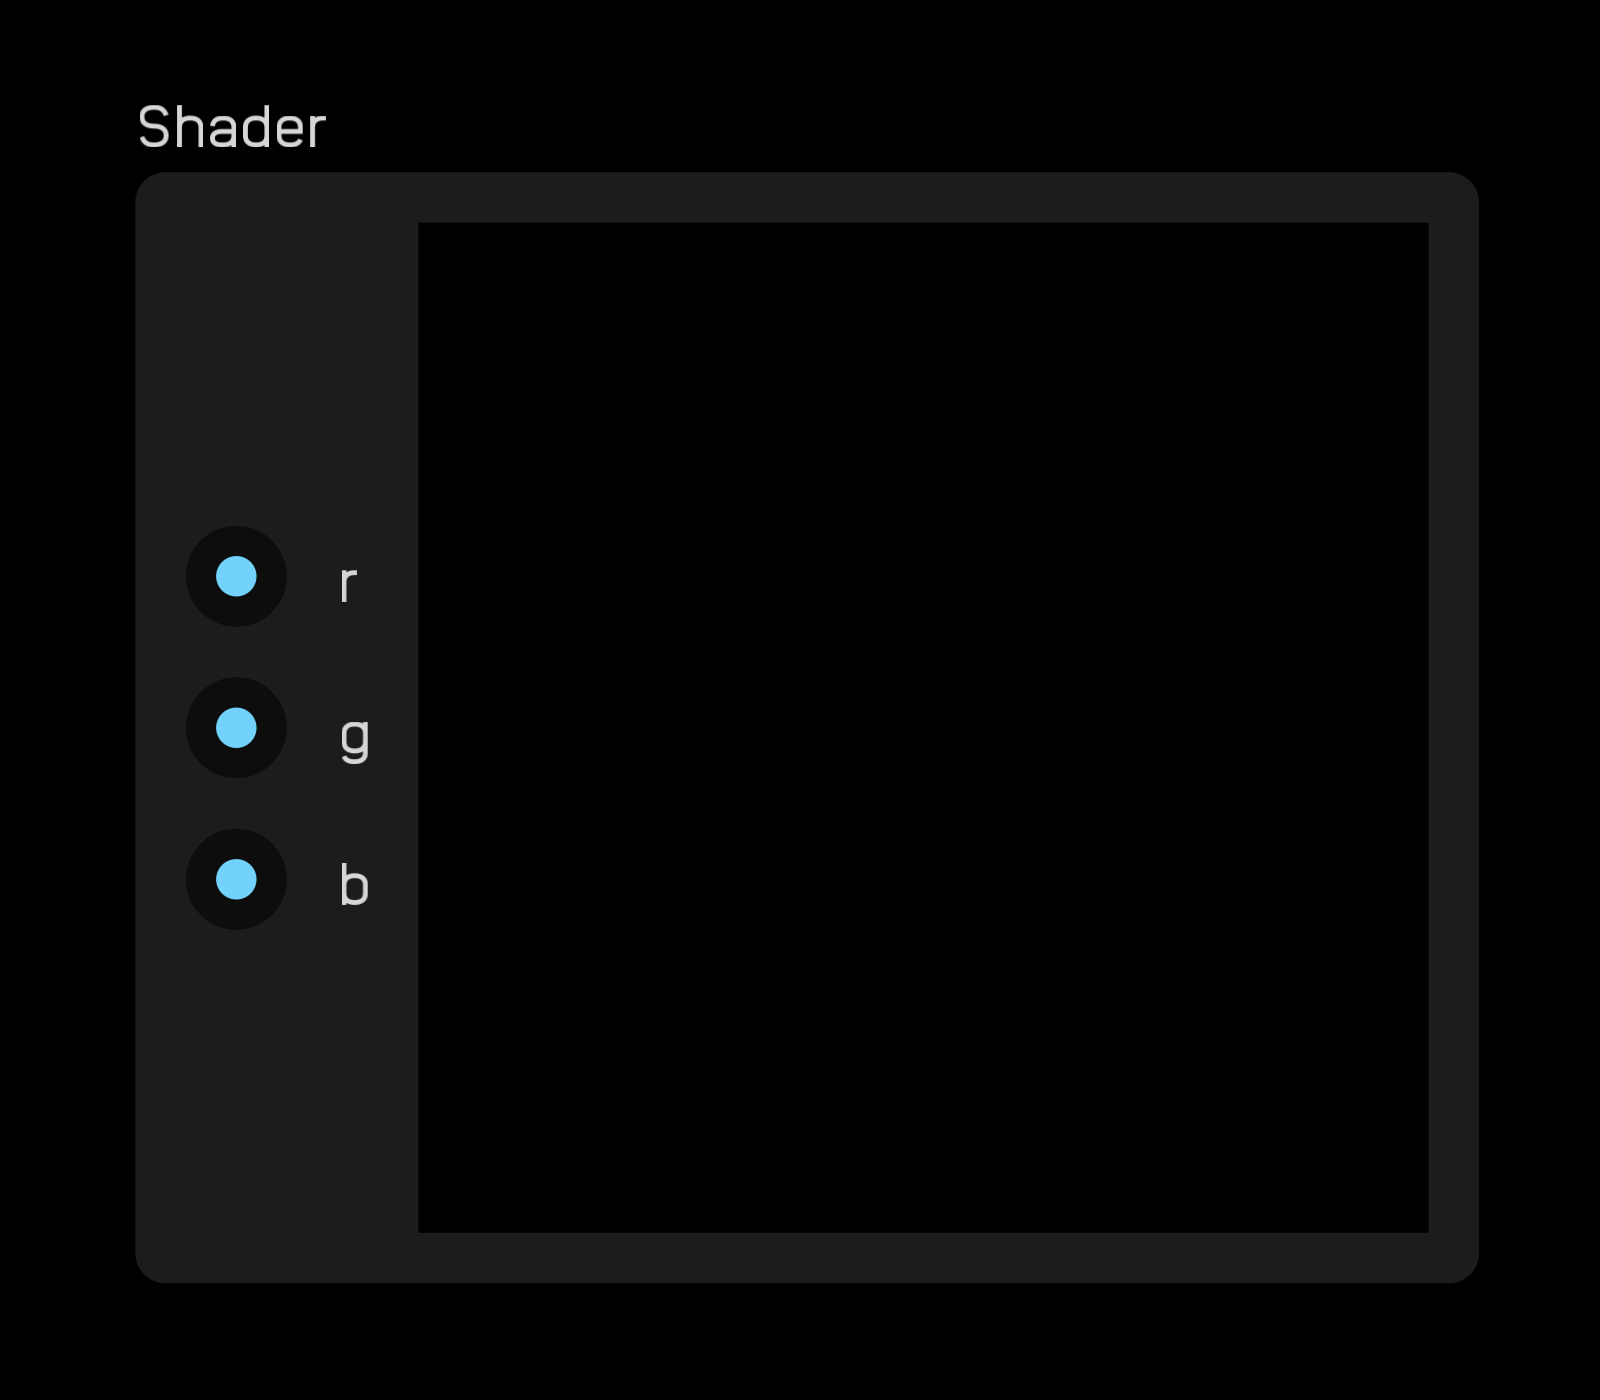
shader
| exposable | ✅ |
|---|---|
description
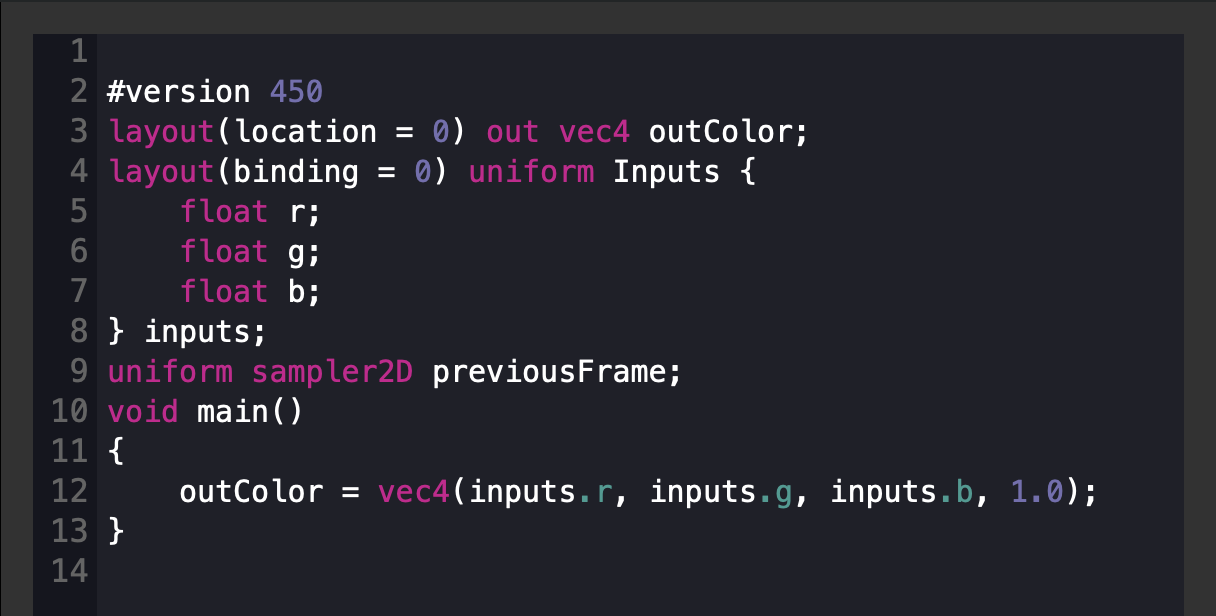
The shader node is an OpenGL shader that allows you to write your own shader using GLSL, a programming language similar to C.
Although the default example has r g b inputs, you are not limited to just those inputs. You can have 0 inputs or as many as you need to run your code.
You write code in the inspector panel.
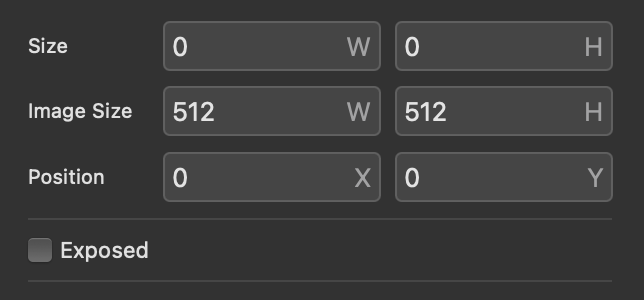
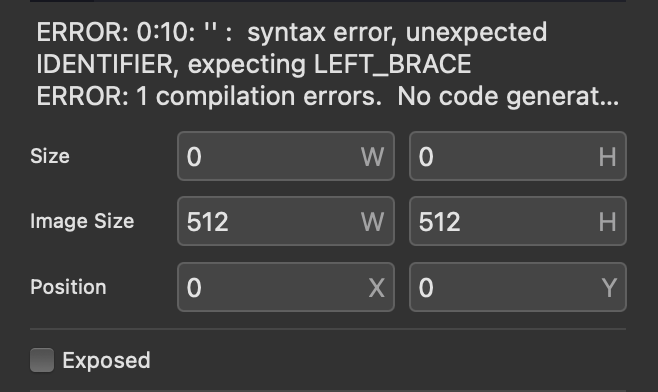
At the bottom of the inspector panel you can also find Size and Image Size parameters.
Error messages, if any, appear above these parameters.
canvas
| exposable | ✅ |
|---|---|
description
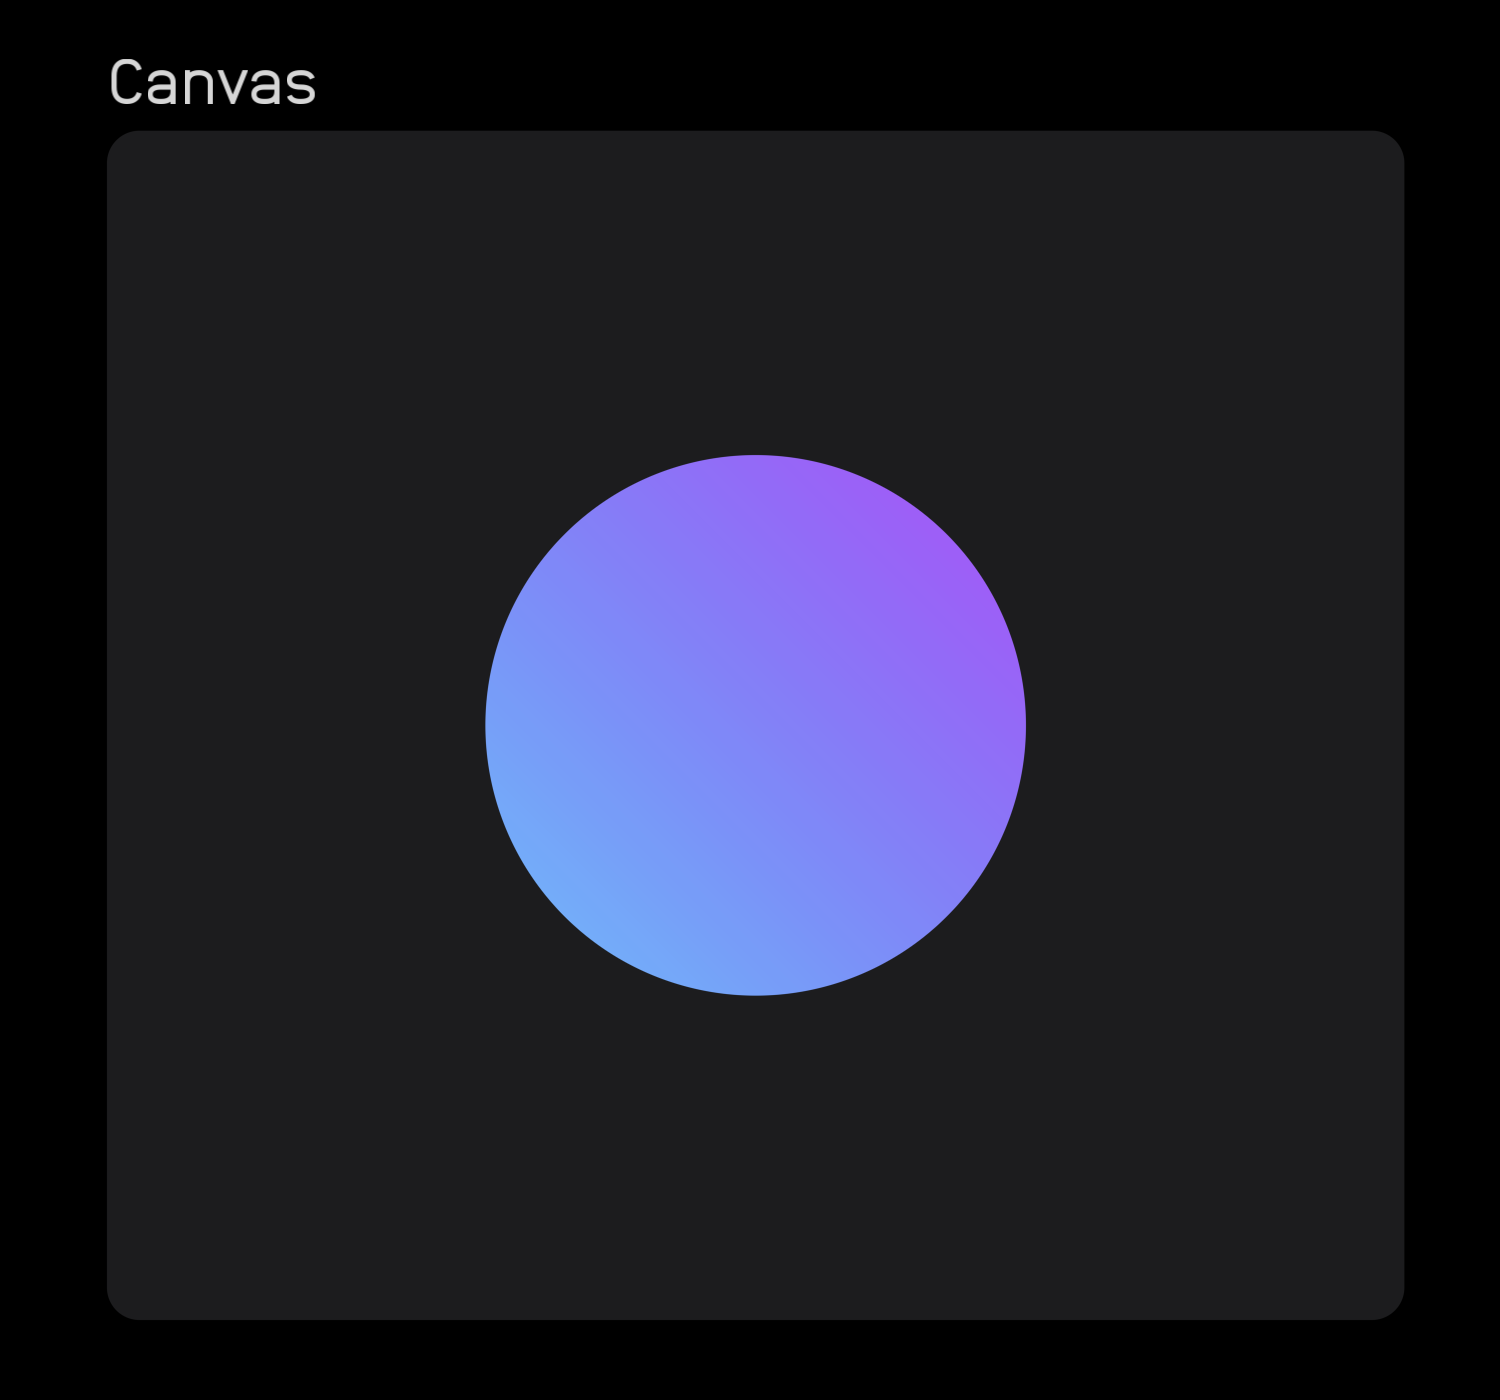
The canvas node allows you to draw things using Lua, a simple interpreted programming language.
Although the default example has no inputs or outputs, you can create as many as you'd like by declaring them in the inspector panel above the code block.
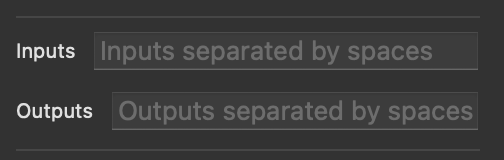
To create inputs and outputs, you must enter each variable with a space in between.
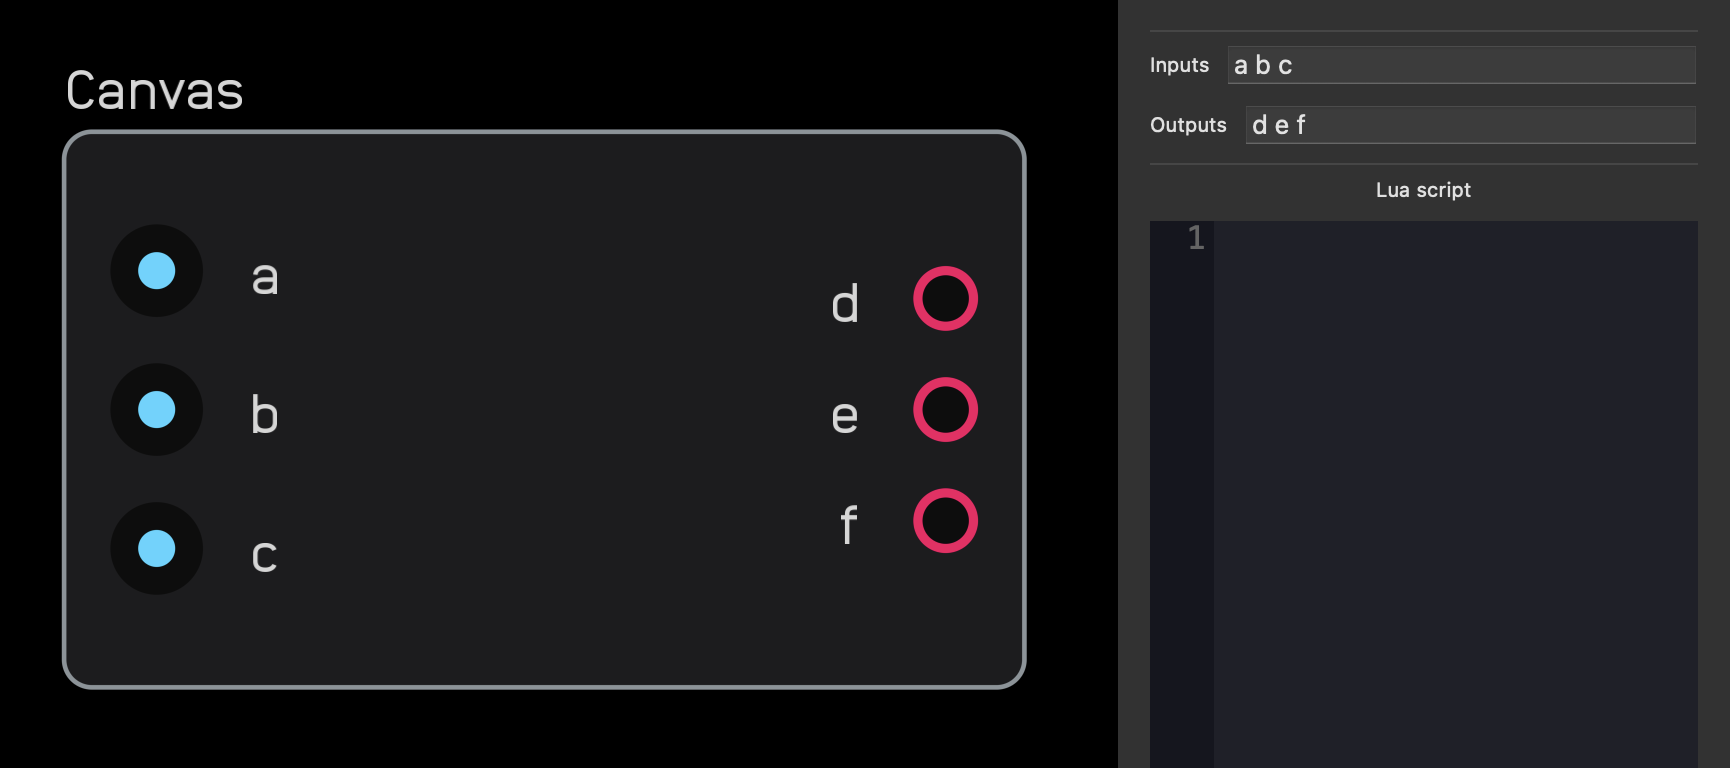
Below the field where you declare variables you can use Lua code to draw things on the canvas node.
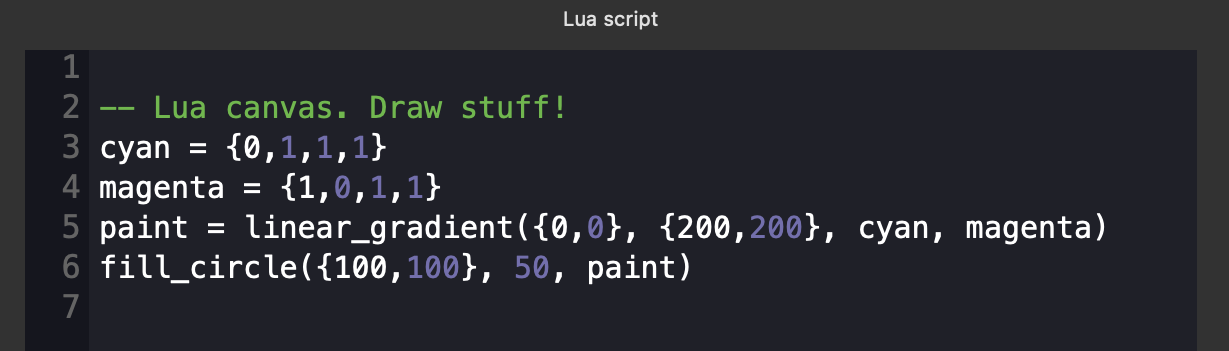
Below the code block are all of the available Lua functions which you can drag and drop into your code.
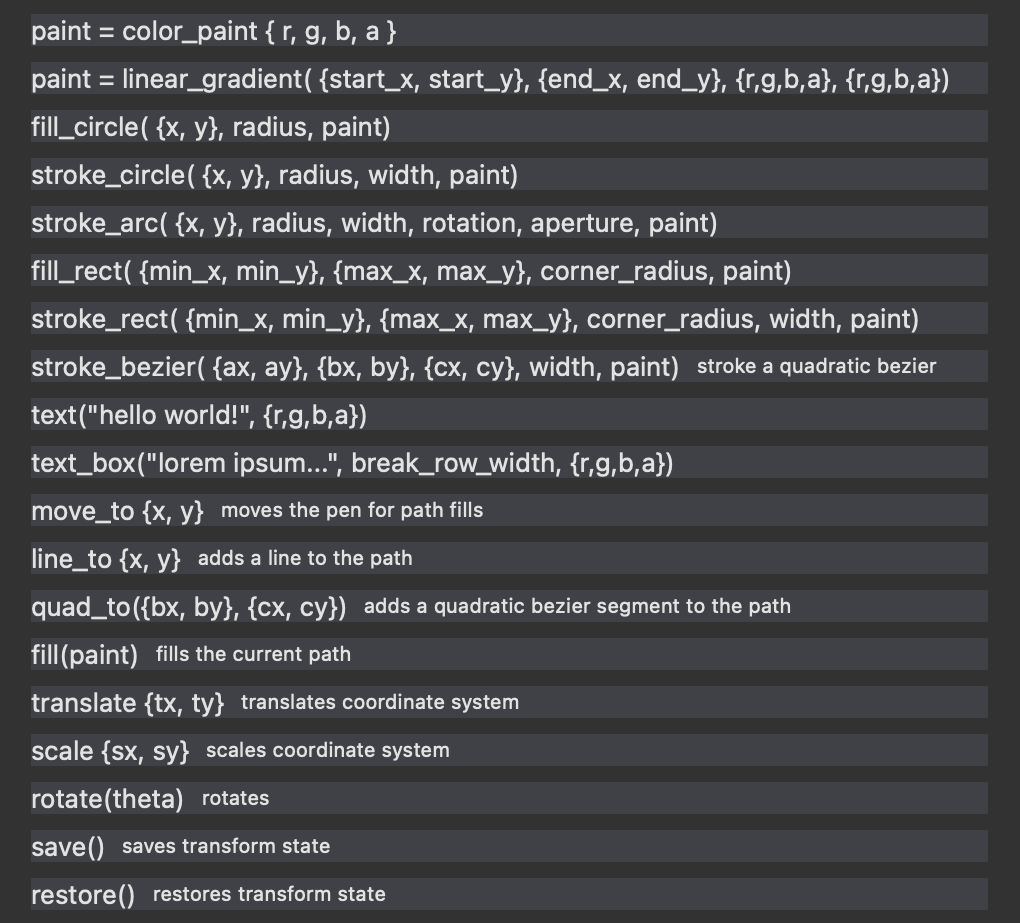
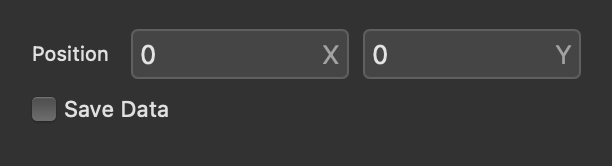
Below the functions are options to change the Size of the canvas node and Save Data between patch loads.
Unlike other nodes, the canvas node does not run at audio rate, making it unsuitable to be within any audio or time-critical control paths. As the name implies, it is intended to be space to draw things.
midi
description
The midi nodes send and receive MIDI signals in and out of Audulus.
- The
keyboardallows you to play Audulus synths with an external MIDI controller or feed in MIDI notes from a DAW. - The
note sendnode sends MIDI notes out of Audulus to hardware or DAWs. - The
cc sendnode sends MIDI CC messages from Audulus to hardware or or DAWs. - The
triggernode can both act like a button within Audulus and can also receive on/off MIDI messages.
keyboard
| output | signal |
|---|---|
Hz |
Hz |
gate |
gate |
| control | description |
|---|---|
Legato/Poly(2,4,8,16) |
sets the number of voices |
Omni/(1-16) |
sets the MIDI channel |
| exposable | ❌ |
|---|---|
description
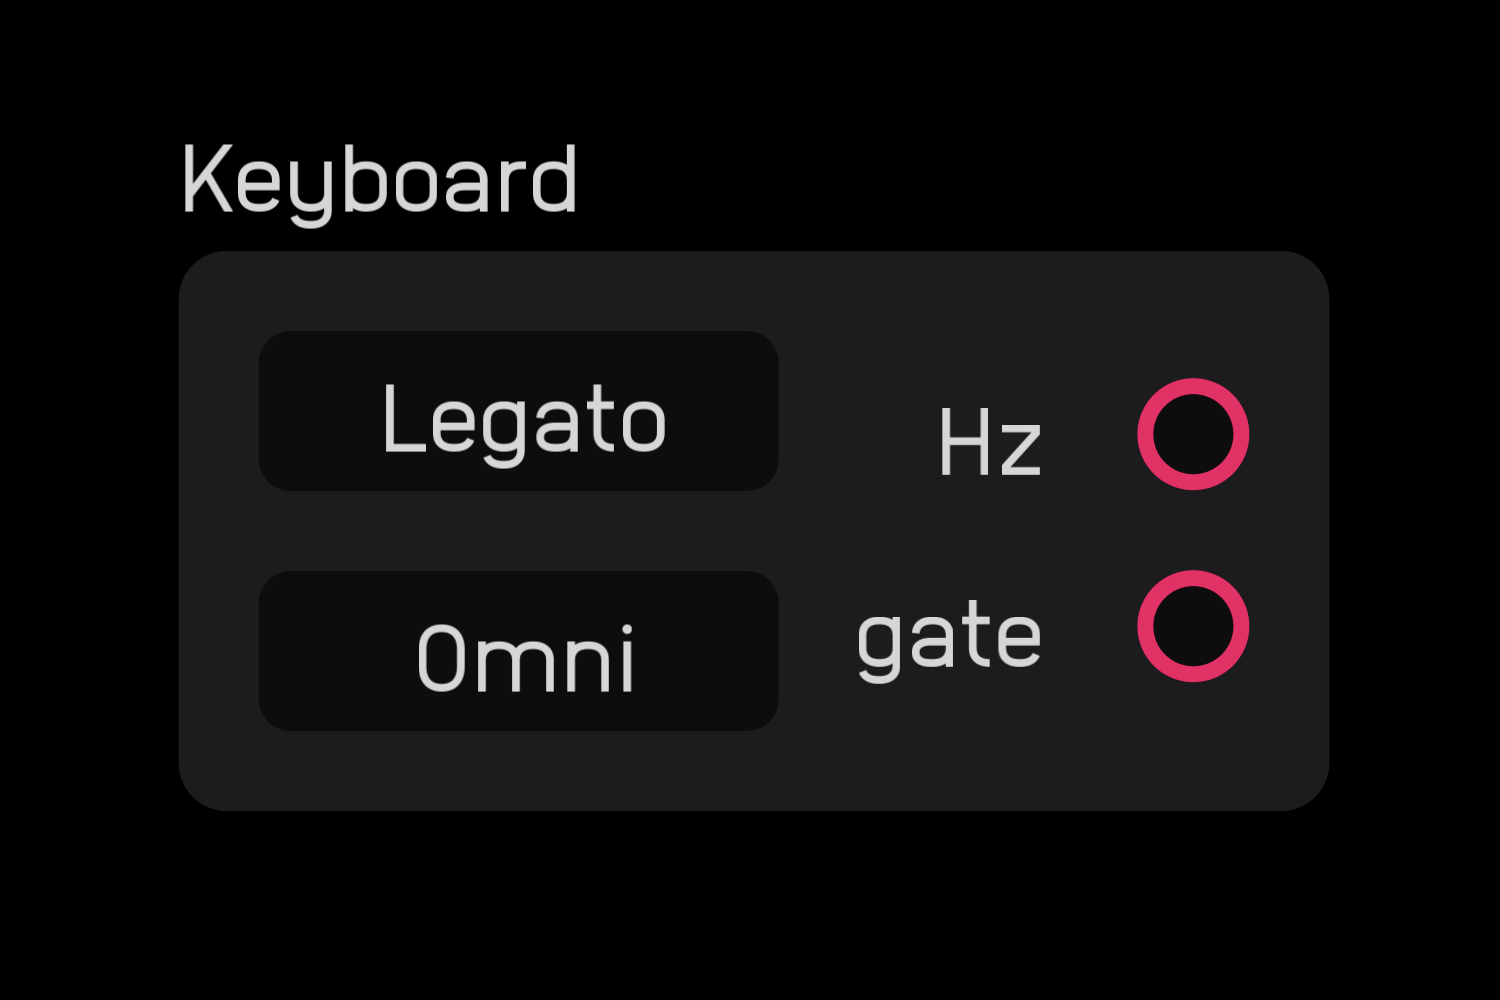
The keyboard node receives input from MIDI keyboards, DAWs, and other input MIDI devices.
It outputs a Hz value for the note and a gate signal for note on/off. The height of the gate represents the velocity.
There are also two controls on the keyboard node. The first cycles through Legato and Poly(2,4,8,16).
Legato means only one note (the last played) will be outputted. Poly 2 means 2 notes can be played at once, Poly 4 means 4, and so on.
Higher poly counts multiply CPU usage, so only set it to the count you need.
The Omni/(1-16) control specifies which incoming MIDI channel is referenced. On Omni, any messages from any of the channels will come through. You can also set the keyboard node to listen to a specific channel 1-16.
note send
| input | signal |
|---|---|
note |
midi value |
gate |
gate |
velocity |
midi value |
| exposable | ❌ |
|---|---|
description
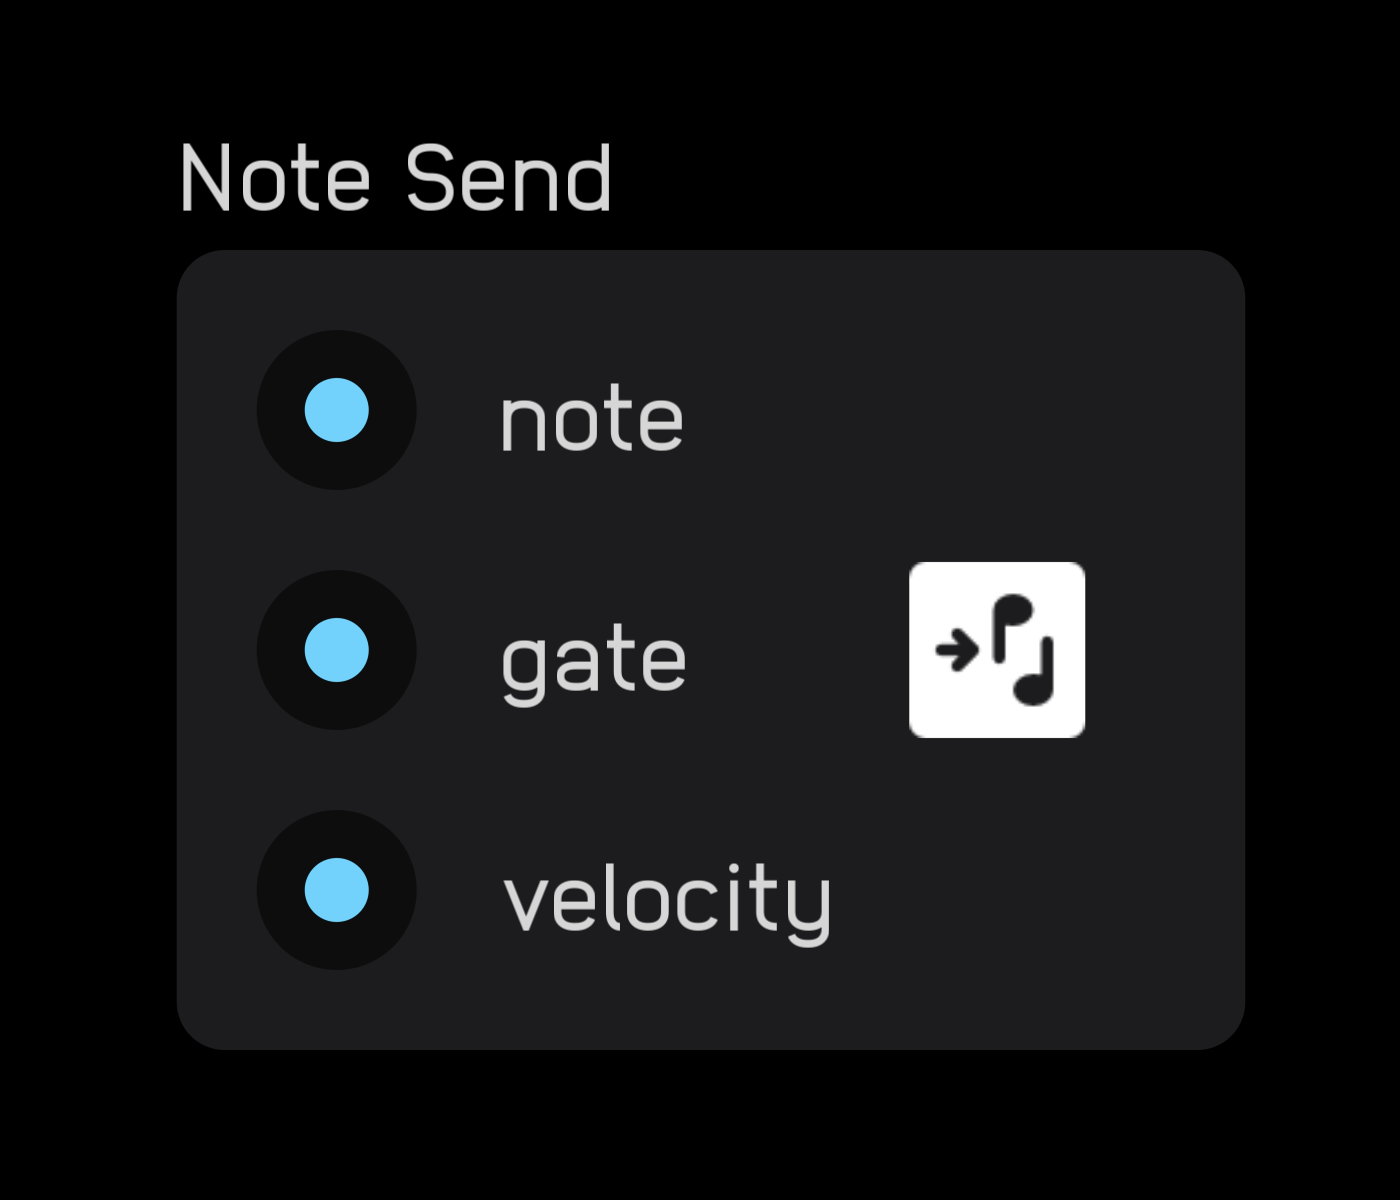
The note send node sends MIDI note, gate, and velocity data from Audulus to external instruments.
The note and velocity inputs correspond to the 0-127 integer values expected by MIDI. Inputs are floored, so if the value is between 0 and 1, 0 is the output.
The gate input sends a note on/off signal where high is on and 0 is off.
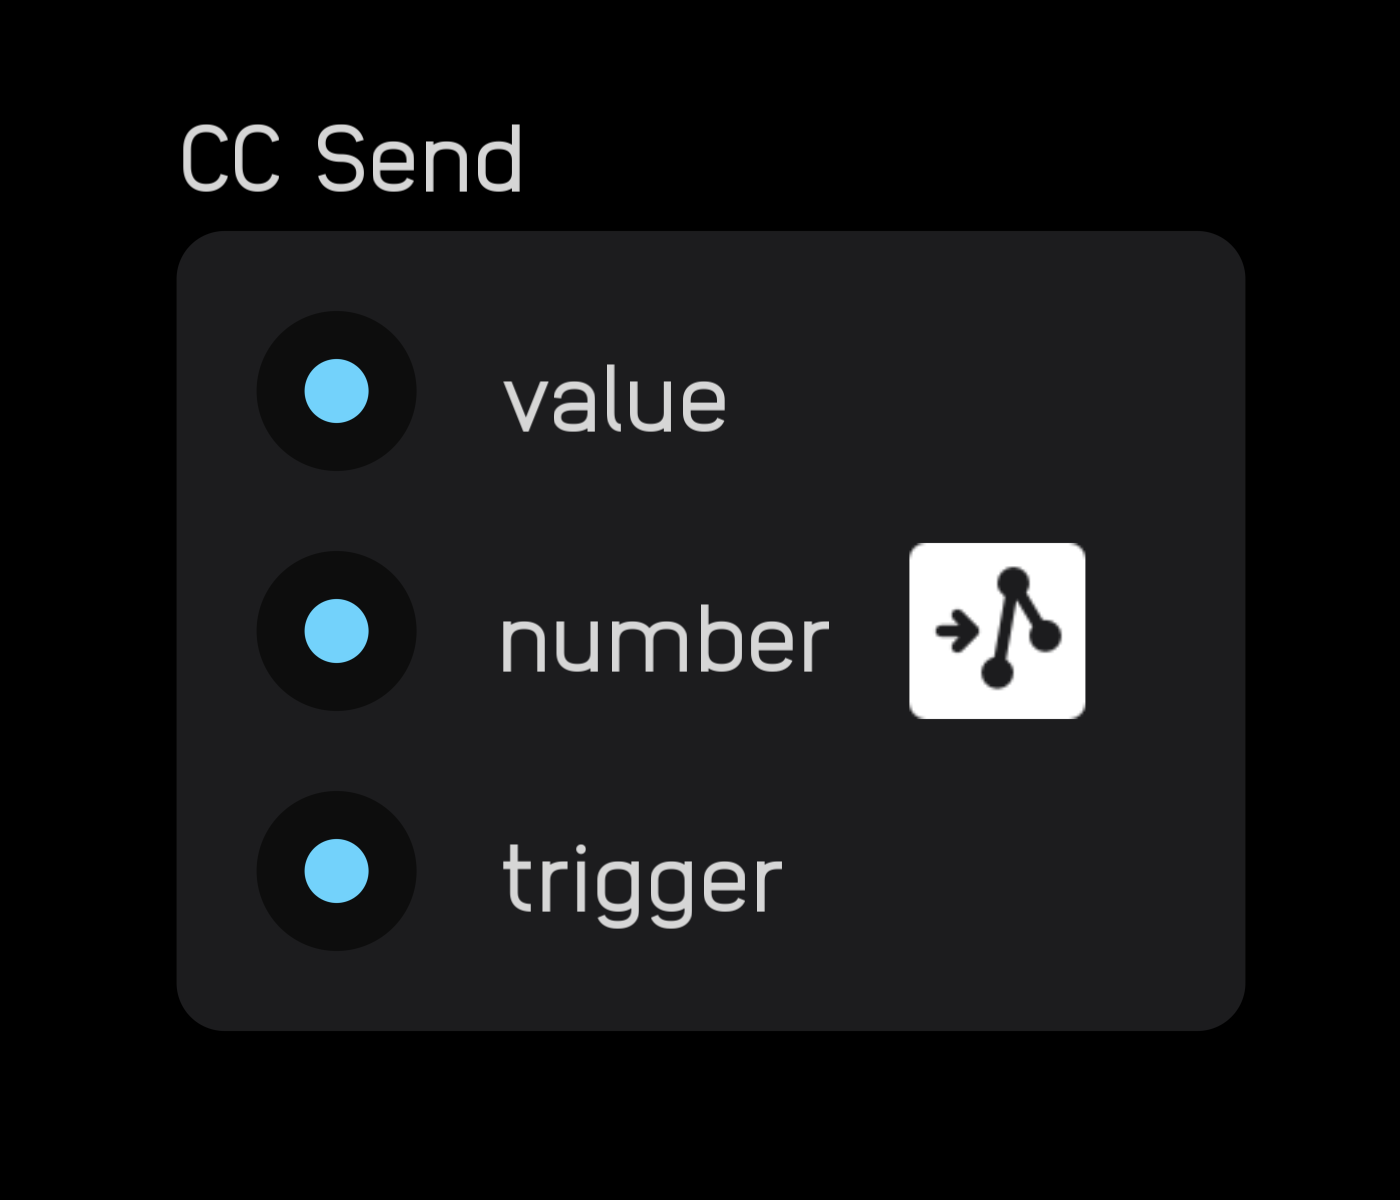
cc send
| input | signal |
|---|---|
value |
midi value |
number |
midi value |
trigger |
gate |
| exposable | ❌ |
|---|---|
description
The cc send node sends MIDI CC value from Audulus to external instruments.
When the trigger input goes high, the signal present at the value input is sent to the number CC.
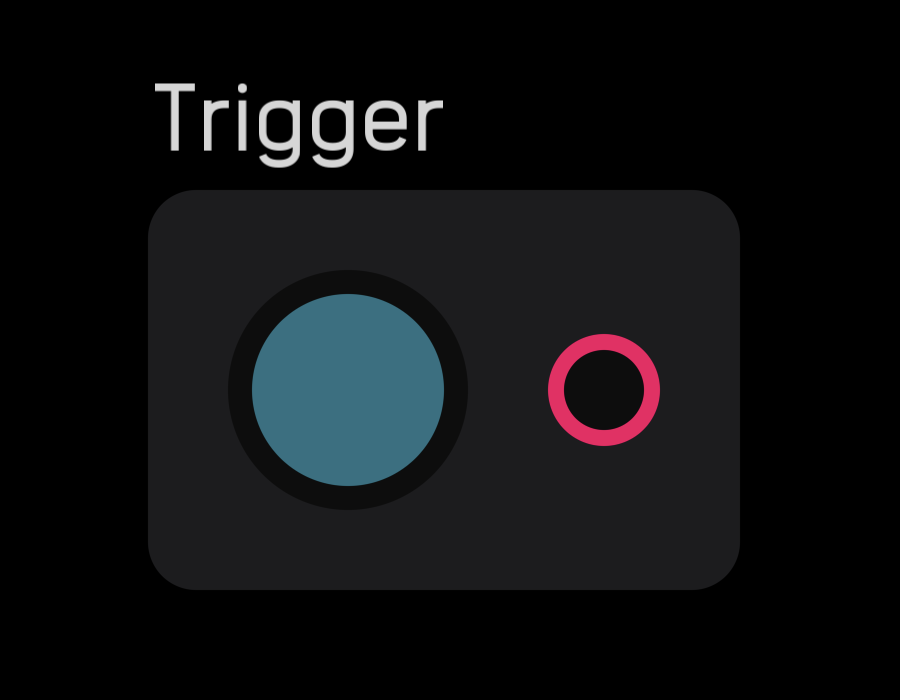
trigger
| control | description |
|---|---|
button |
outputs gate when pressed |
| exposable | ✅ automatic |
|---|---|
description
The trigger node outputs a gate when its button is pressed. The button can be clicked, tapped, or assigned to an external hardware MIDI signal in MIDI mapping mode.
level
description
The level nodes are tools helpful for manipulating the level of a signal.
- You can create custom lines with the
splinenode and trace over them to output a continuous series of custom values. - The
mappernode allows you to shape the response curve of a knob or signal moving through it. - The
env follownode traces the loudness envelope of an incoming signal and outputs it as amodsignal.
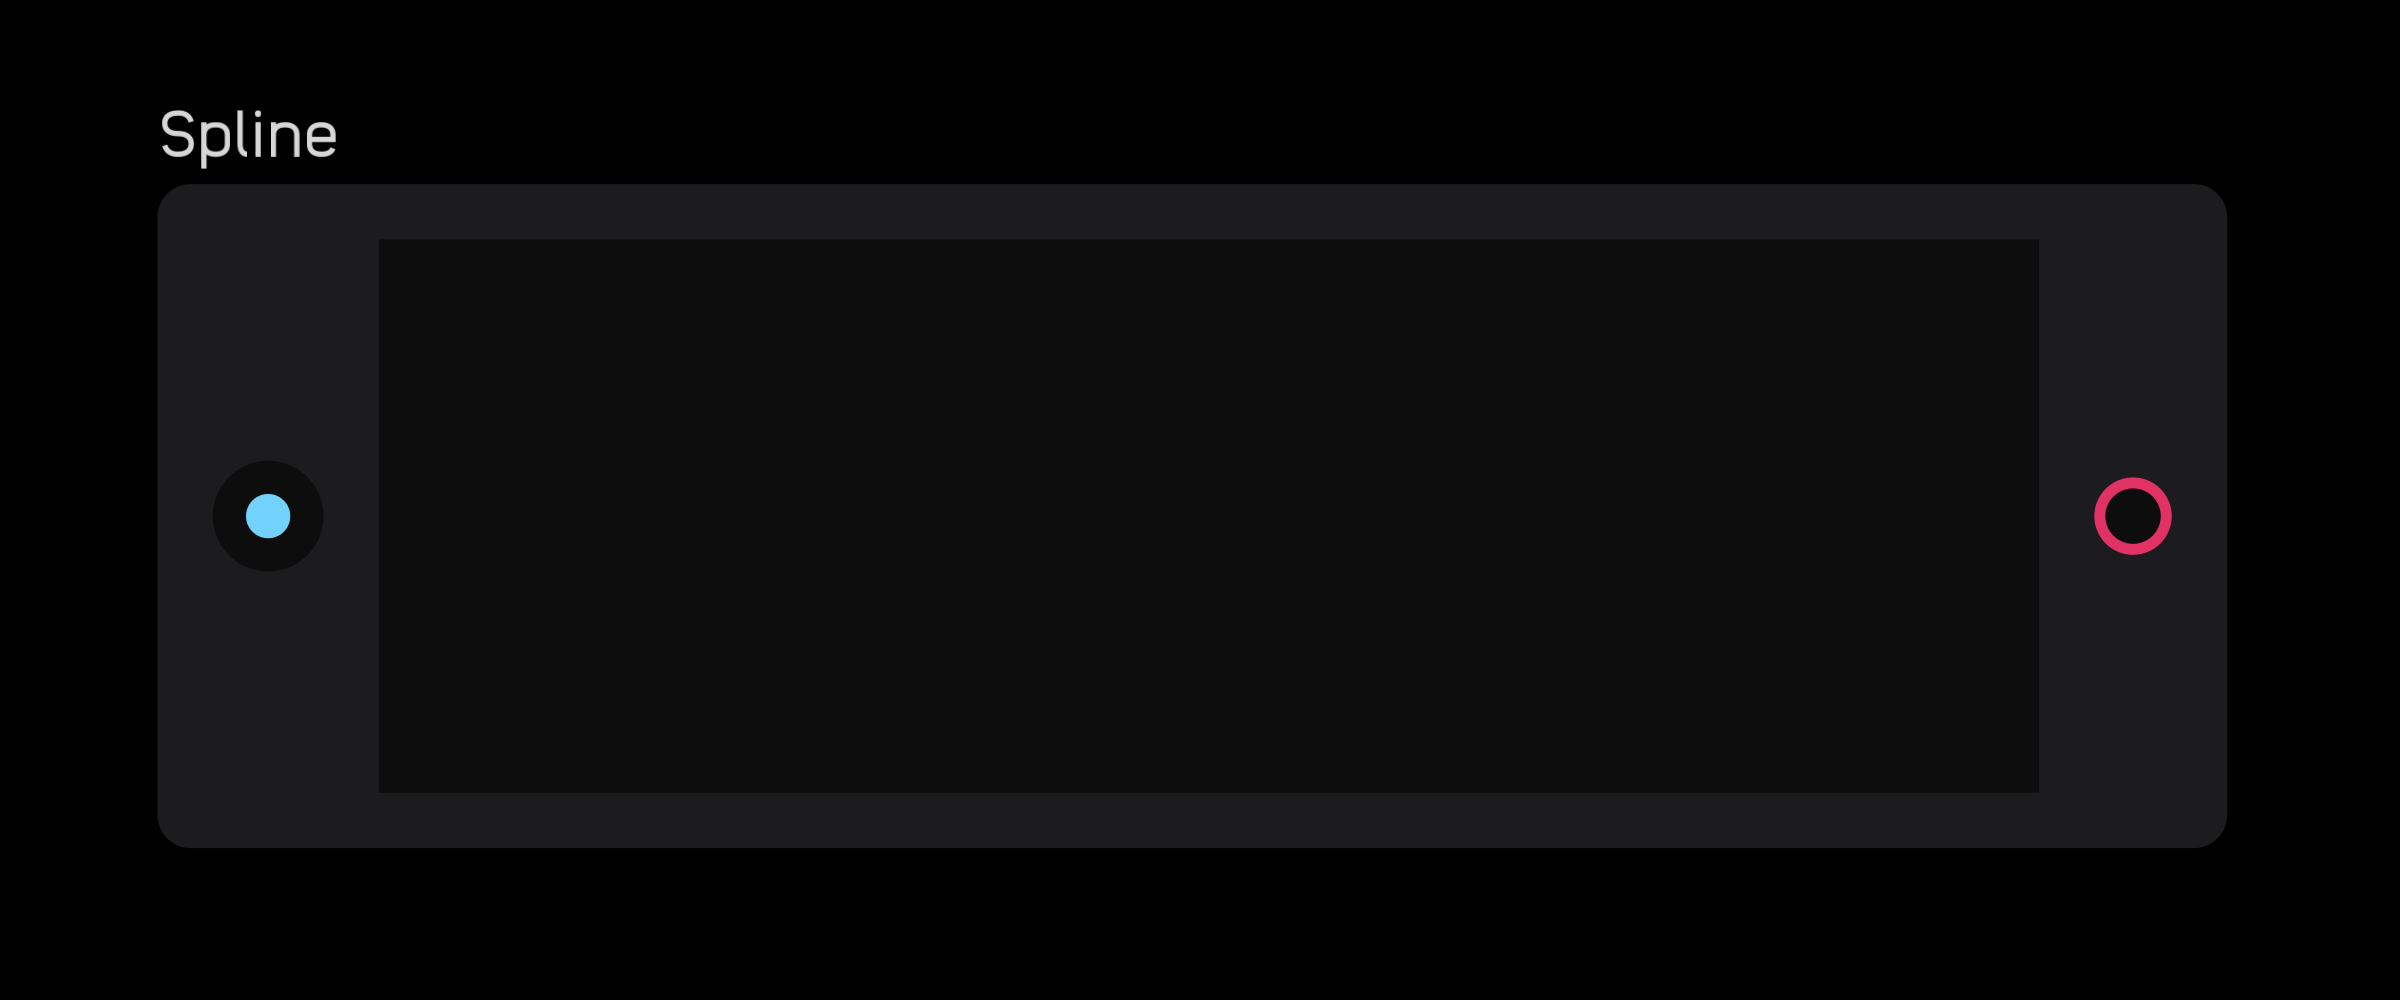
spline
| input | signal |
|---|---|
in |
mod |
| out | signal |
|---|---|
out |
mod |
| control | description |
|---|---|
spline |
create breakpoints to draw spline |
| exposable | ✅ |
|---|---|
description
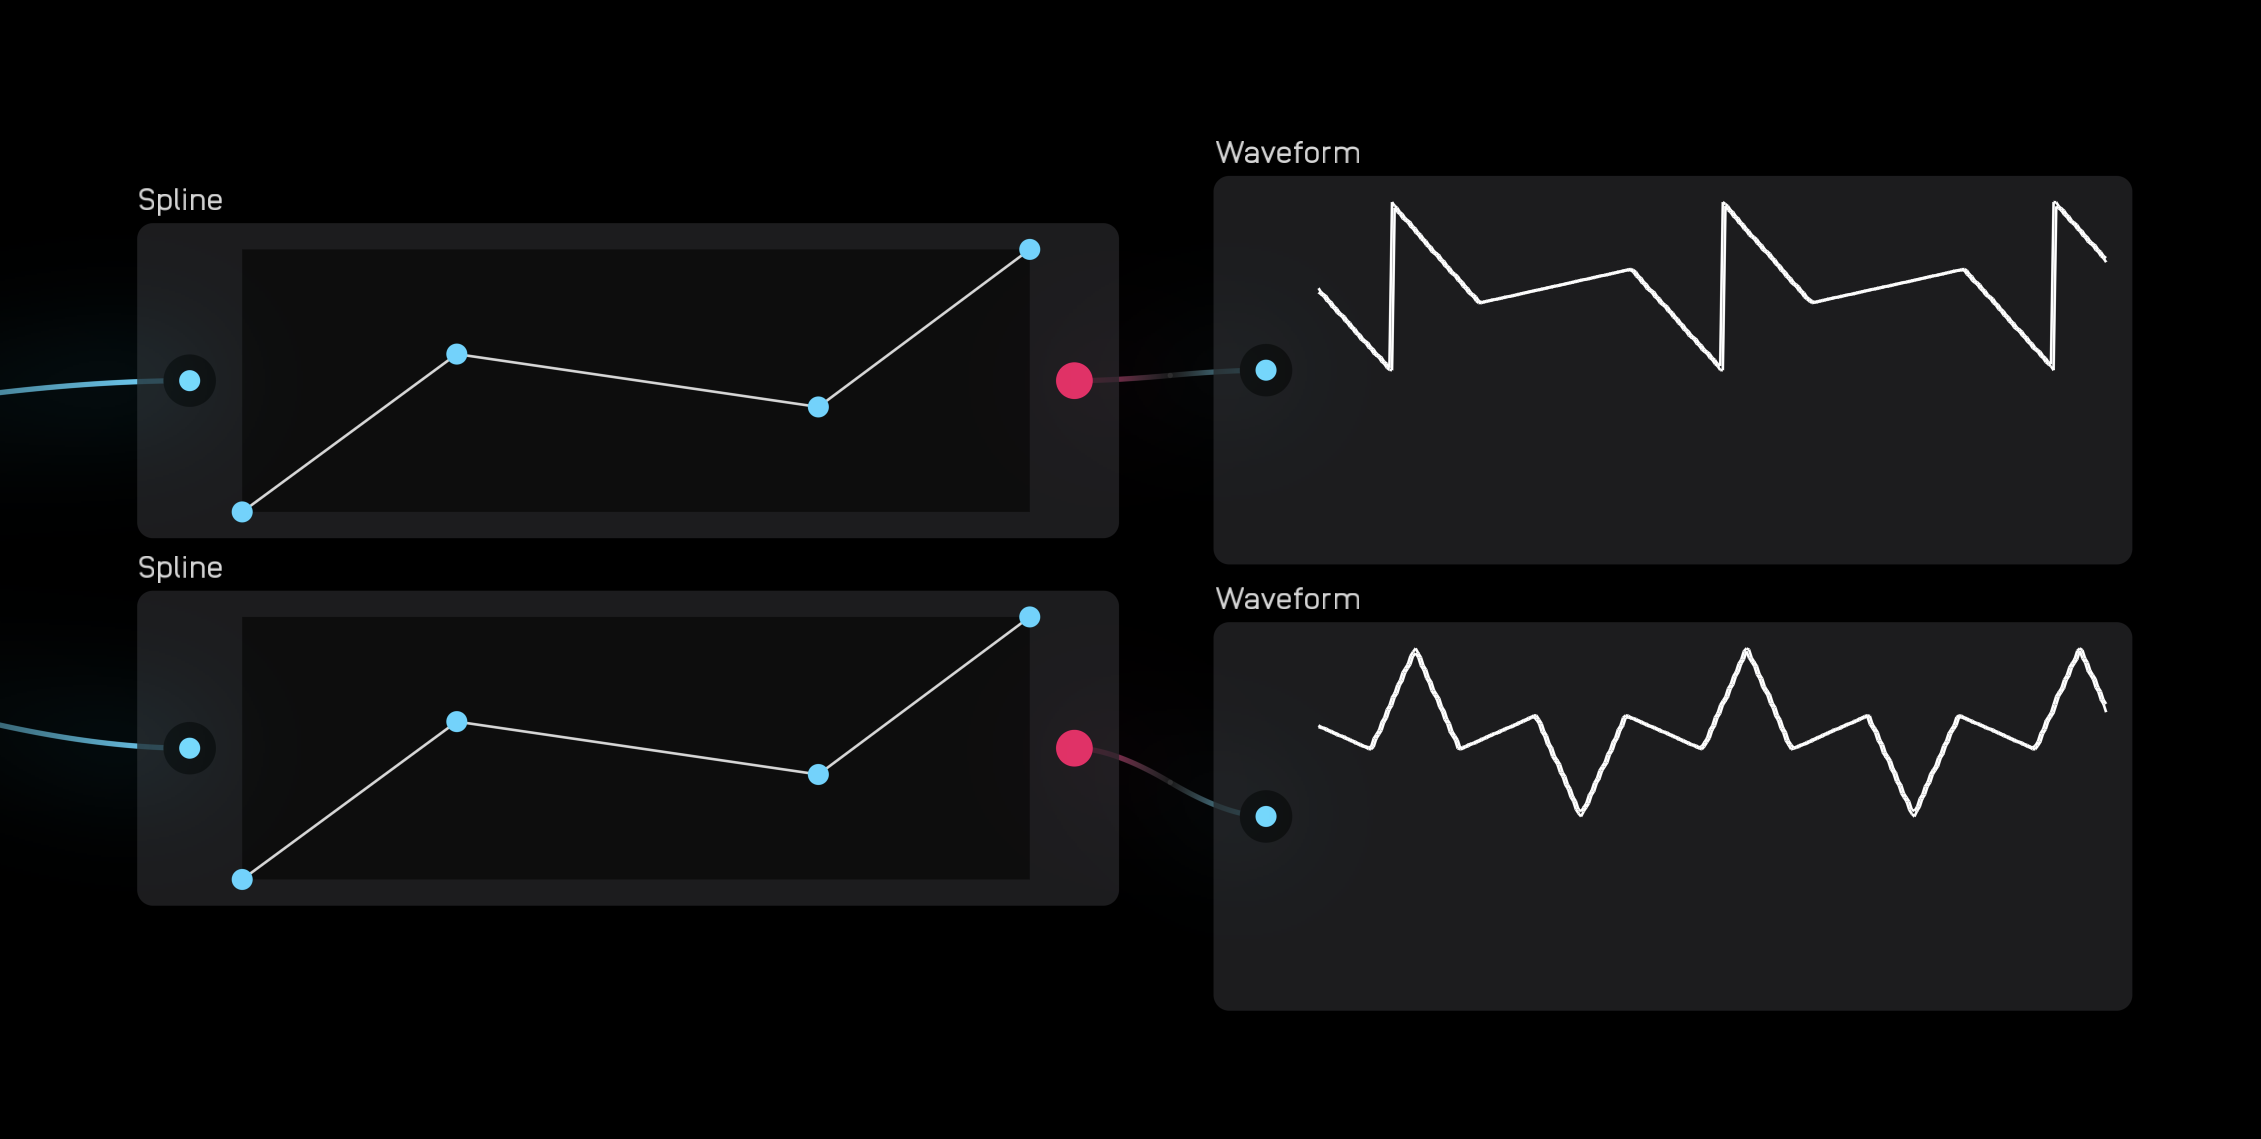
The spline node allows you to draw a line using two or more breakpoints and then trace over that line using a mod input.
Breakpoints are added by double clicking or tapping on the blank field inside the node. Once created, they can be dragged around anywhere inside of the field.
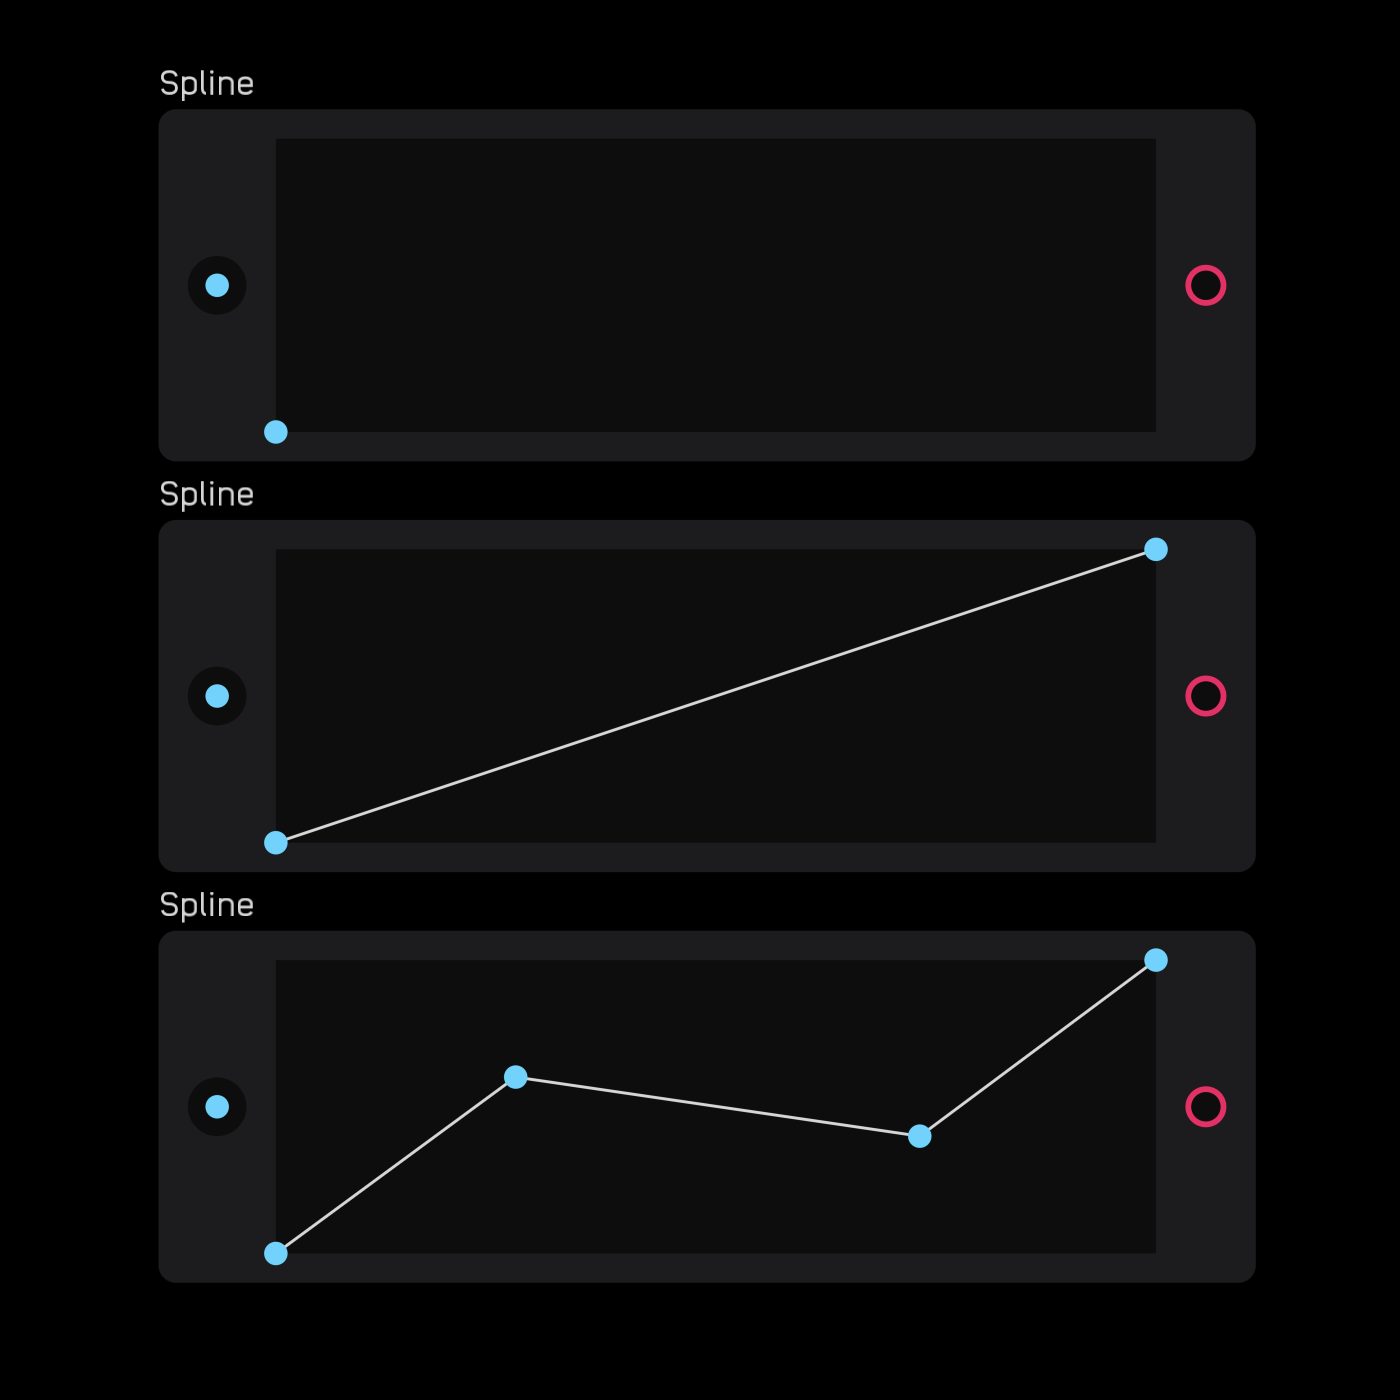
The coordinate system determining the output is (in, line). The bottom left of the field is (0, 0) and the top right is (1, 1). The output of the node is the y value of the line given x input.
In the example below, identical spline nodes are driven by two different LFO shapes. The top is a saw wave and the bottom is a triangle wave.
mapper
| input | signal |
|---|---|
in |
mod |
| out | signal |
|---|---|
out |
mod [^5] |
[^5]: The output of the mapper node can overshoot the maximum and minimum of the mod signal by ~0.12.
| control | description |
|---|---|
mapper |
move one of three breakpoints up or down to shape curve |
| exposable | ✅ |
|---|---|
description
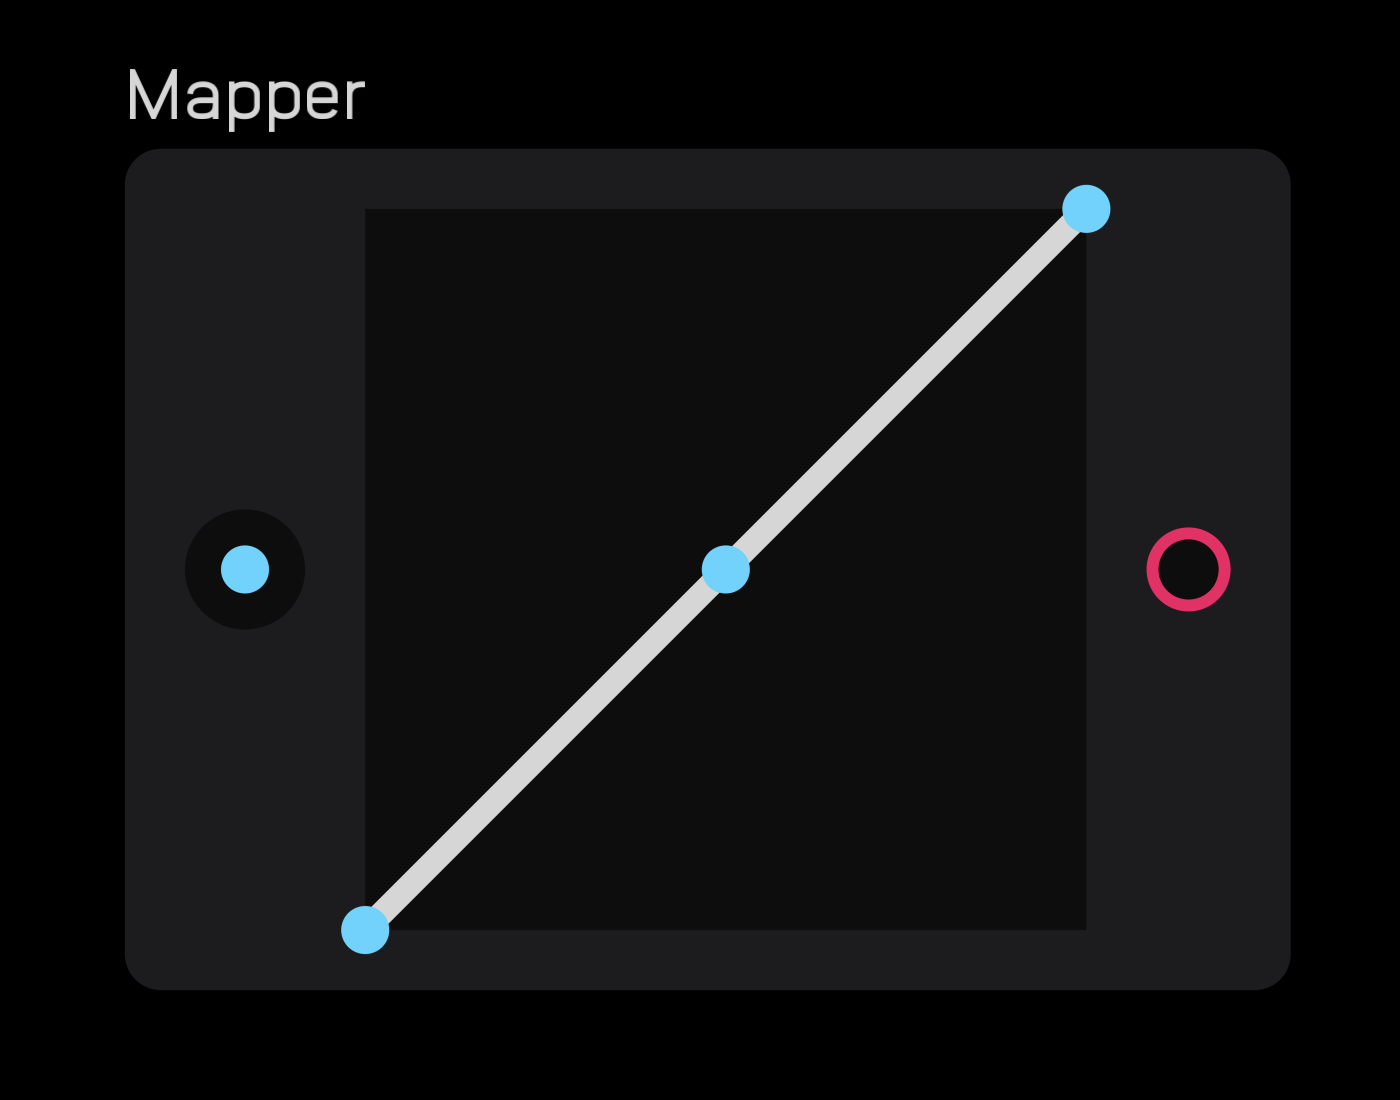
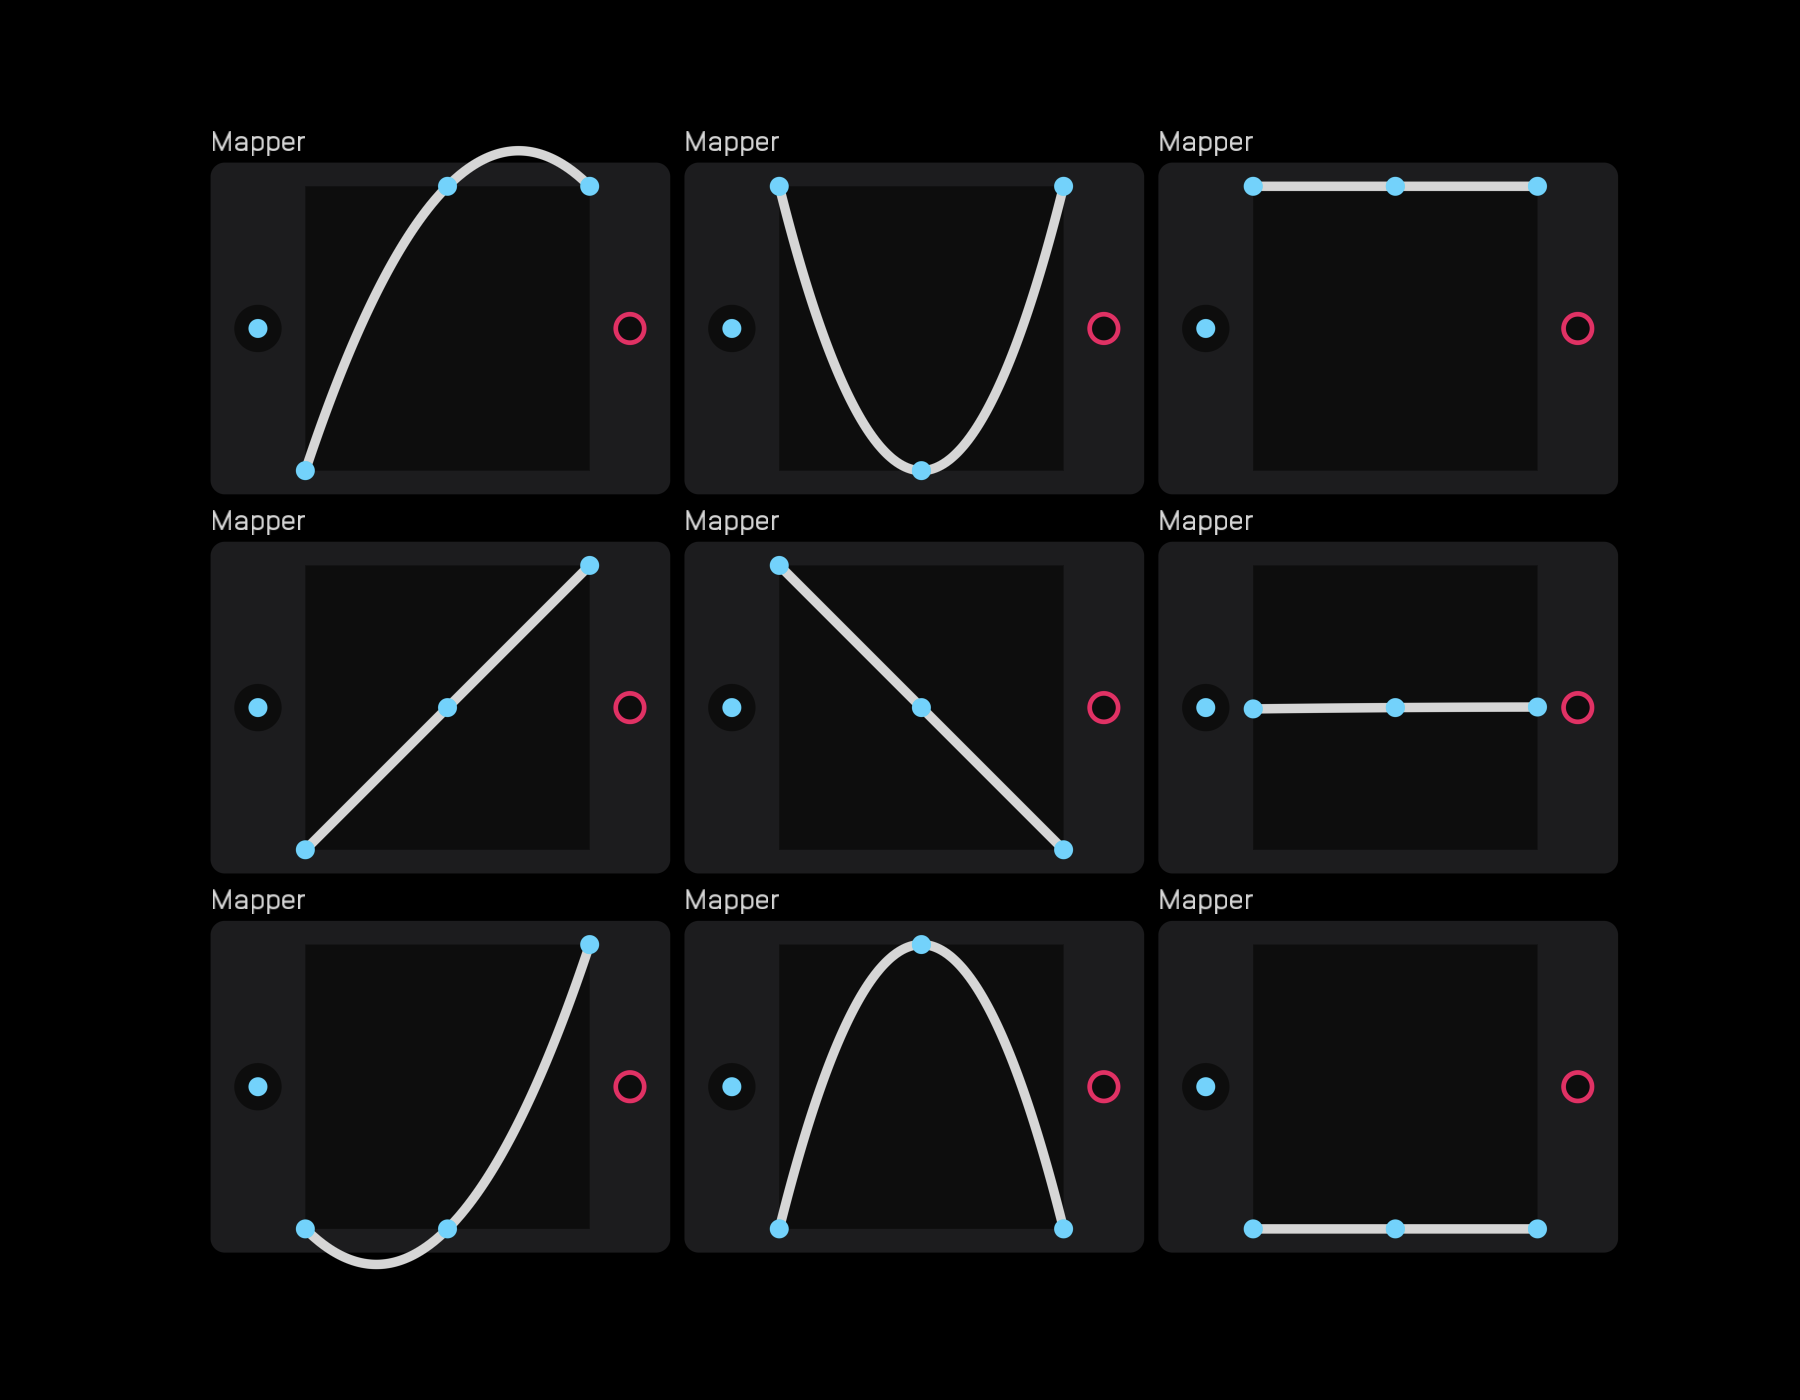
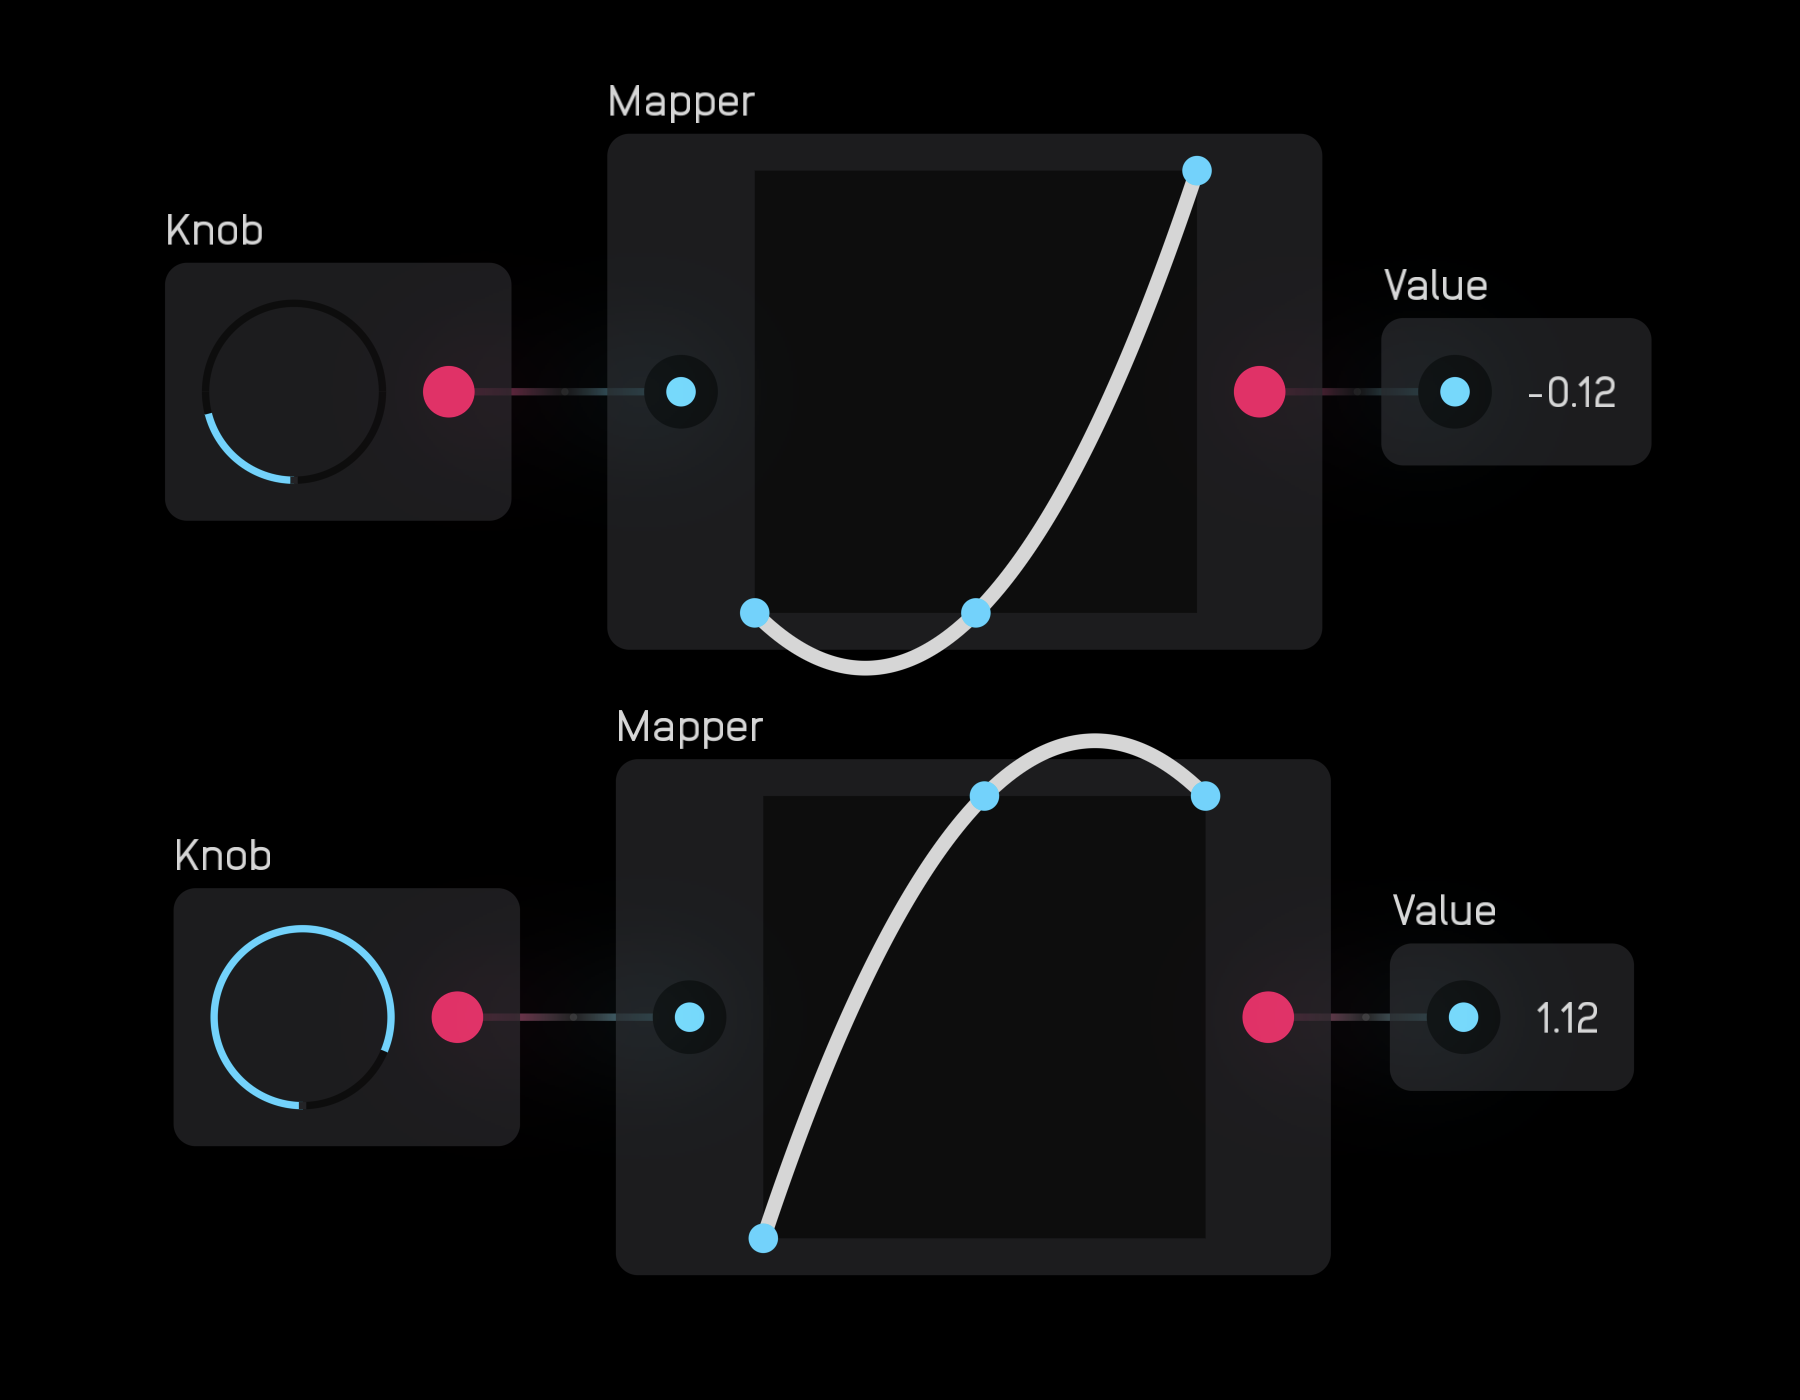
The mapper node allows you to change the response of an incoming modulation signal depending on the curve drawn in the node's field.
Below are some of the possible shapes you can draw using the mapper node.
The coordinate system determining the output is (in, line). The bottom left of the field is (0, 0) and the top right is (1, 1). The output of the node is the y value of the line given x input.
The image below shows how the different shapes transform the incoming saw LFO.
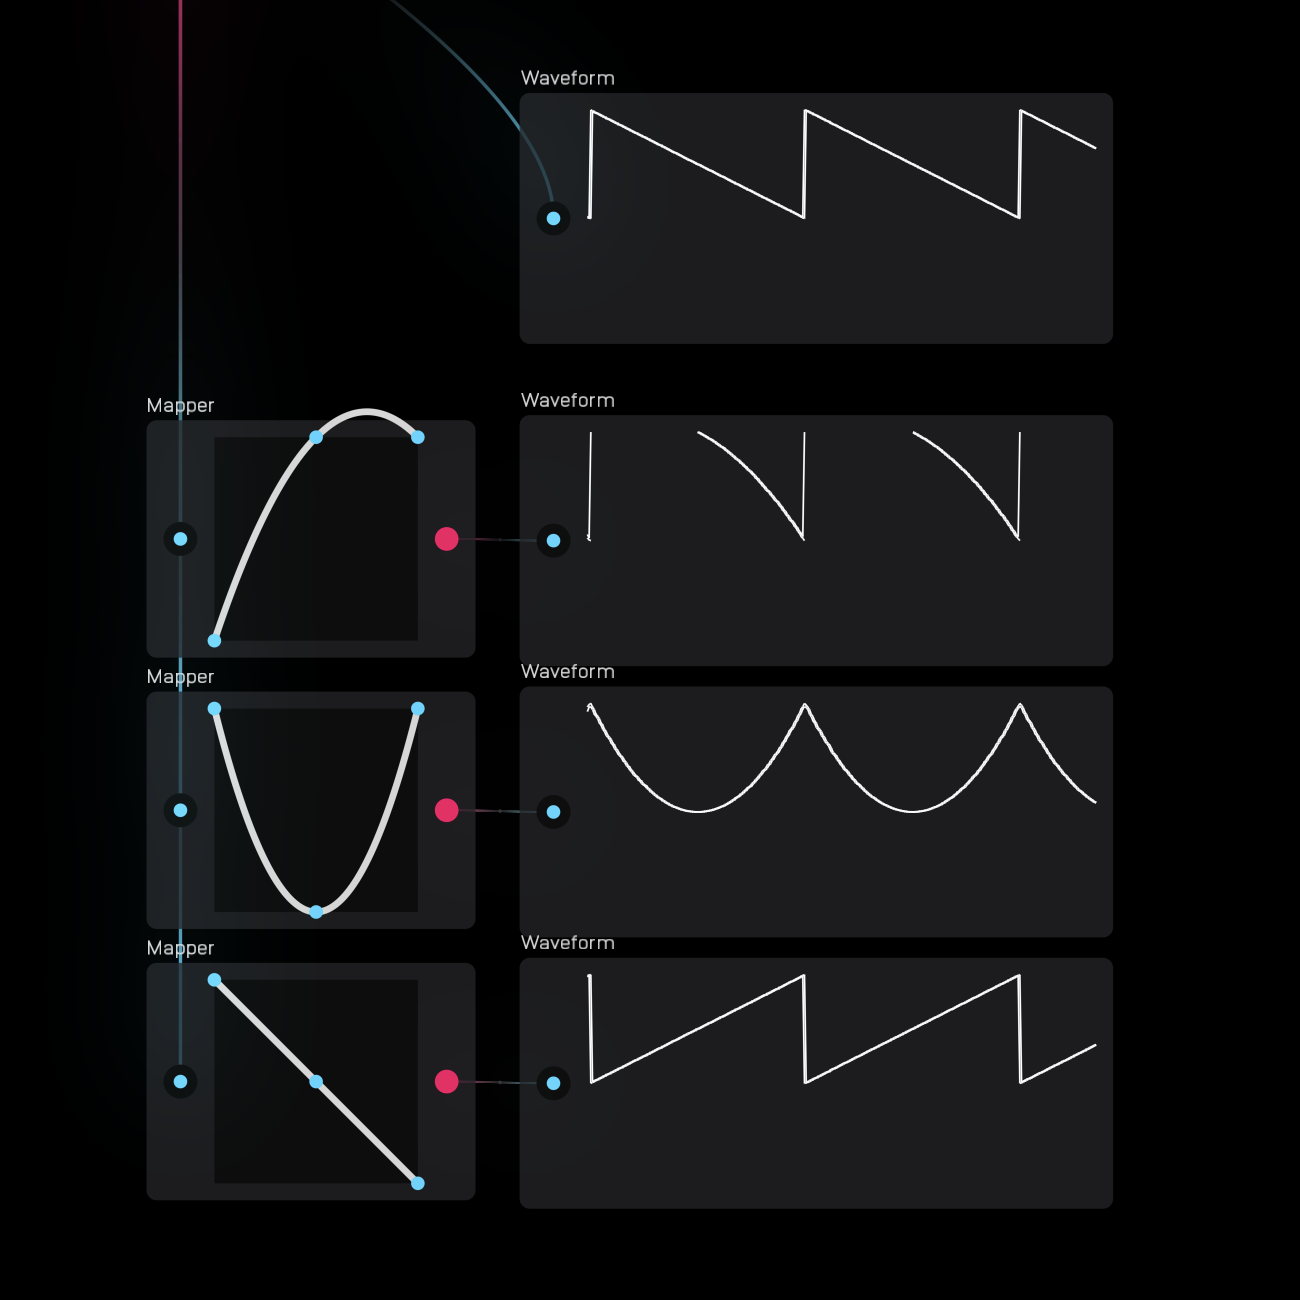
As you can see in the above image, the mapper node can overshoot the modulation signal. This exception is a maximum of approximately +/- 0.12.
env follow
| input | signal |
|---|---|
in |
audio |
| out | signal |
|---|---|
out |
mod [^6] |
[^6]: In most cases, the env follow node is used to extract an amplitude envelope of an audio signal, and abs(audio) = mod. However, in reality the env follow node outputs abs(any) with some minor filtering to smooth transitions between samples.
| exposable | ❌ |
|---|---|
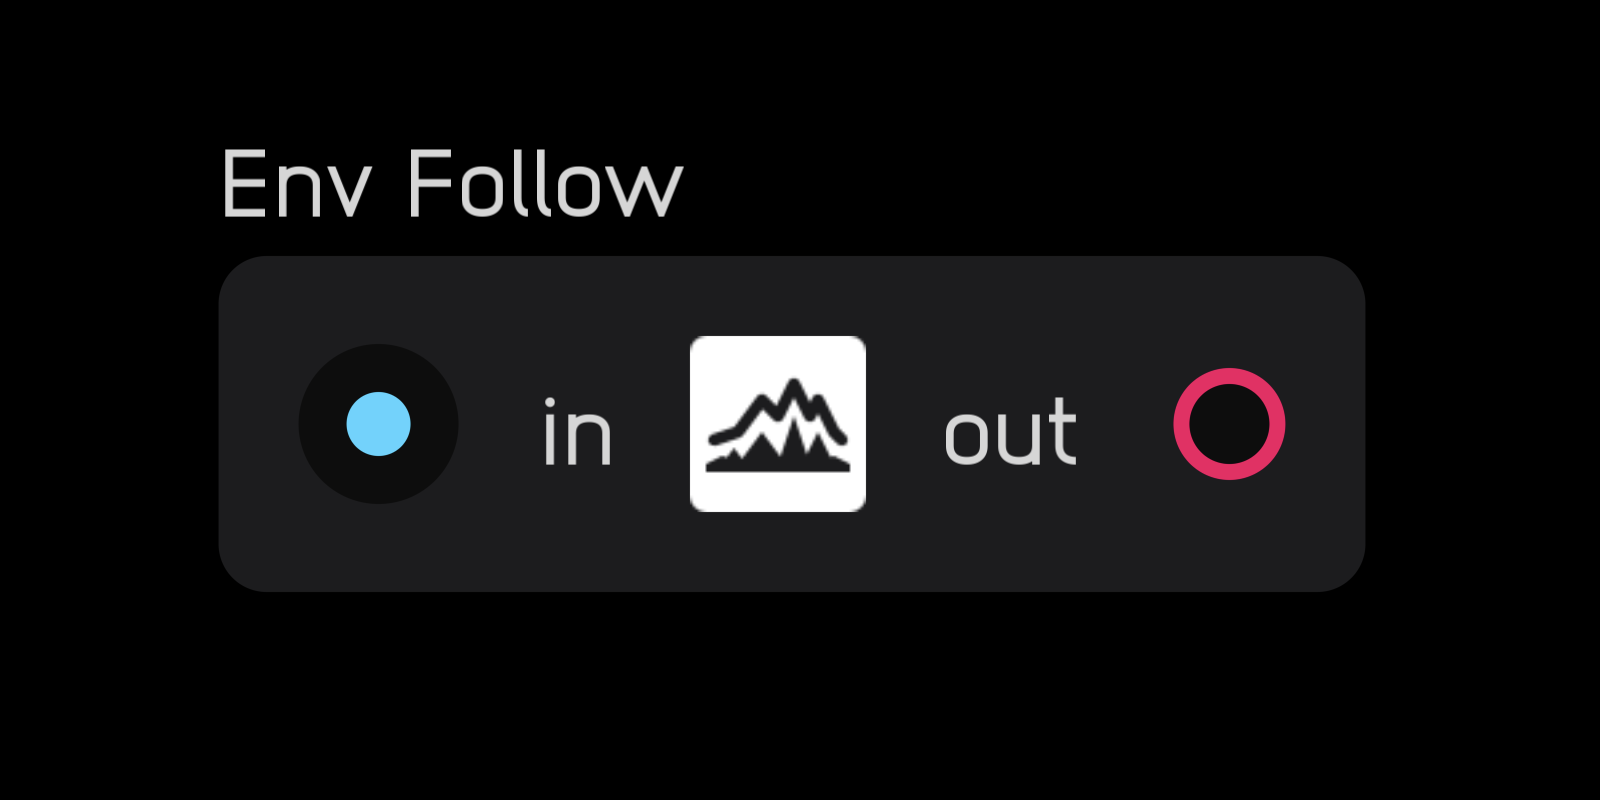
description
The env follow node extracts an envelope from an incoming audio signal and transforms it into a modulation signal. It does this by taking the absolute value of the incoming signal and applying a small amount of filtering to smooth transitions between samples.
dsp
description
DSP is an acronym that means digital signal processing. The dsp nodes are essentials for creating filters and manipulating signals at a conceptually low level.
- The
unit delaynode delays a signal by a single sample and marks precisely where a feedback delay happens within a feedback loop. - The
biquadnode is a building block for creating custom biquad filters. - The
low-passandhigh-passnodes are conveniently packaged, non-resonant filters. - The
delay linenode can delay a signal up to 20 seconds. - The
dc blockernode prevents a signal with a DC-offset from harming speakers. - The
sample ratenode outputs the current sample rate, useful in many calculations where the precise sample rate is needed. - The
resamplenode allows you to up- and then down-sample a signal to run certain parts of a module at a higher sample rate. - The
memorynode allows you to record, playback, and import audio or control signals. - The
dspnode allows you to write code for low-level signal processing using the Lua programming langauge.
unit delay
| input | signal |
|---|---|
in |
any |
| out | signal |
|---|---|
out |
any |
| exposable | ❌ |
|---|---|
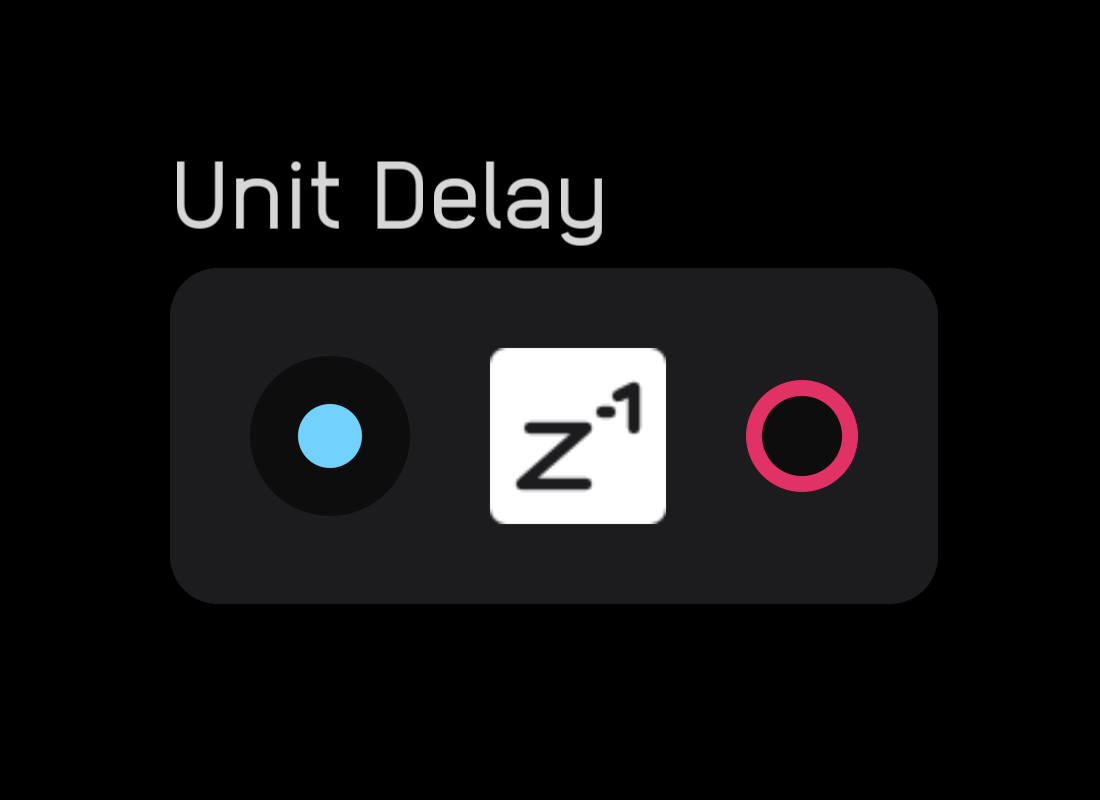
description
The unit delay node delays an incoming signal by 1 sample. It also explicitly tells Audulus where to insert a single sample feedback delay within a feedback loop.
If a unit delay is not inserted somewhere within a feedback loop, Audulus will guess where to put it. Much of the time this is ok, but in some cases, like when creating analog-modeling filters, you need to be explicit about where the feedback delay goes.
biquad
| input | signal |
|---|---|
in |
any |
a1 |
a1 coefficient |
a2 |
a2 coefficient |
a3 |
a3 coefficient |
b1 |
b1 coefficient |
b2 |
b2 coefficient |
| out | signal |
|---|---|
out |
any |
| exposable | ❌ |
|---|---|
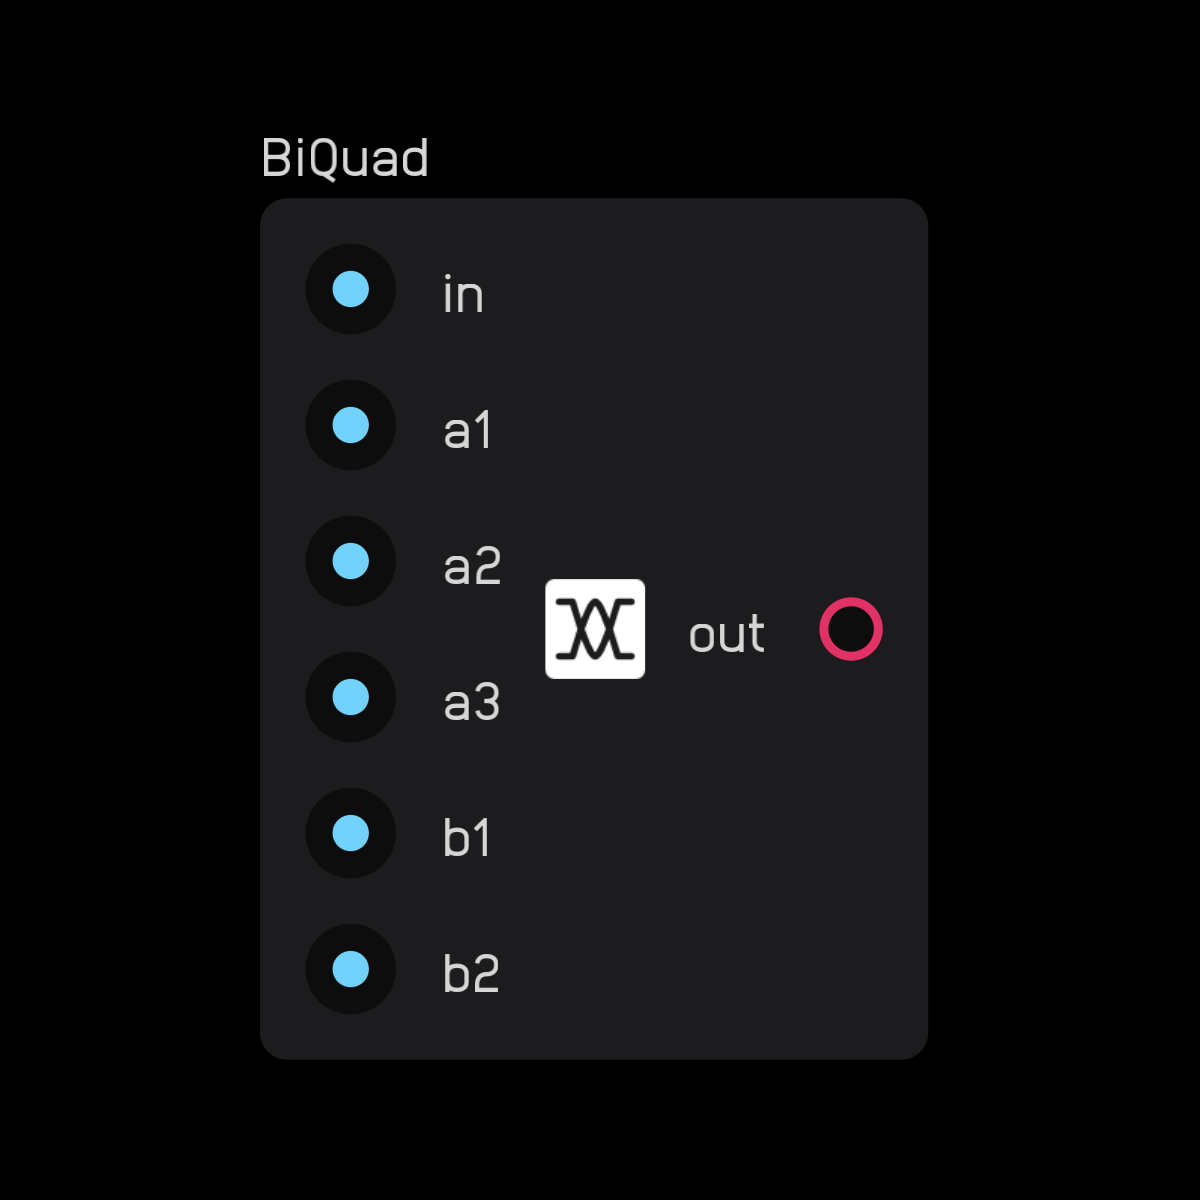
description
The biquad node allows you to create all different types of biquadratic filters. Refer to this guide for more information.
You need to calculate the coefficient inputs separately from the node using expr nodes.
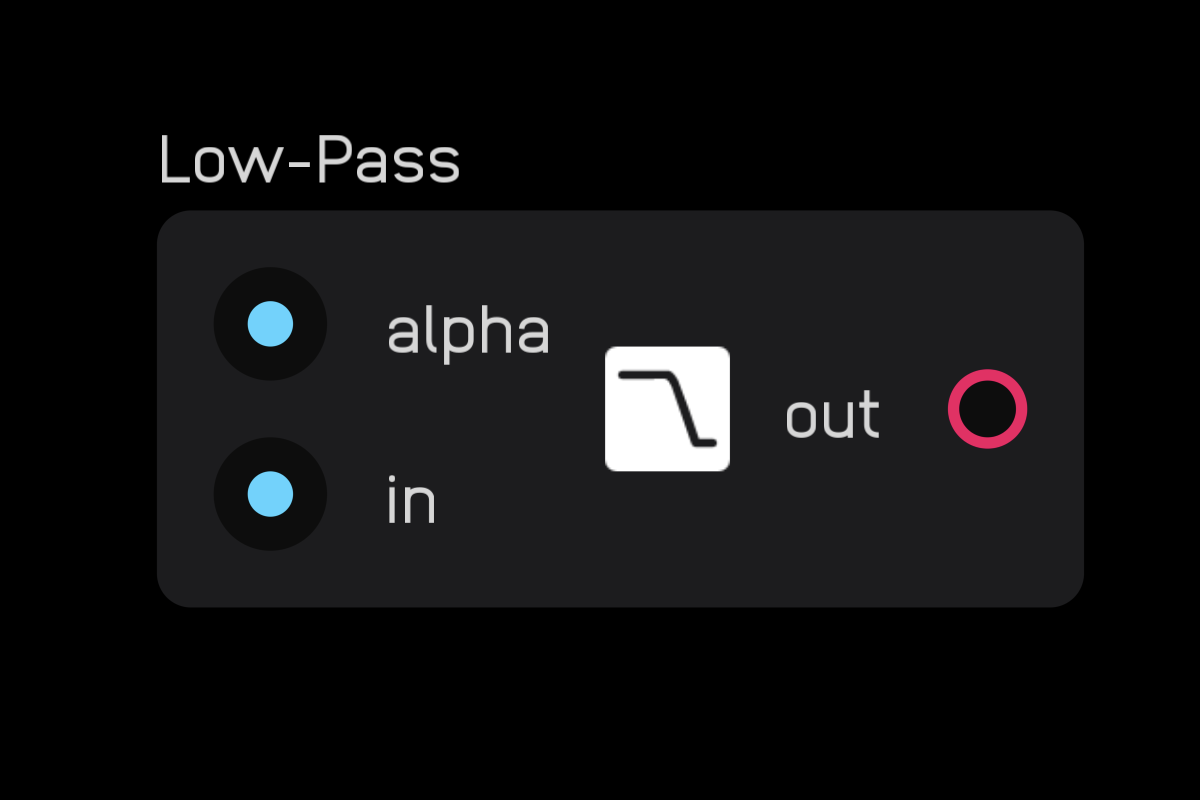
low-pass
| input | signal |
|---|---|
in |
any |
alpha |
mod |
| out | signal |
|---|---|
out |
any |
| exposable | ❌ |
|---|---|
description
The low pass node is a simple non-resonant 6dB/oct low-pass filter. The alpha input is the smoothing factor where 1 = no filtering and 0 = maximum filtering.
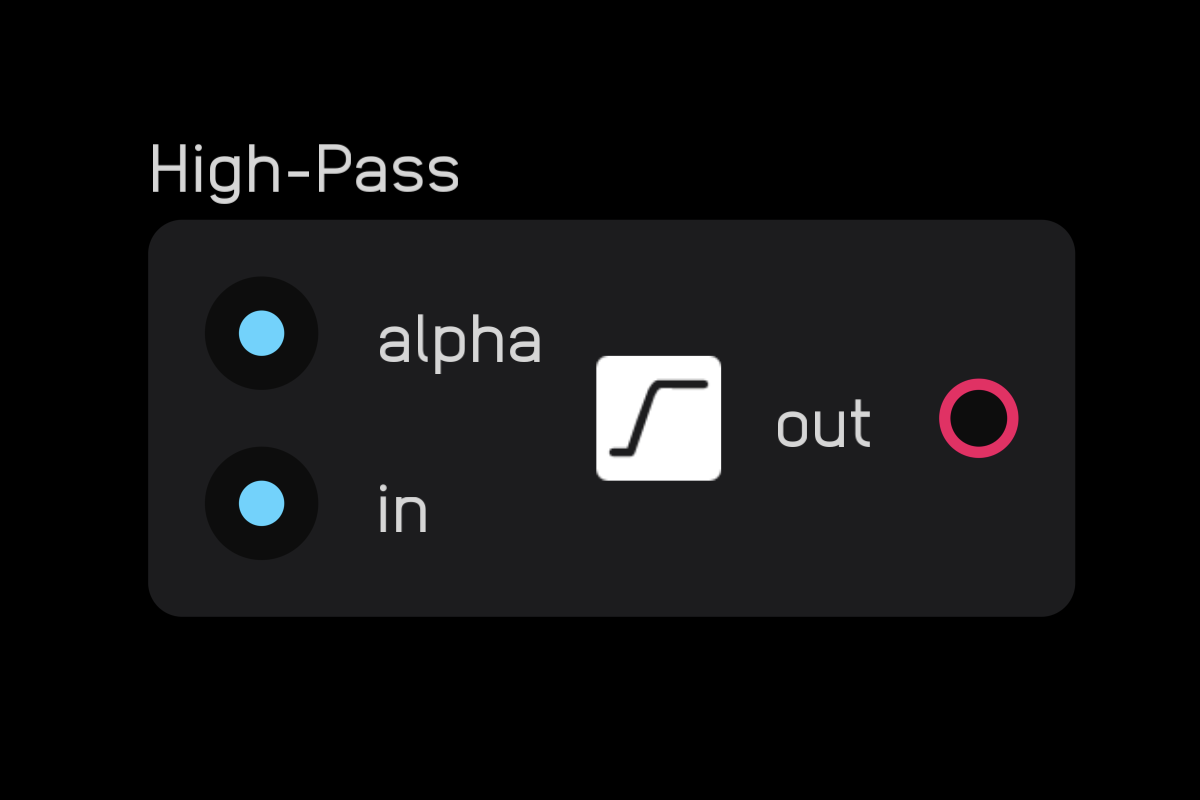
high-pass
| input | signal |
|---|---|
in |
any |
alpha |
mod |
| out | signal |
|---|---|
out |
any |
| exposable | ❌ |
|---|---|
description
The high pass node is a simple non-resonant 6dB/oct high-pass filter. The alpha input is the smoothing factor where 1 = maximum filtering and 0 = no filtering.
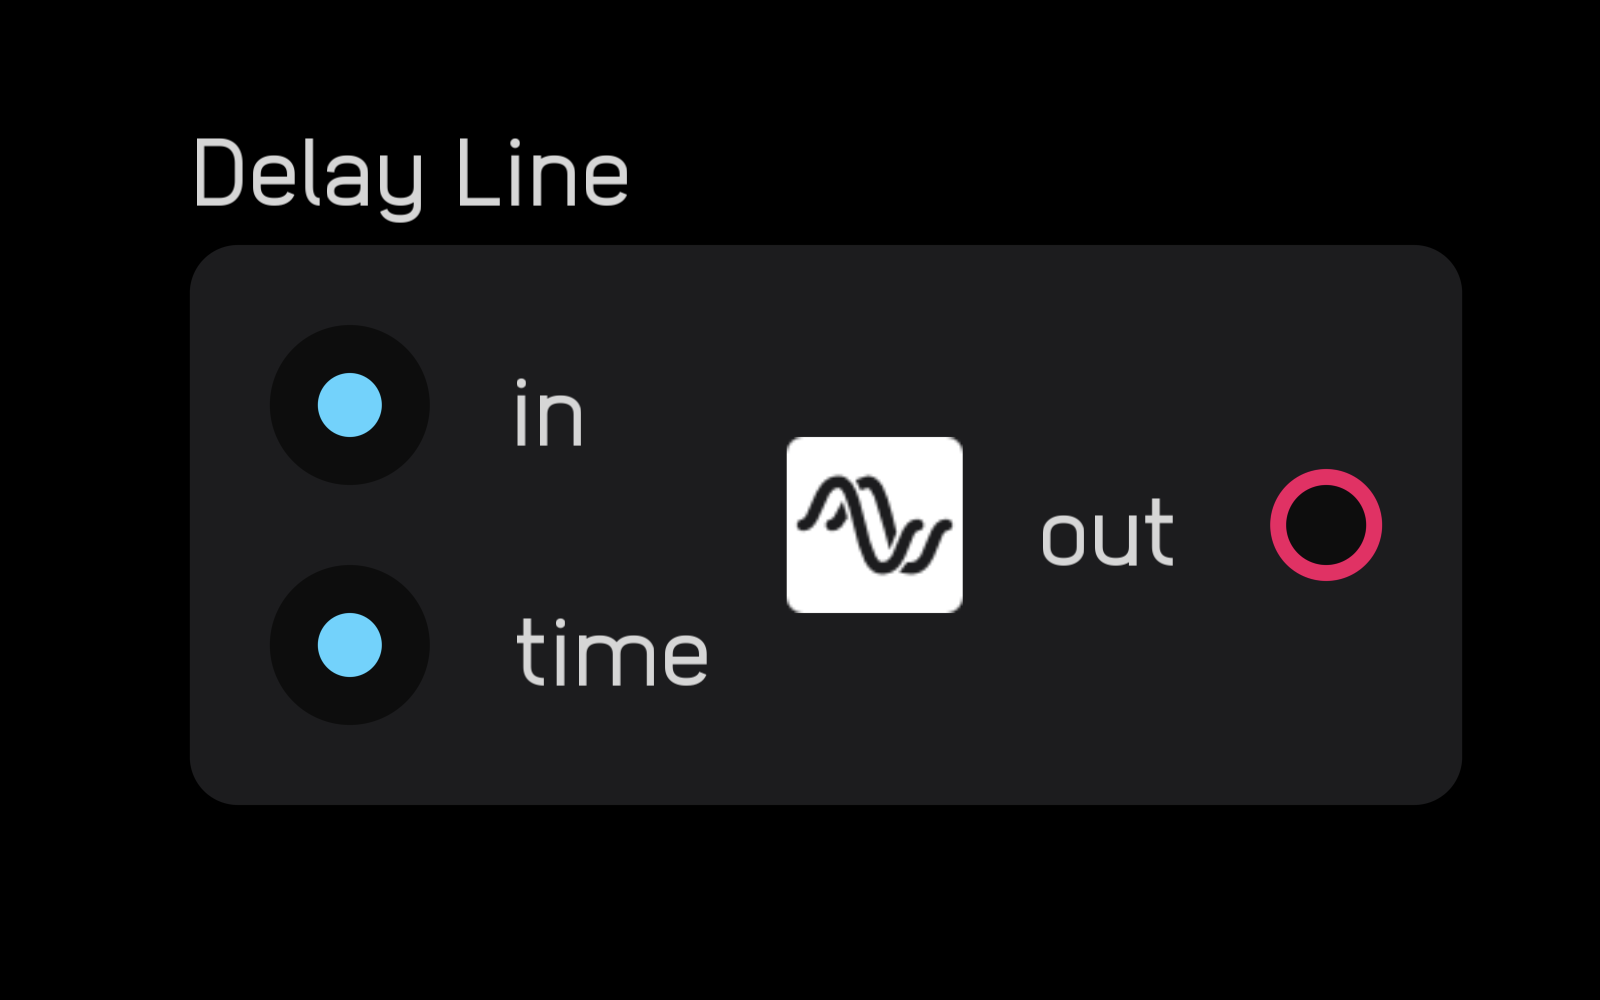
delay line
| input | signal |
|---|---|
in |
any |
time |
seconds |
| out | signal |
|---|---|
out |
any |
| exposable | ❌ |
|---|---|
description
The delay line node delays an incoming signal by a set number of seconds, determined by the value at the time input.
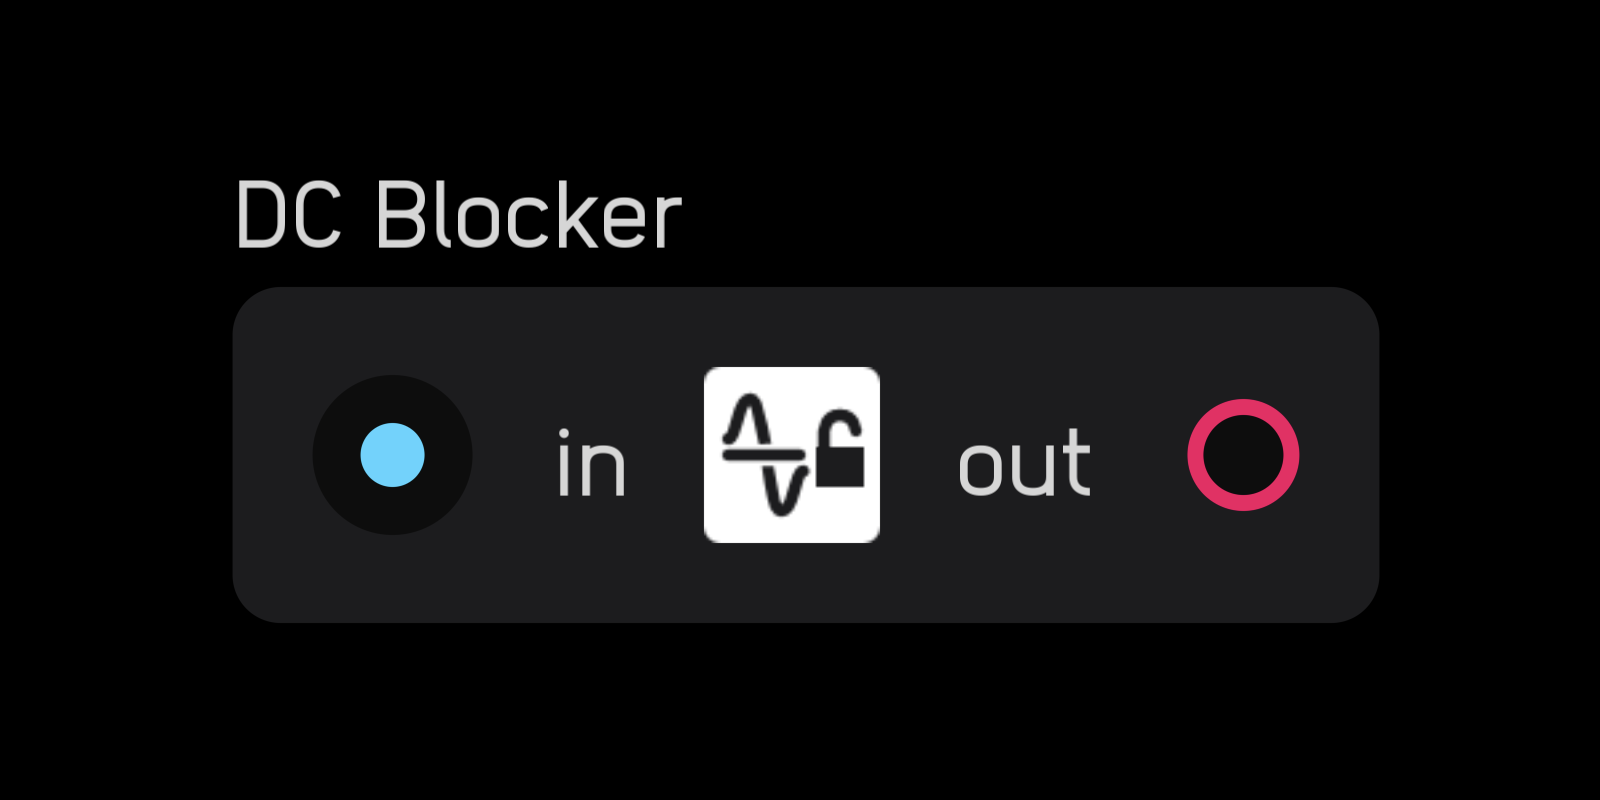
dc blocker
| input | signal |
|---|---|
in |
audio |
| out | signal |
|---|---|
out |
audio |
| exposable | ❌ |
|---|---|
description
The dc blocker node removes any DC offset from an audio signal.
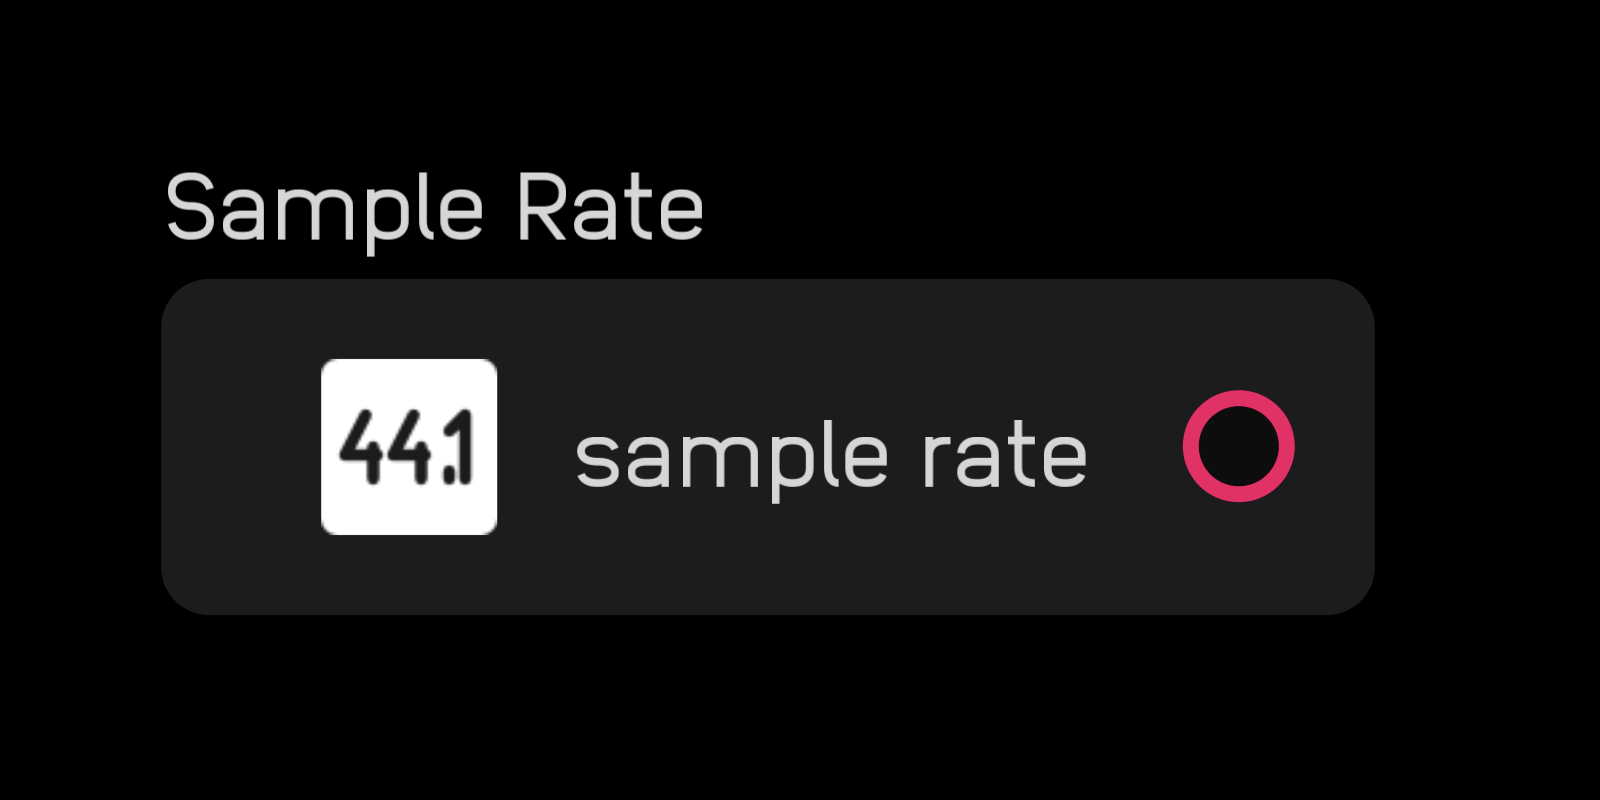
sample rate
| out | signal |
|---|---|
sample rate |
Hz |
| exposable | ❌ |
|---|---|
description
The sample rate node outputs the current sample rate in Hz.
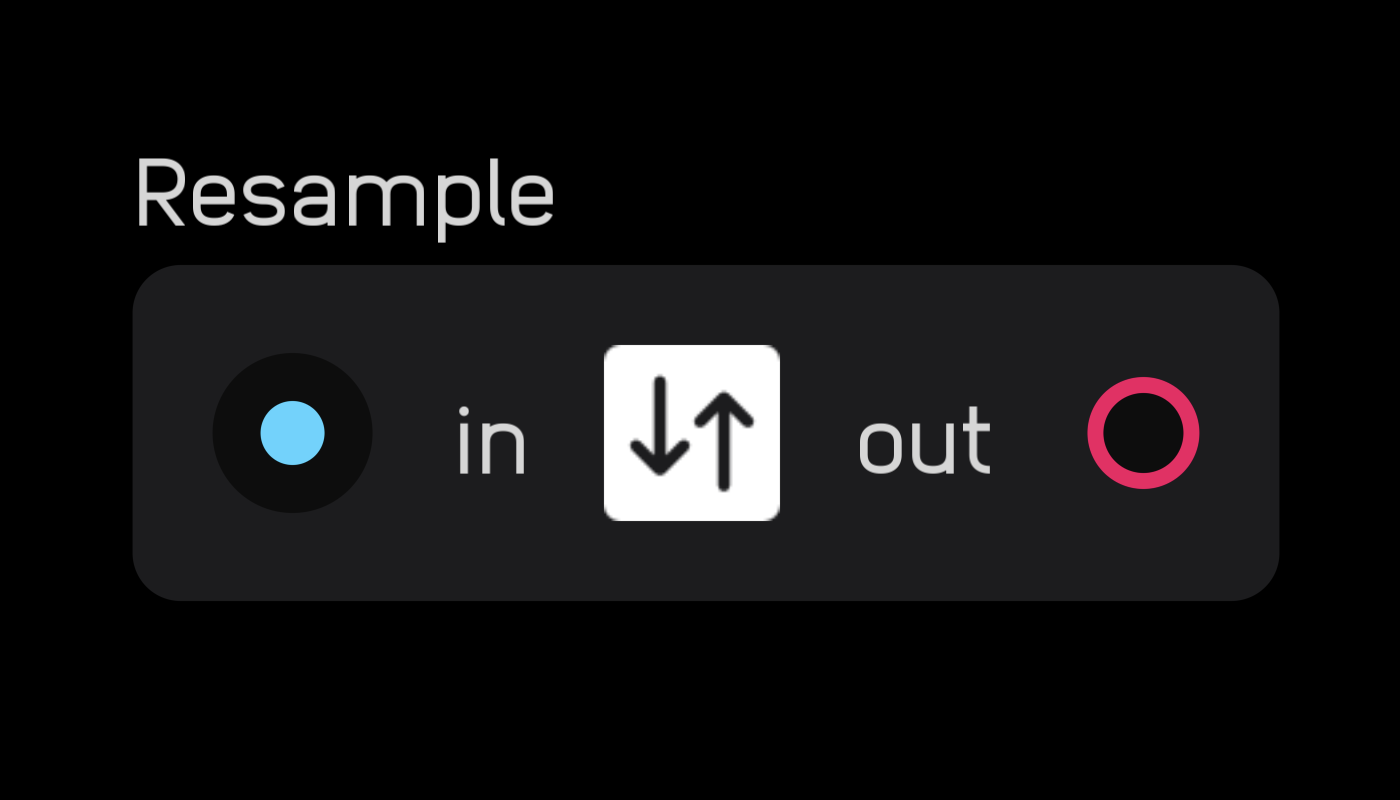
resample
| in | signal |
|---|---|
in |
any |
| out | signal |
|---|---|
out |
any |
| exposable | ❌ |
|---|---|
description
The resample node lets you run a portion of a patch at a higher sample rate, also known as supersampling.
In the inspector panel you can choose from different multiples of the base sample rate from 1x to 16x. Higher sample rates use more CPU time.
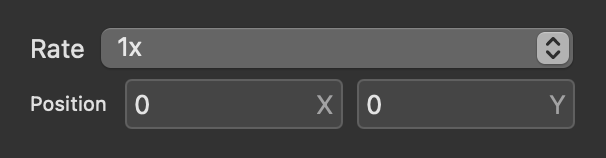
For example, given a base sample rate of 44.1kHz, 4x sample rate would be 176.4kHz.
To properly use the resample node, you have to have two resample nodes in your patch, one to mark where you want to begin supersampling and one to mark where you want to downsample back to the original sample rate, as well as a pre-downsampling low-pass filter with a cutoff set to half the base sample rate.
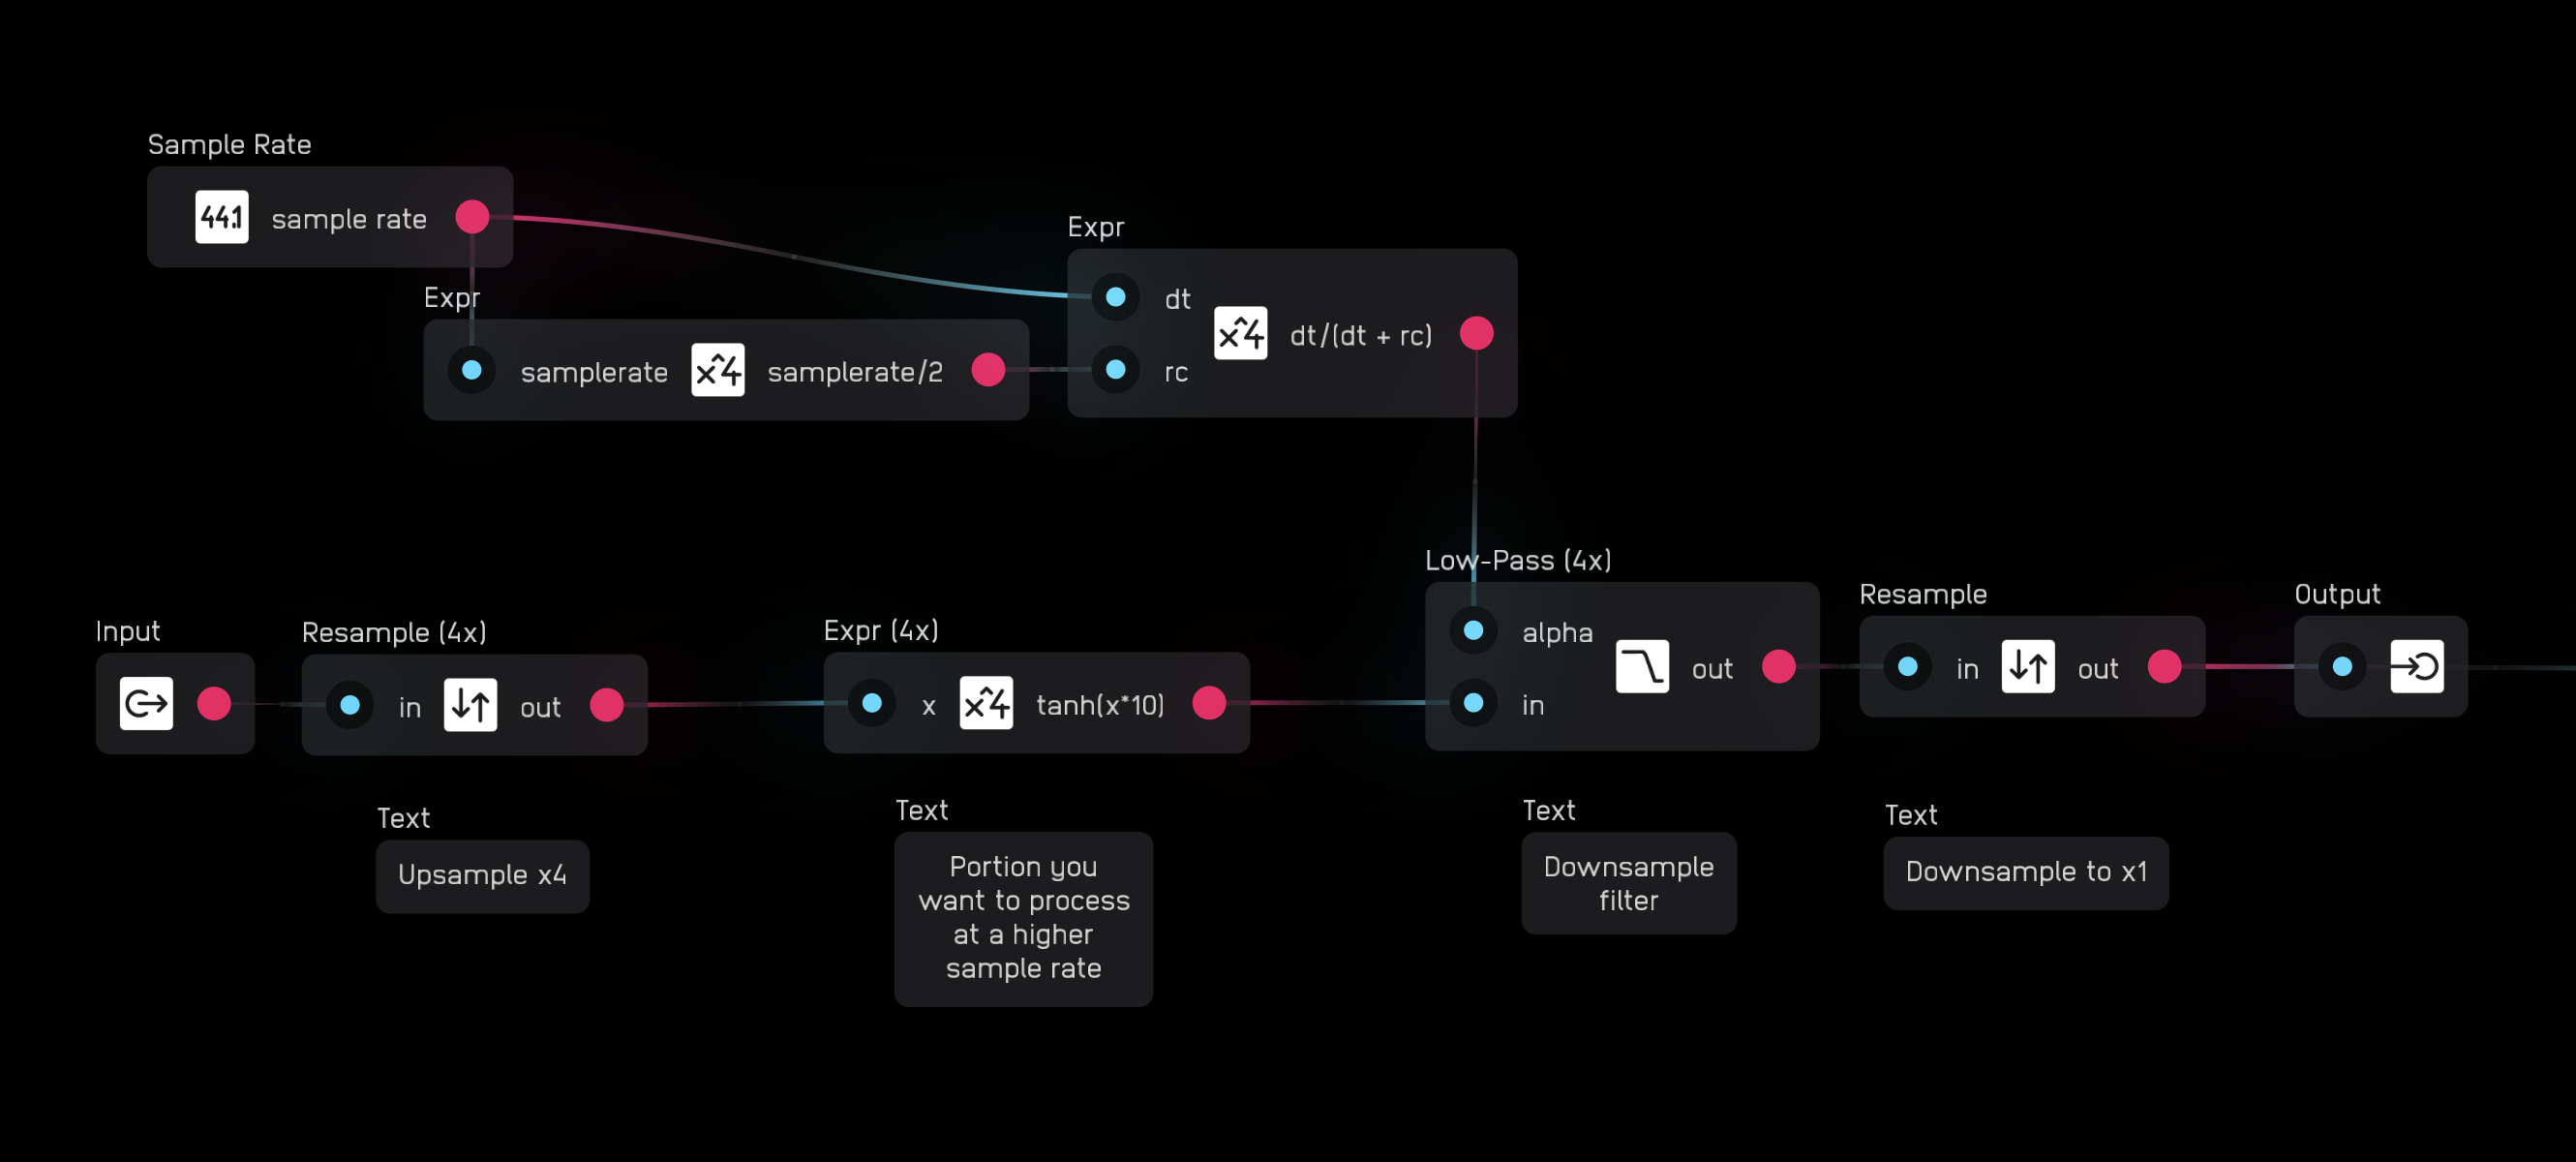
Nodes that are super-sampled have a multiple in parentheses next to their titles, like Resample (4x).
memory
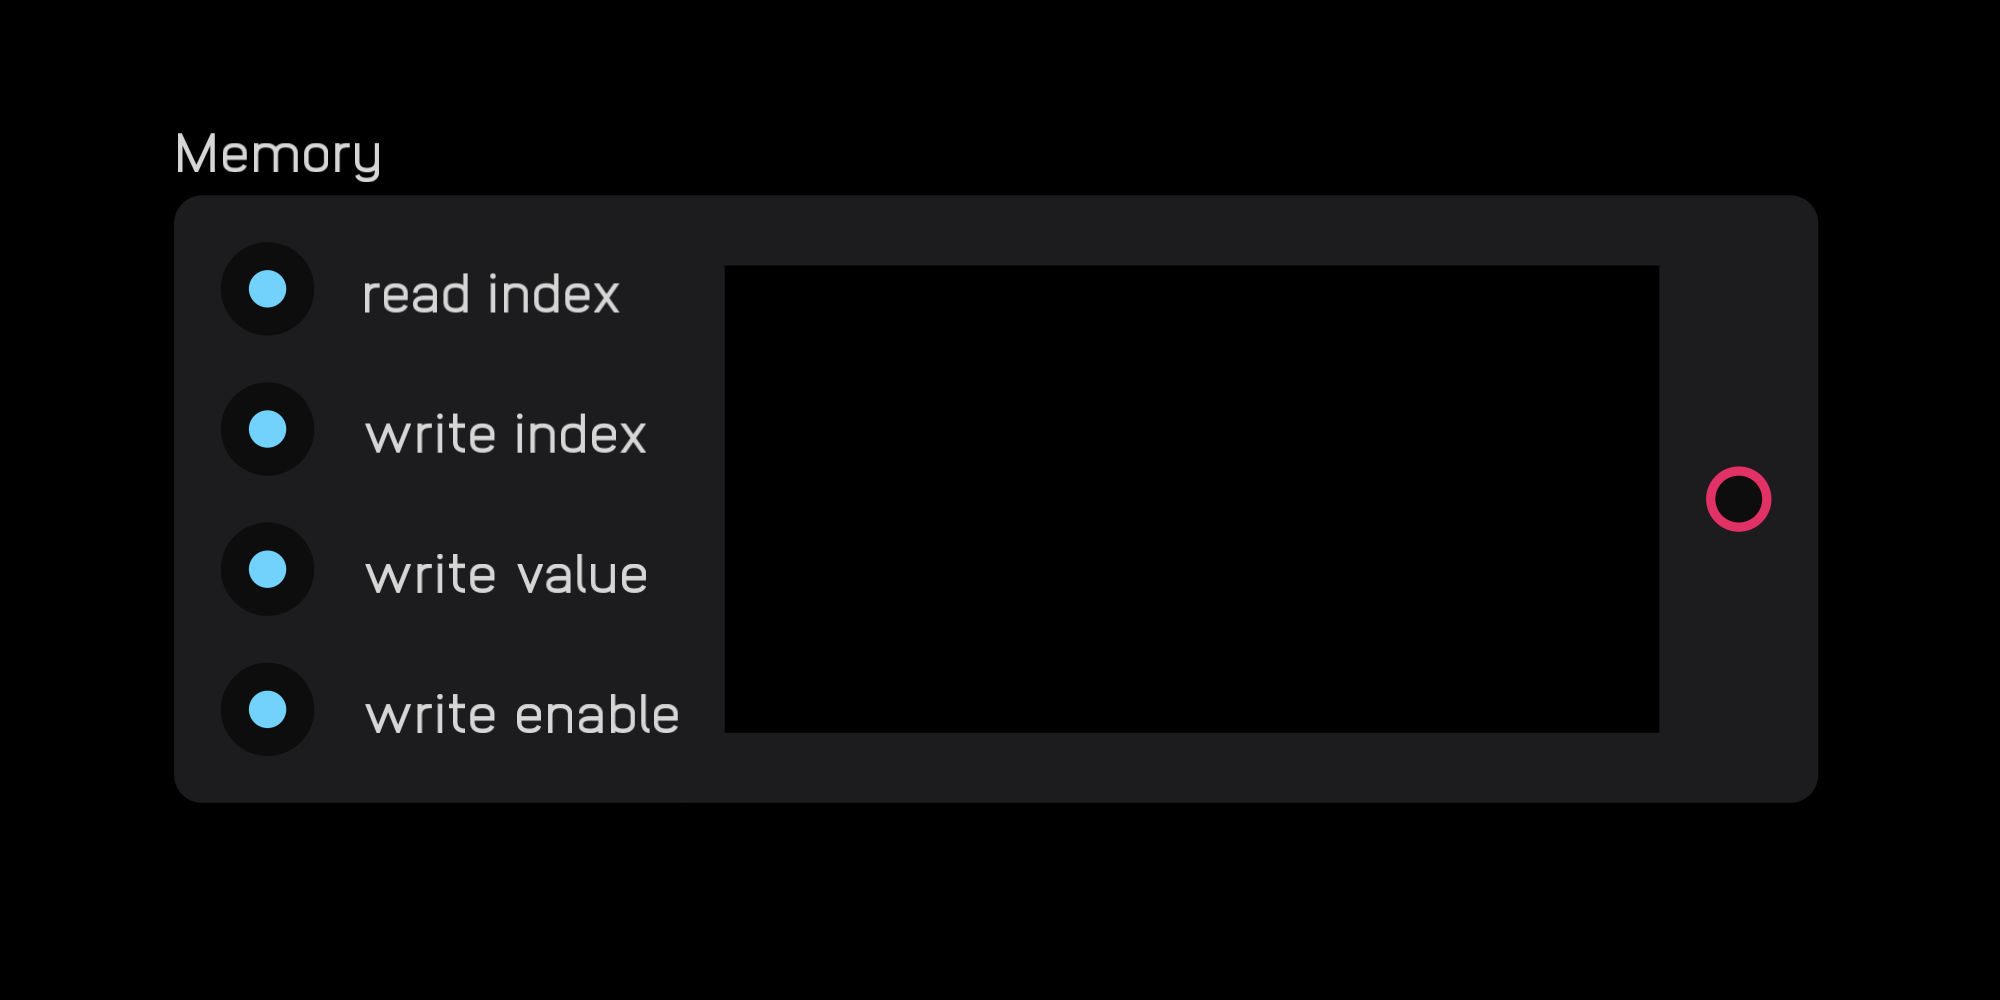
| in | signal |
|---|---|
read index |
any (positive) |
write index |
any (positive) |
write value |
any |
write enable |
gate |
| out | signal |
|---|---|
out |
any |
| exposable | ❌ |
|---|---|
description
The memory node can read, write, and store audio and control signals. Information is stored in the memory node as a series of samples.
The read index is the sample number currently outputted, indexed from 0.
The write index is the sample number currently selected to be (over)written, indexed from 0.
The write value is the value of the sample to be written.
The write enable input will, if held high, write the write value to the write index.
Reading and writing to the memory node can happen at different index values at the same time.
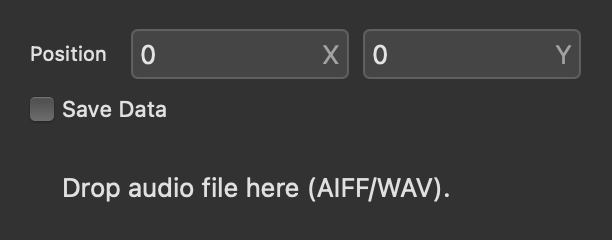
You can also import audio to the memory node. On Mac, you do this by dragging an .AIFF or .WAV file from a Finder window into the space marked Drop audio file here. There is also a check box labeled Save Data that, when checked, will save the contents of the memory node in between patch loads.
dsp
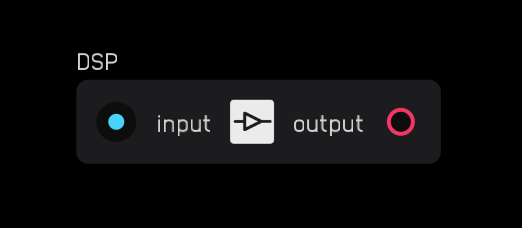
| exposable | ❌ |
|---|---|
description
The dsp node is an allows you to write code for signal processing using Lua, a simple interpreted programming language.
You can create inputs and outputs using the fields in the inspector panel. Inputs and outputs are global arrays of samples. You must define a function called process which takes a sample count to process and operates on the global arrays. Define constants and any storage you need between calls to process above the process function. A global variable, sampleRate, is set to the current sample rate and is available outside the process function. Another global variable, storage is an array of samples that is saved in the patch, indended to save audio, sequencer data, etc.
synth
description
The synth nodes are low-level building blocks specific to audio synthesis.
- The
oscnode outputs one of 4 classic anti-aliased waveforms. - The
phasornode outputs an un-aliased phasor signal from0 to 2πuseful for creating custom oscillators - The
sample & holdnode can sample an input signal, store it, and hold that value at its output. - The
adsrnode generates an envelope according to an incominggatesignal.
osc
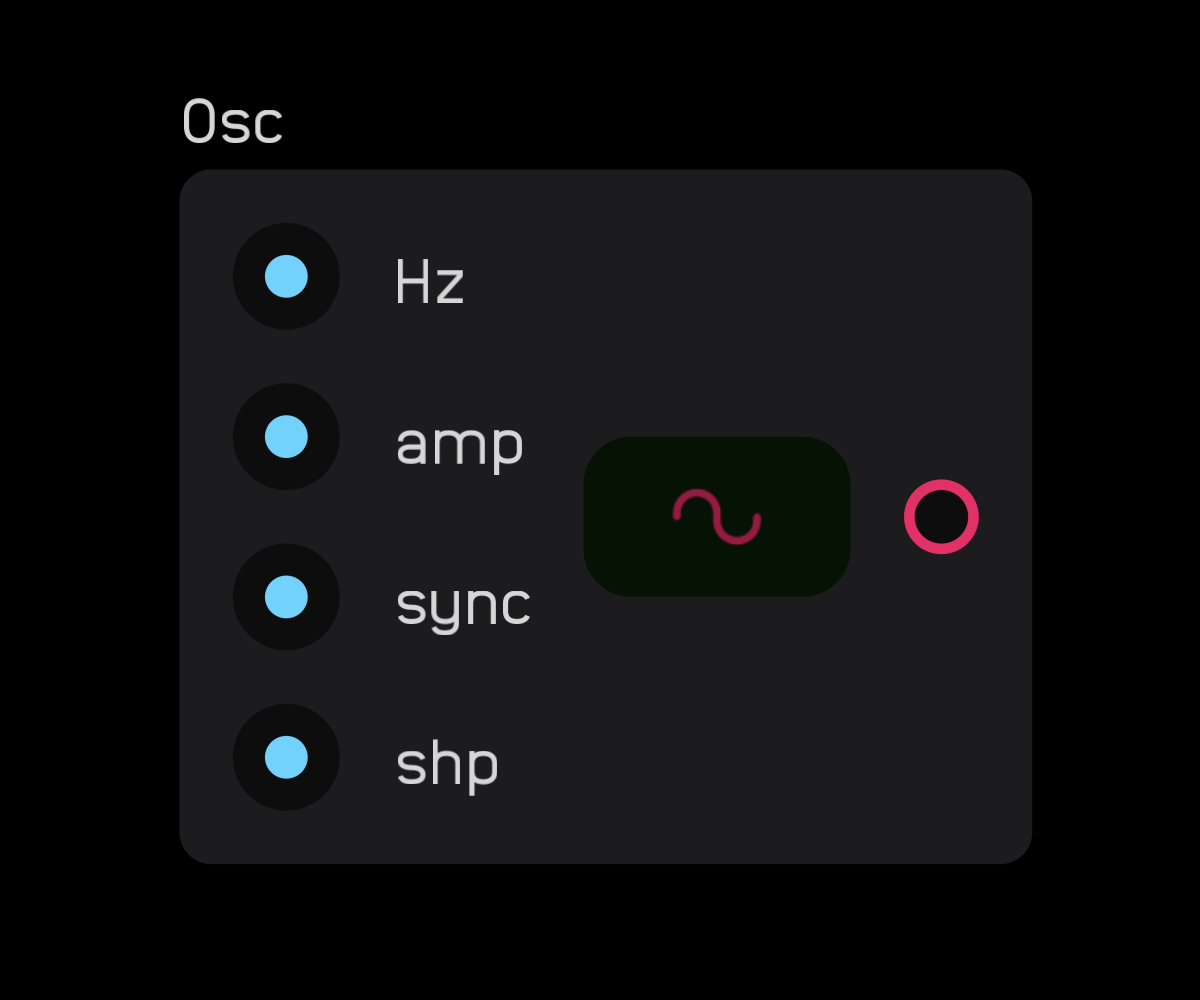
| in | signal |
|---|---|
Hz |
Hz |
amp |
mod |
sync |
gate or audio |
shp |
mod |
| out | signal |
|---|---|
out |
audio |
| control | description |
|---|---|
waveform selector |
selects one of 4 waveforms |
| exposable | ✅ |
|---|---|
description
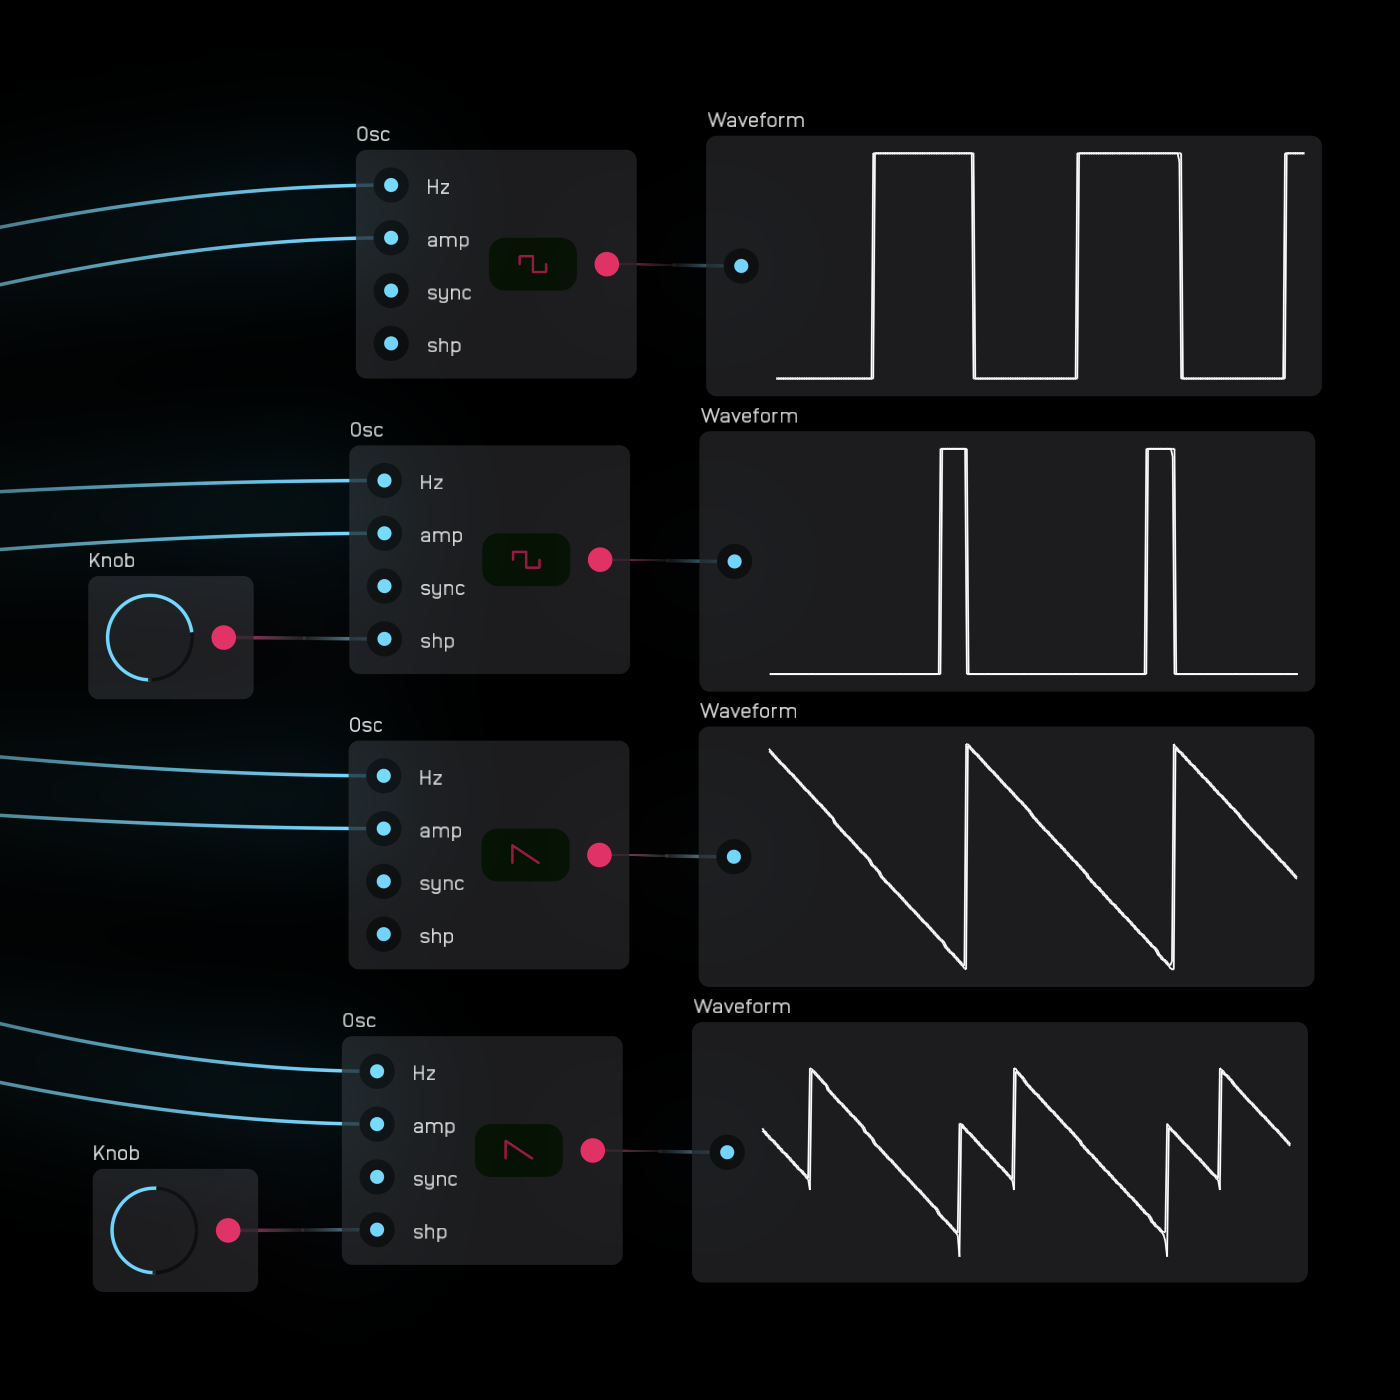
The osc node outputs as audio one of four anti-aliased elemental waveforms, selectable on the panel of the node: sine, square, triangle, and saw.
The osc node is intended as an audio-rate oscillator. This means it is anti-aliased. Using the osc node as an LFO can lead to some unpredictable behavior with overshooting caused by the anti-aliasing.
The Hz input controls the speed of the oscillator from 0 to sampleRate/2 Hz.
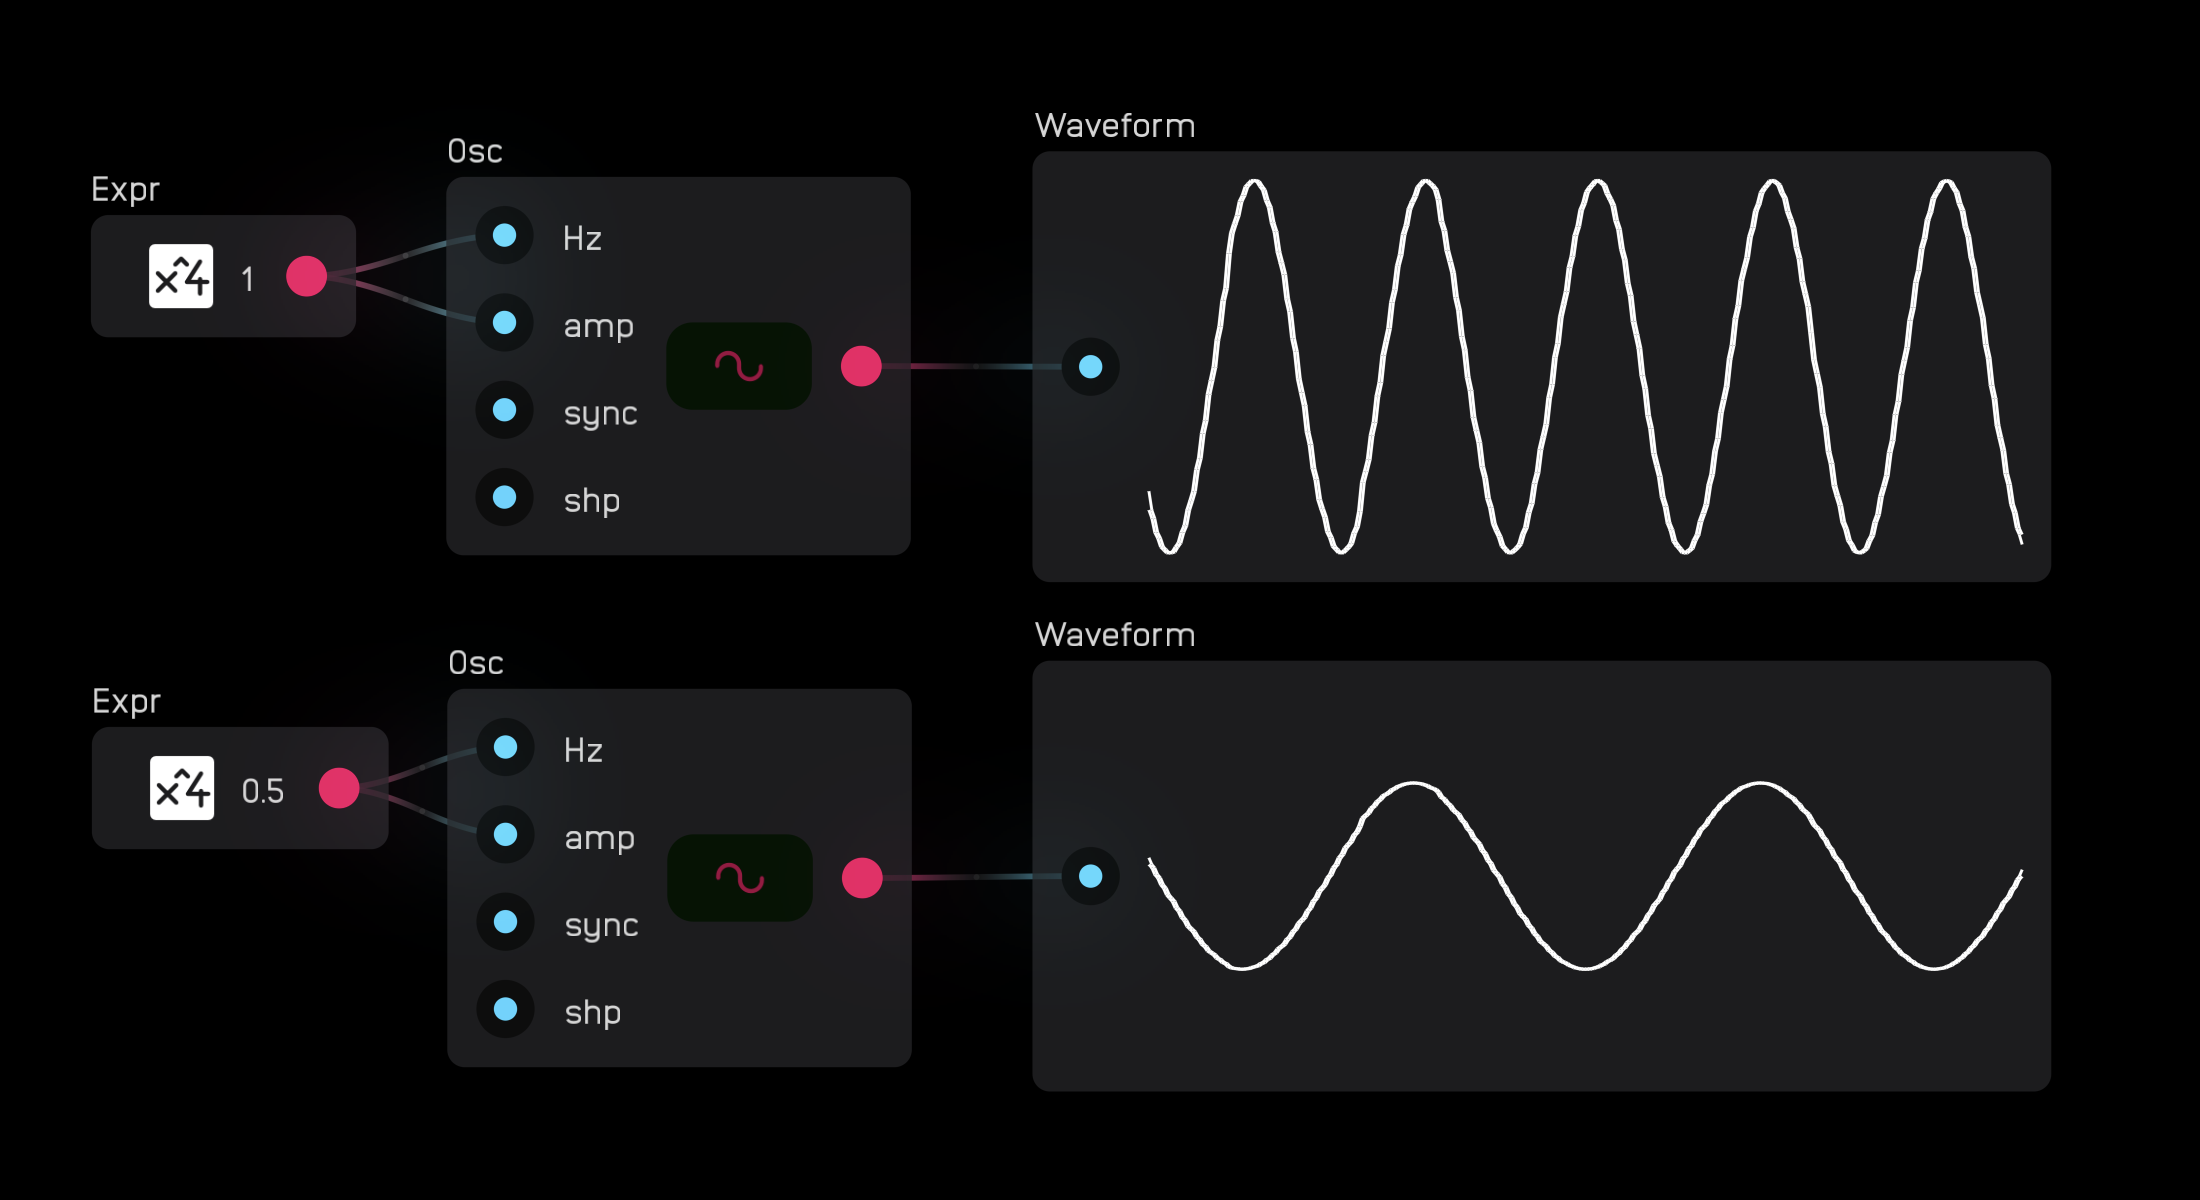
The amp input uses a mod signal to control the amplitude of the wave. For example: An amplitude value of 1 will set the output of the osc node to range between -1 and 1, whereas a value of 0.5 will oscillate between -0.5 and 0.5.
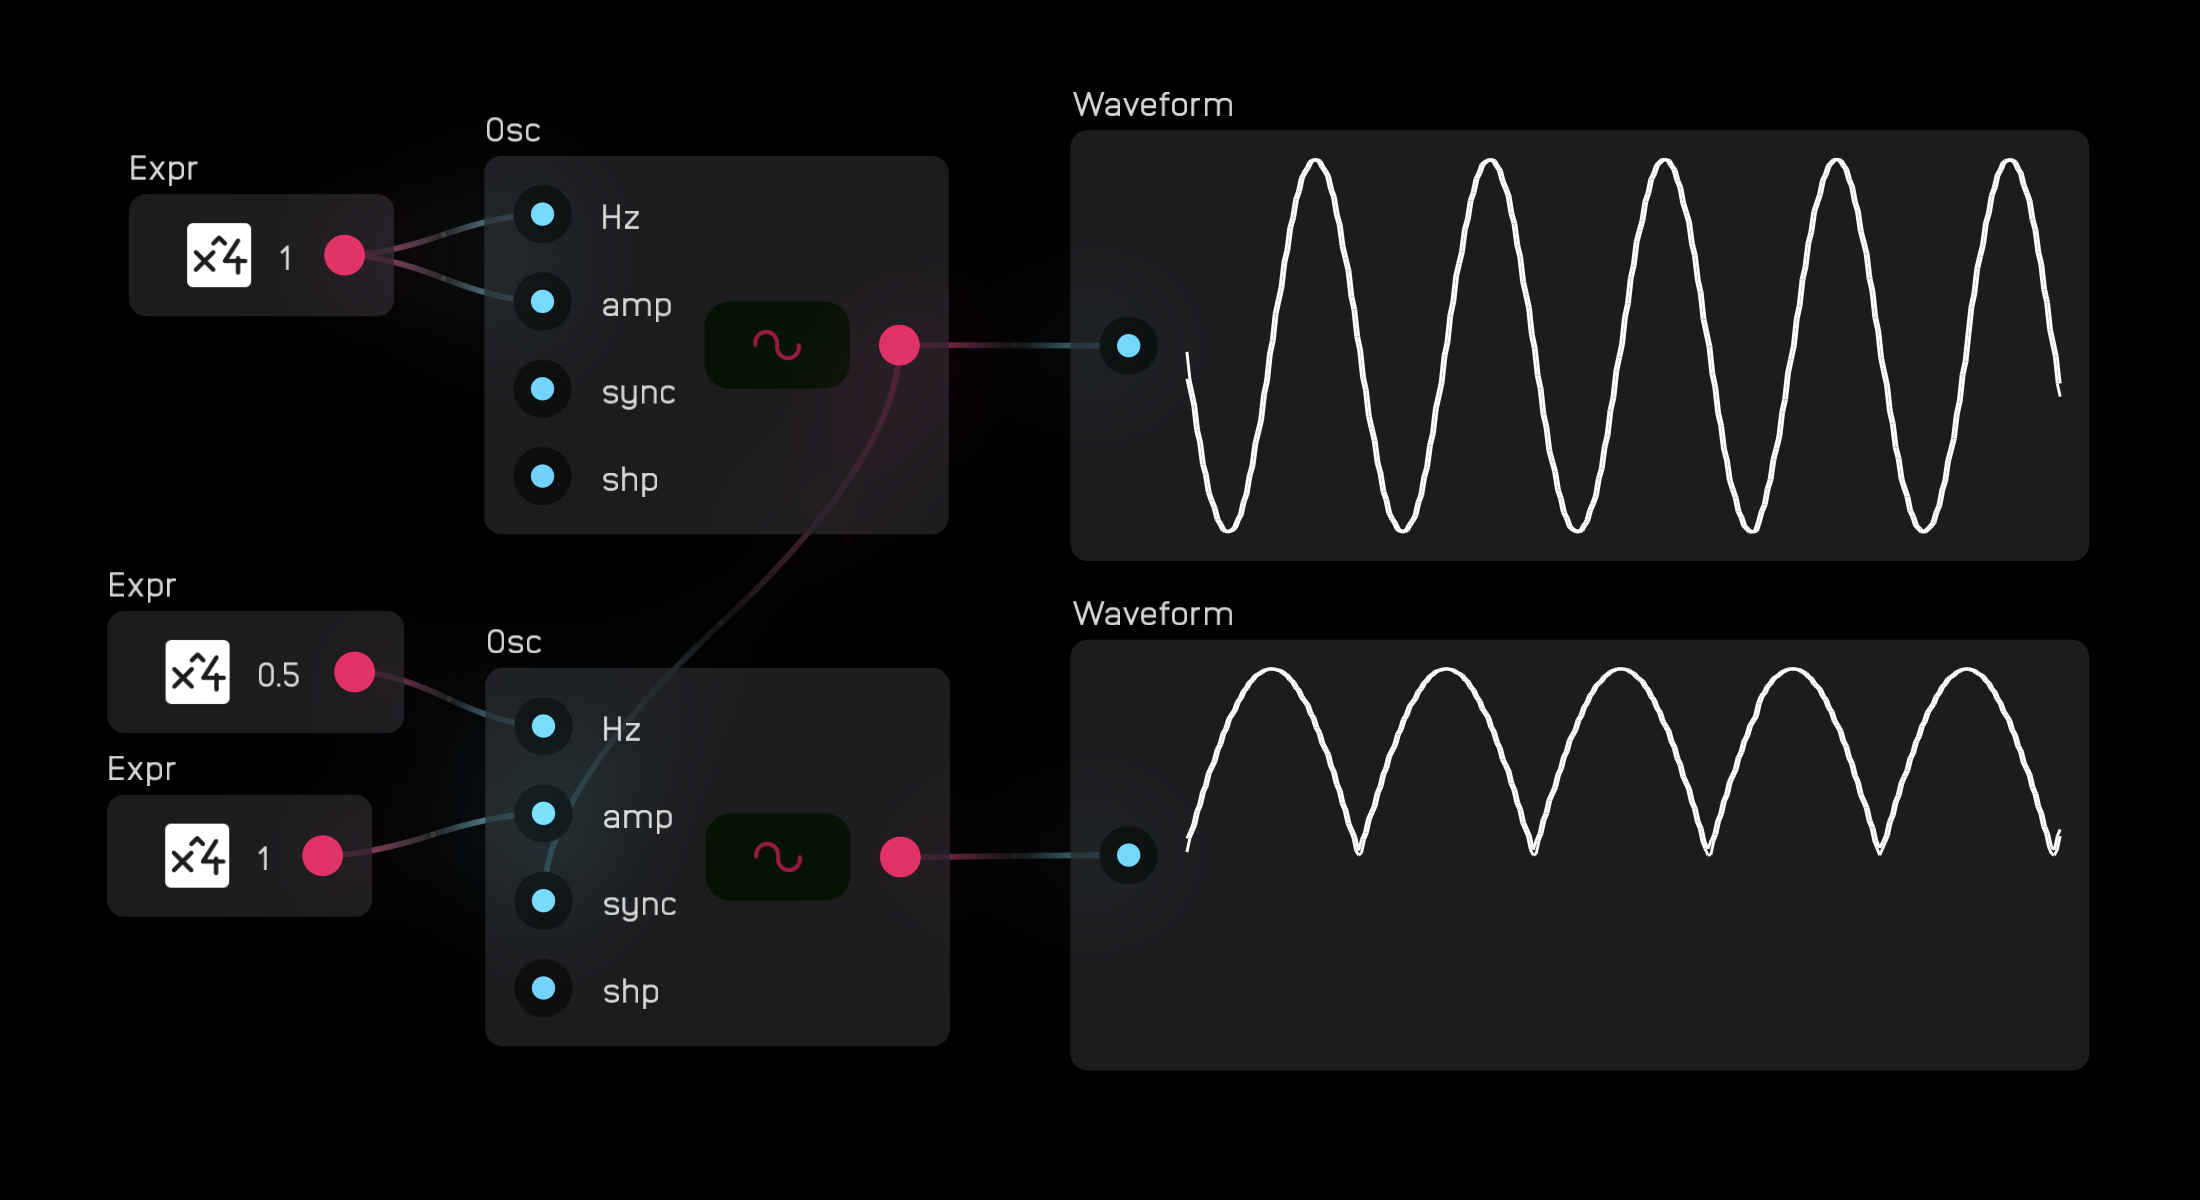
The sync input will restart the waveform on the rising edge of an incoming gate or audio signal. It is a hard sync, meaning it will reset regardless of where it is in its cycle.
The shp input changes the shape of the square and saw waves. For the square wave, shp controls the pulse width from 50% to 100%. For the saw wave, shp will transform the saw wave into a supersaw which, when modulated, simulates the chorusing effect of two detuned saw waves.
The waveform selector is exposable.
phasor
| in | signal |
|---|---|
freq |
Hz or -Hz |
sync |
gate or audio |
| out | signal |
|---|---|
out |
0 to 2π |
| exposable | ❌ |
|---|---|
description
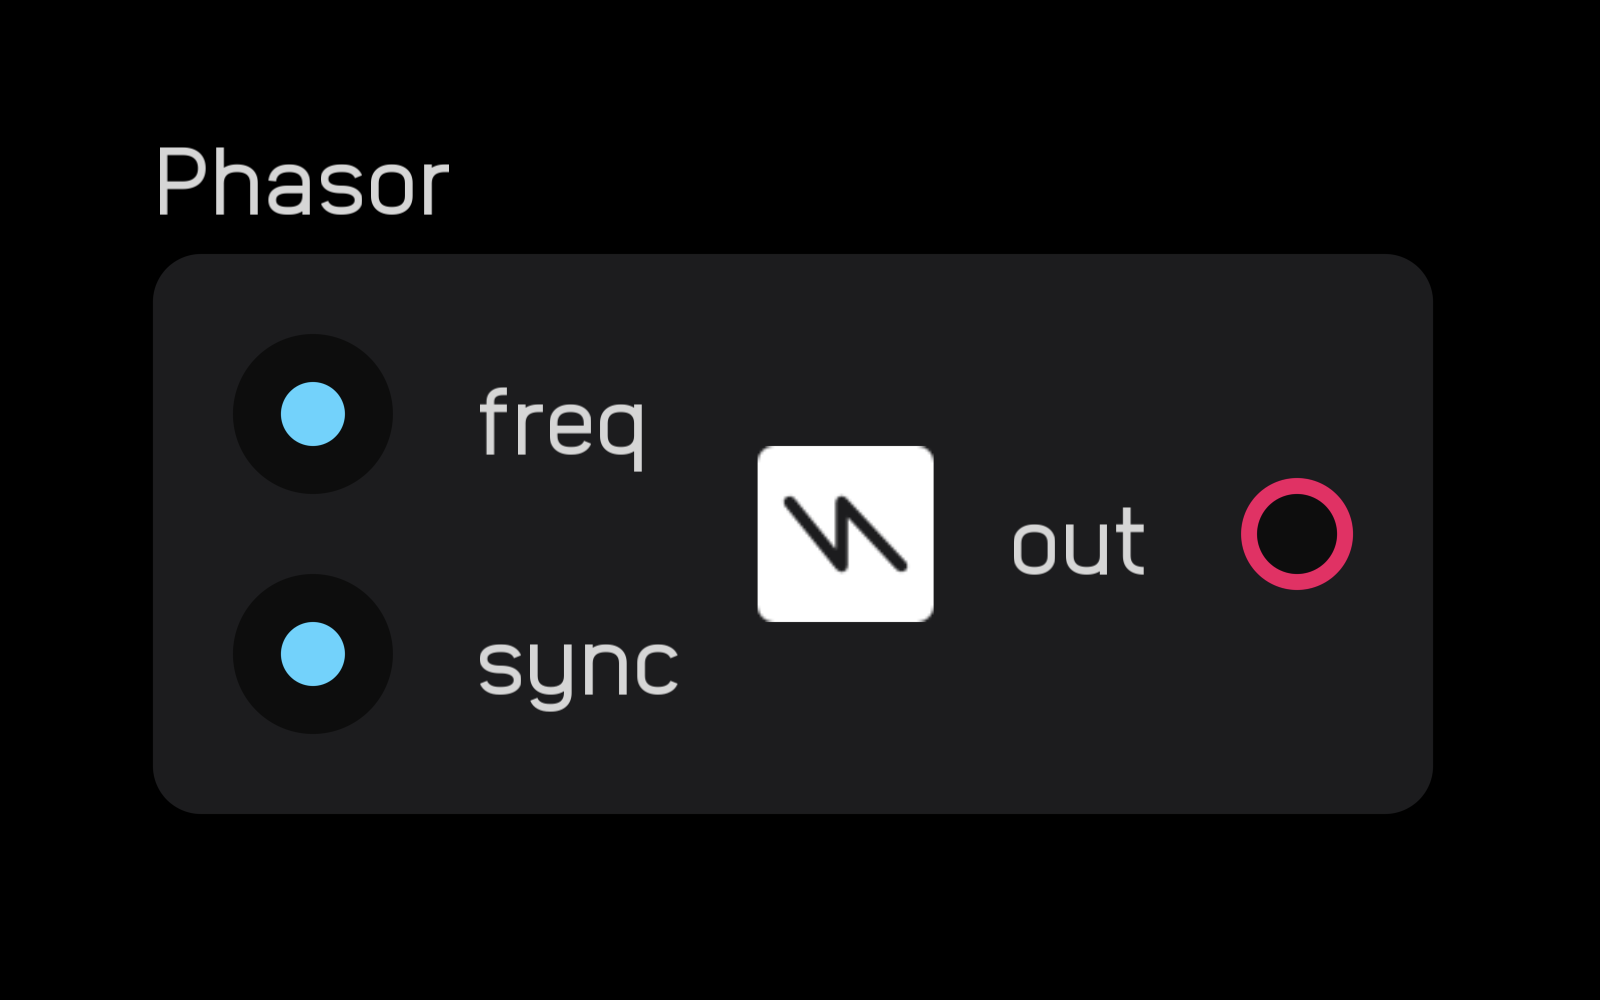
The phasor node outputs a phasor from 0 to 2π with 64-bit internal precision.
The phasor node is not anti-aliased, making it suitable for creating custom LFOs. If you want to create a custom VCO with a phasor node, refer to the resample node section to see how to anti-alias its output. You can use an expr node to shape and scale the output of the phasor node.
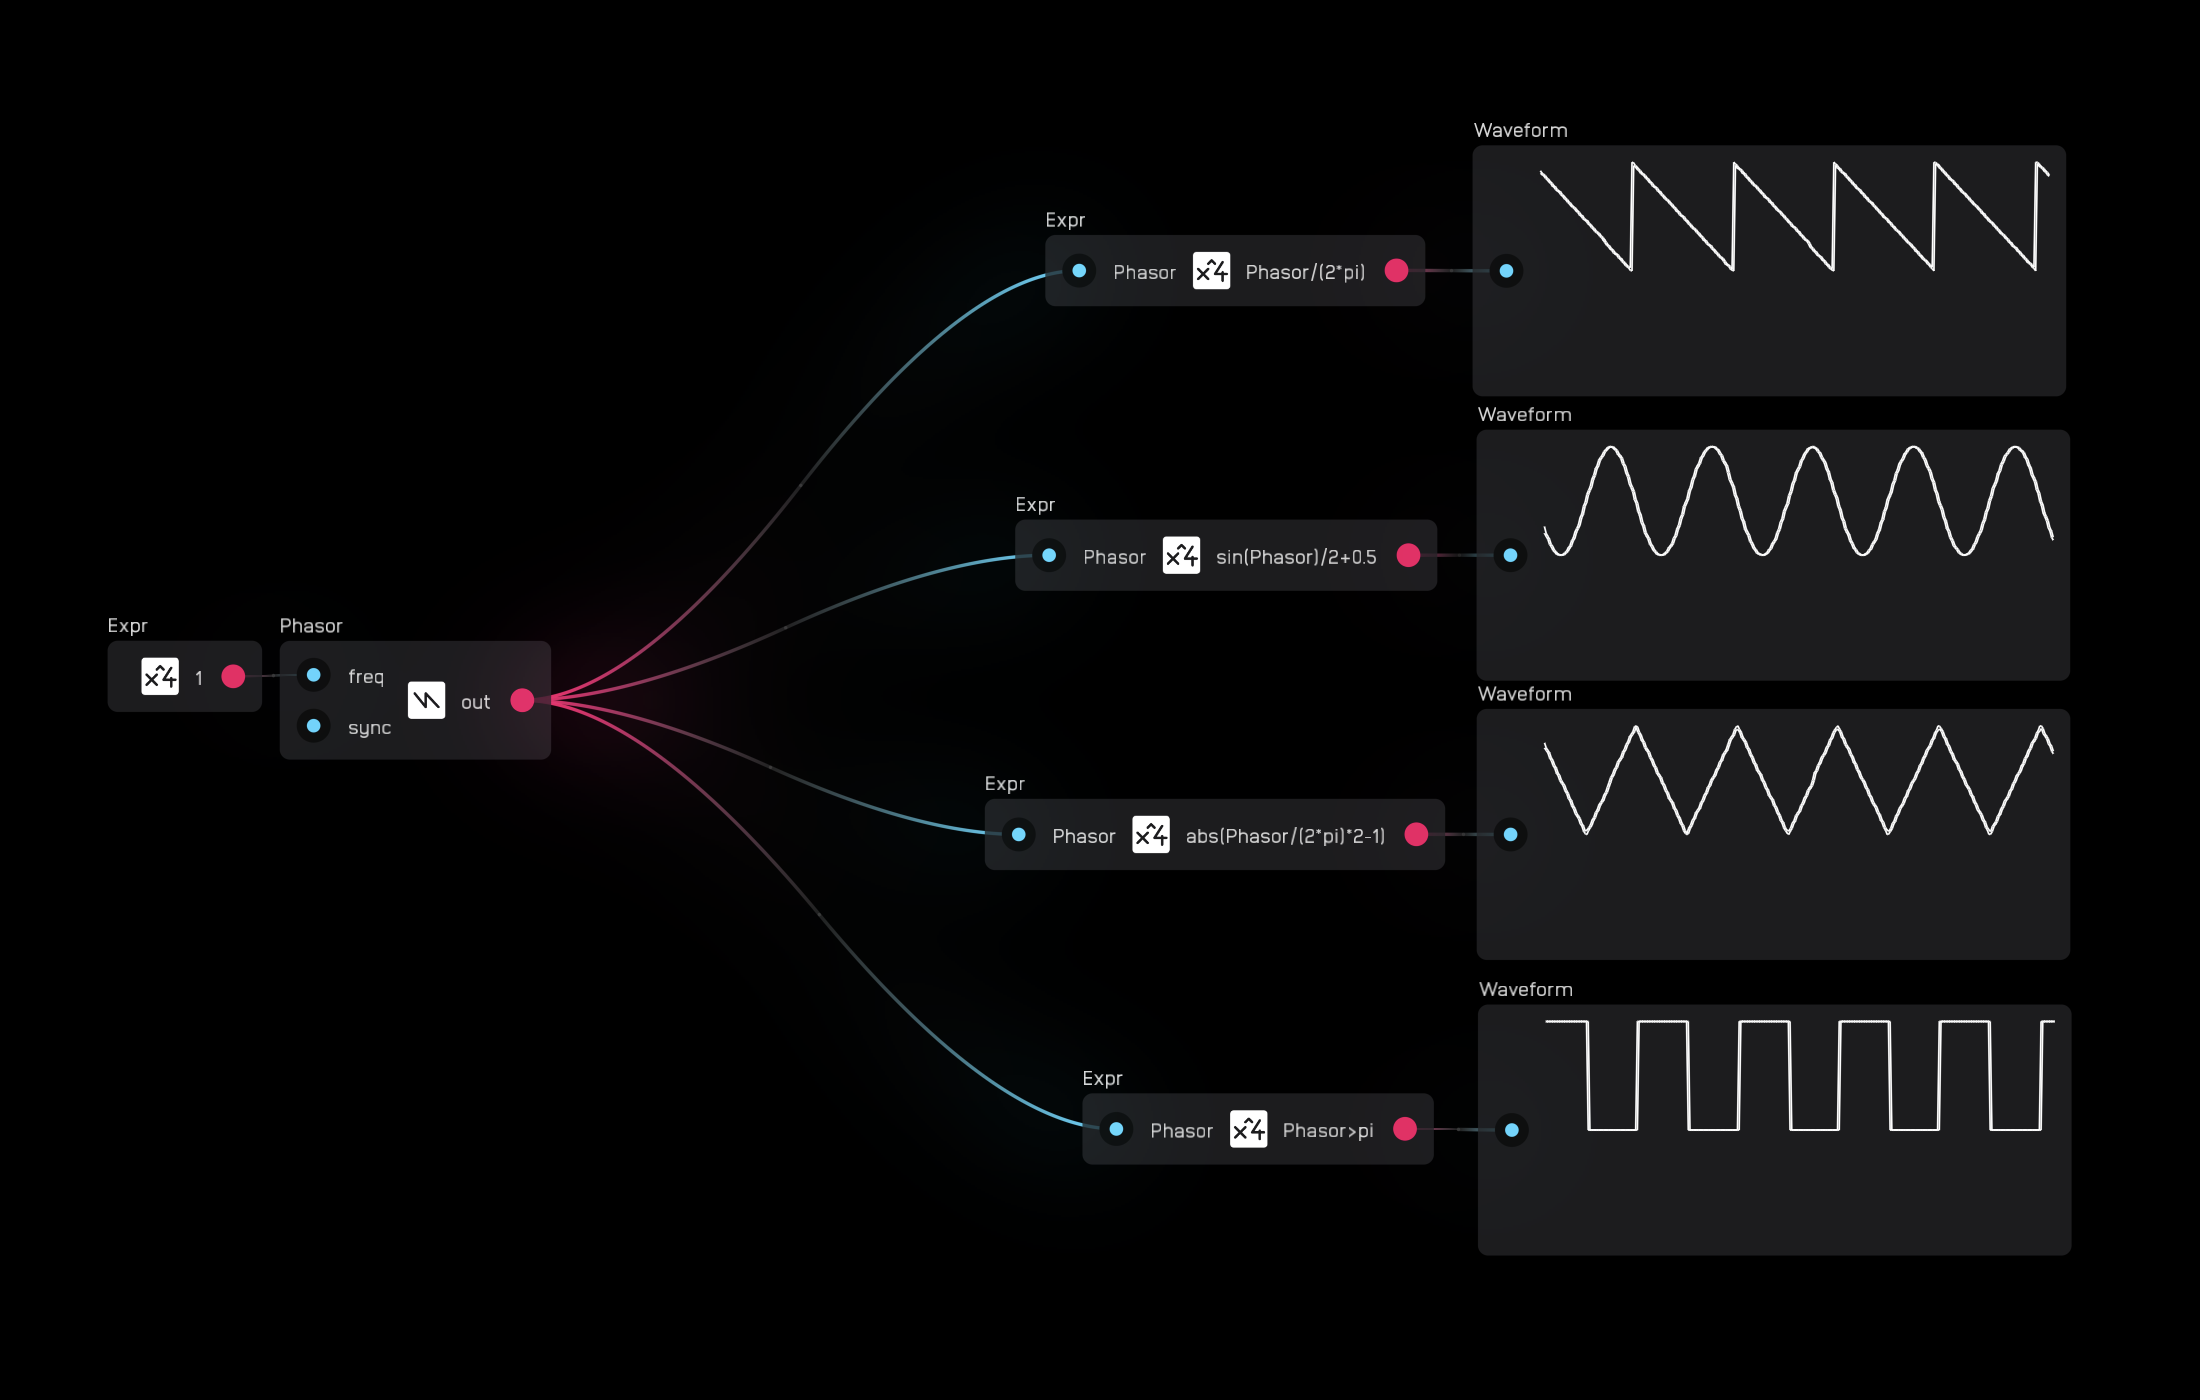
The sync input will reset the phasor on the rising edge of a gate or audio signal.
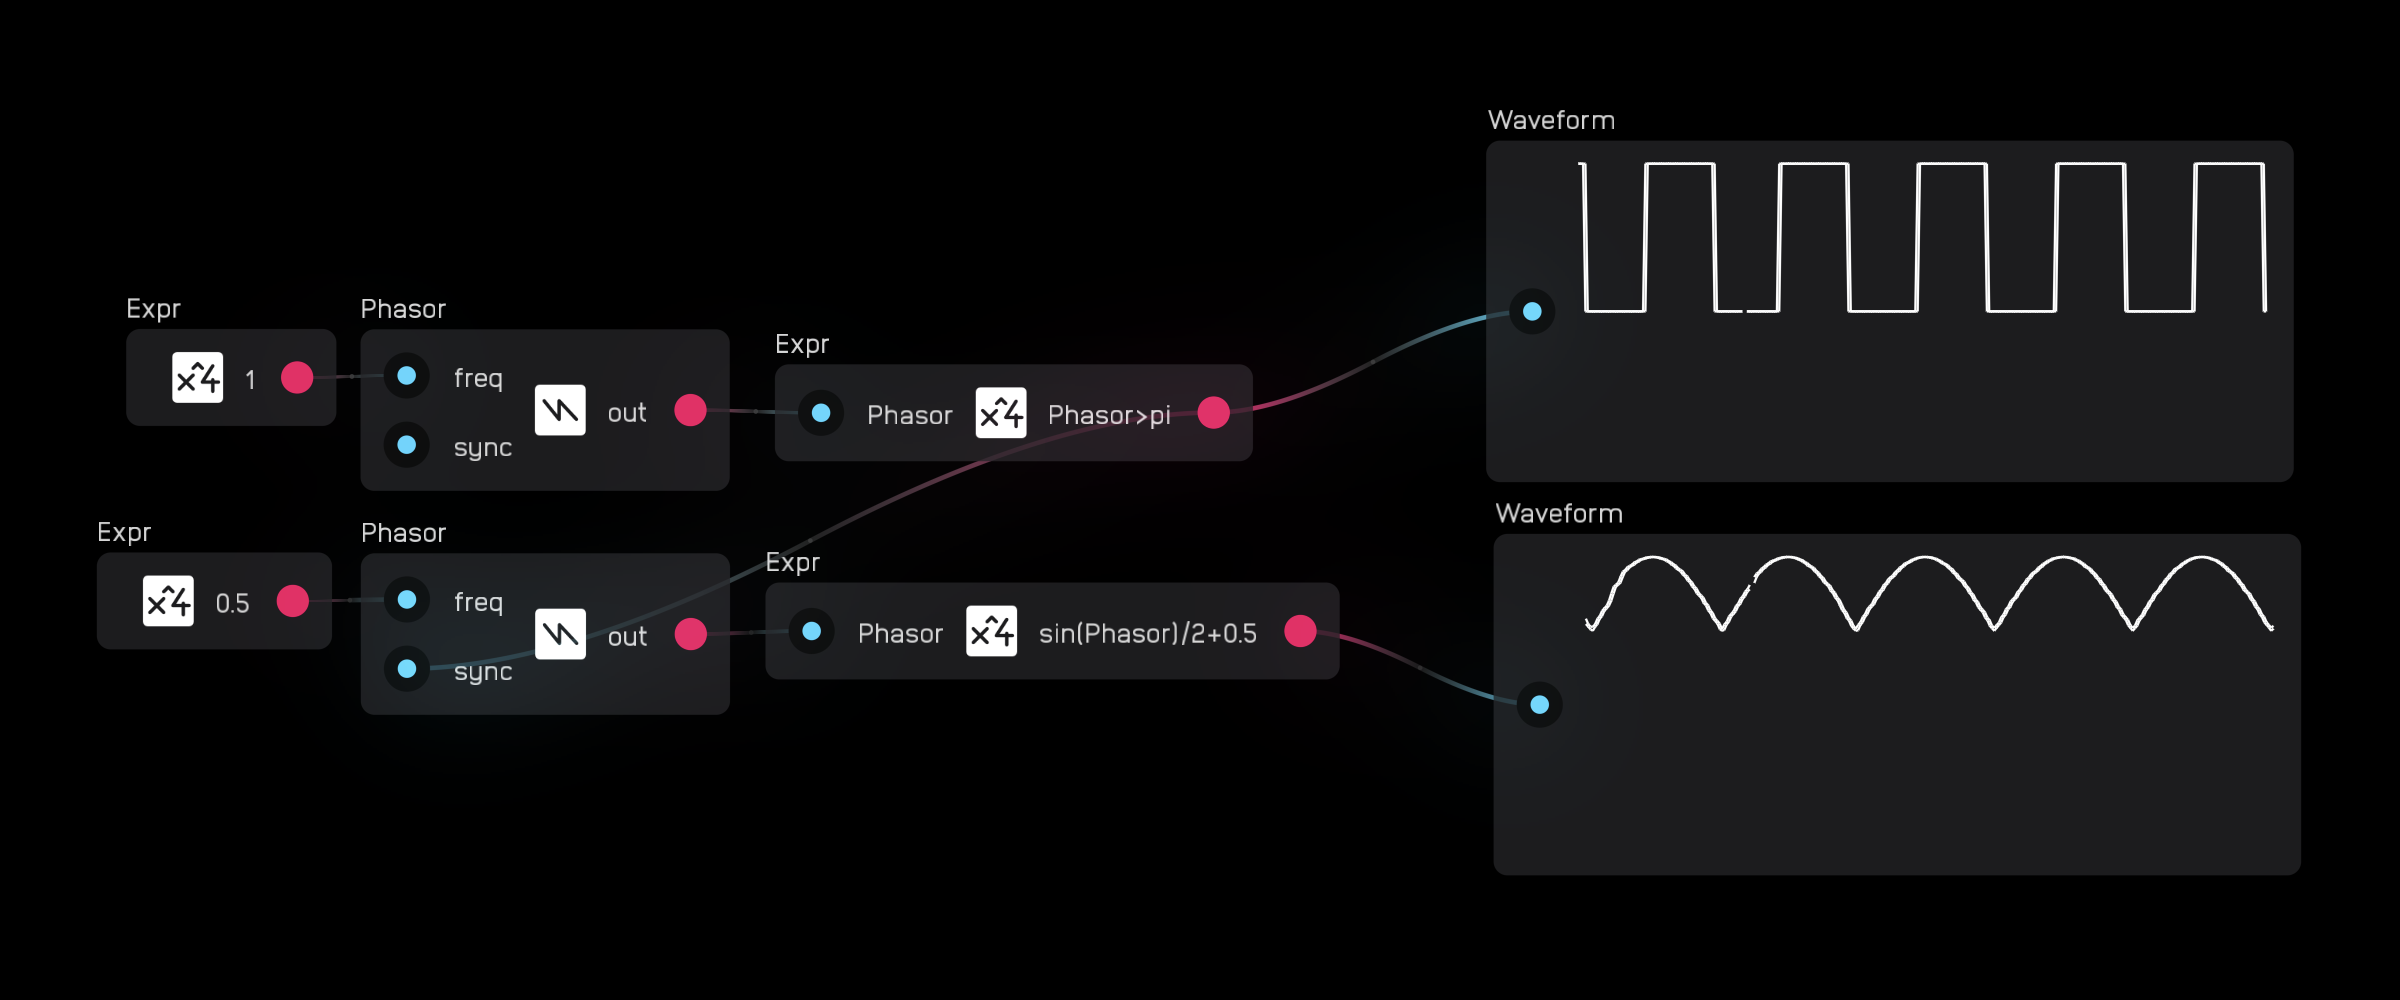
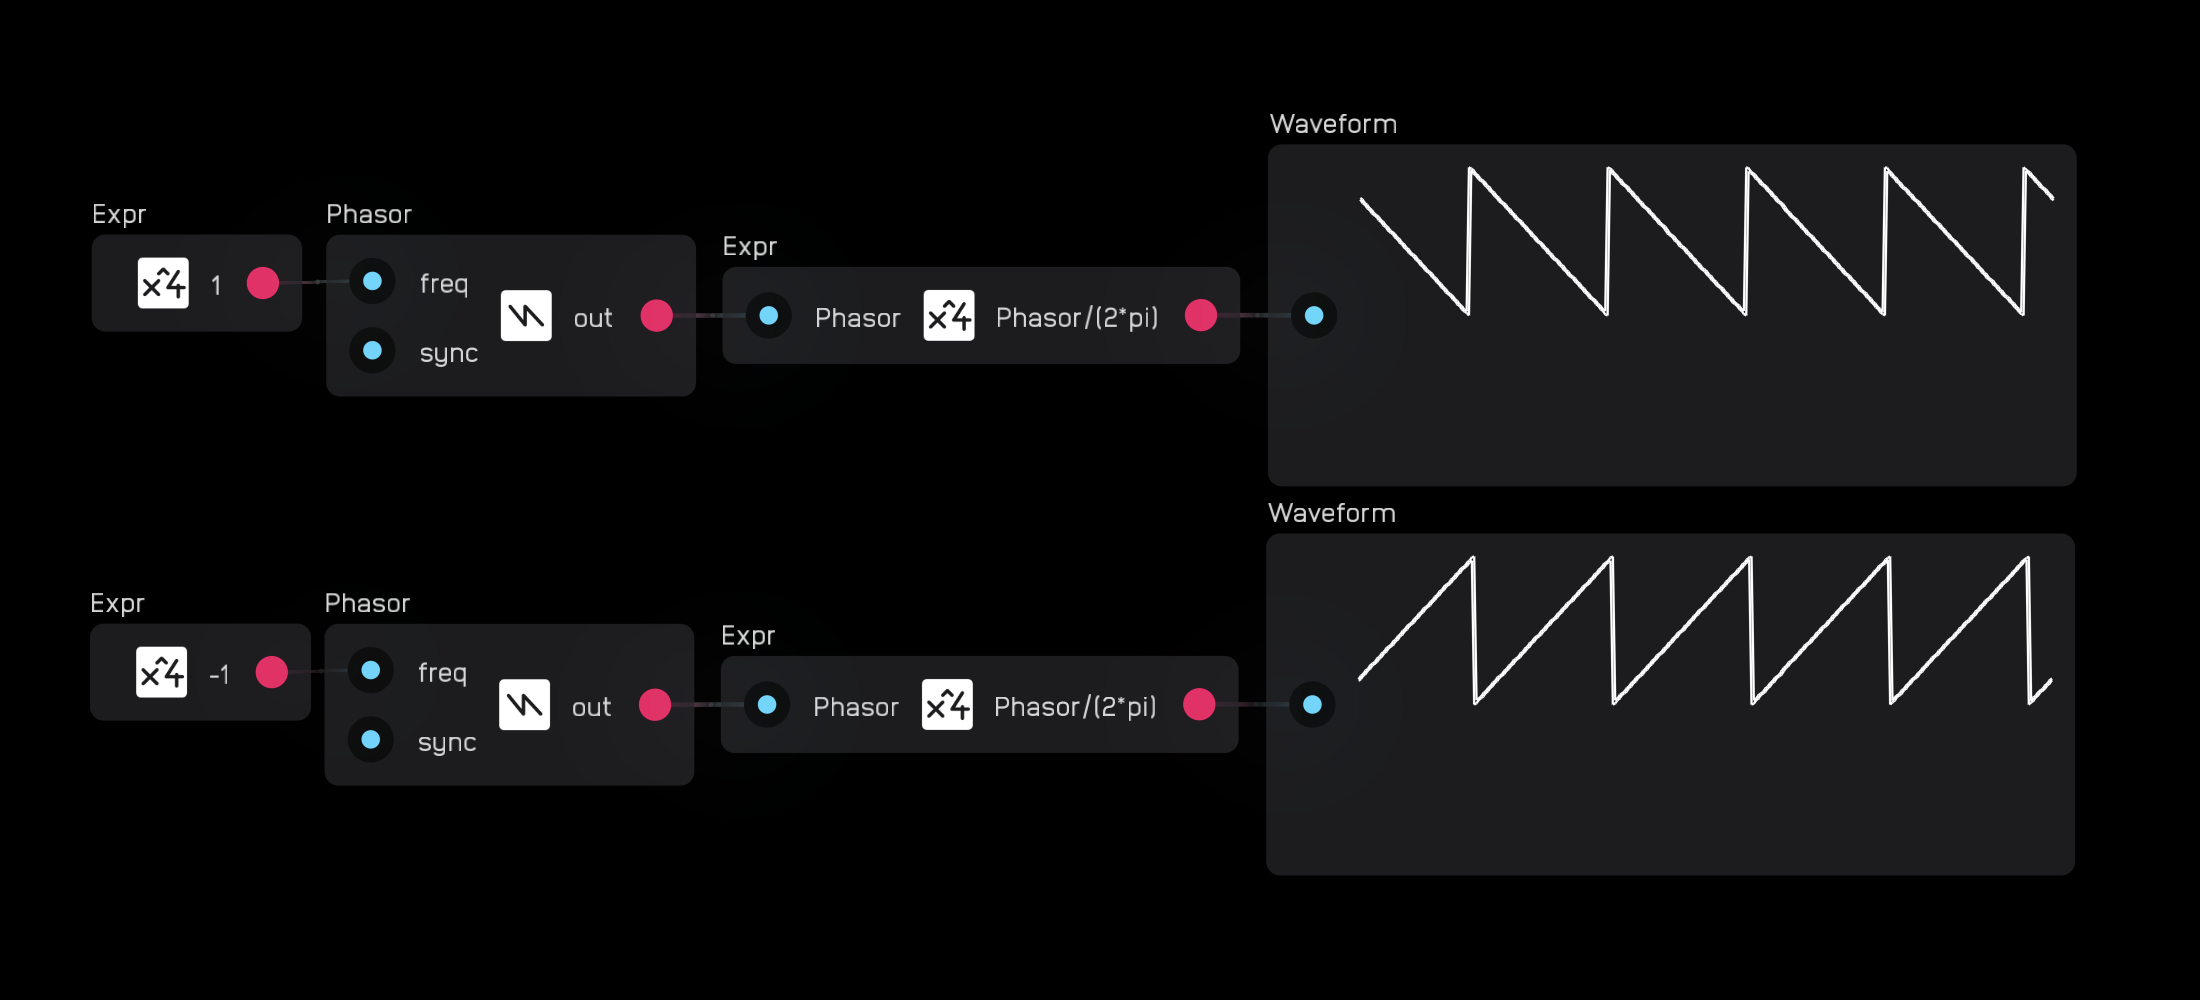
Positive Hz values at the freq input will run the phasor from 0 to 2π, while negative Hz values will reverse the direction, running from 2π to 0.
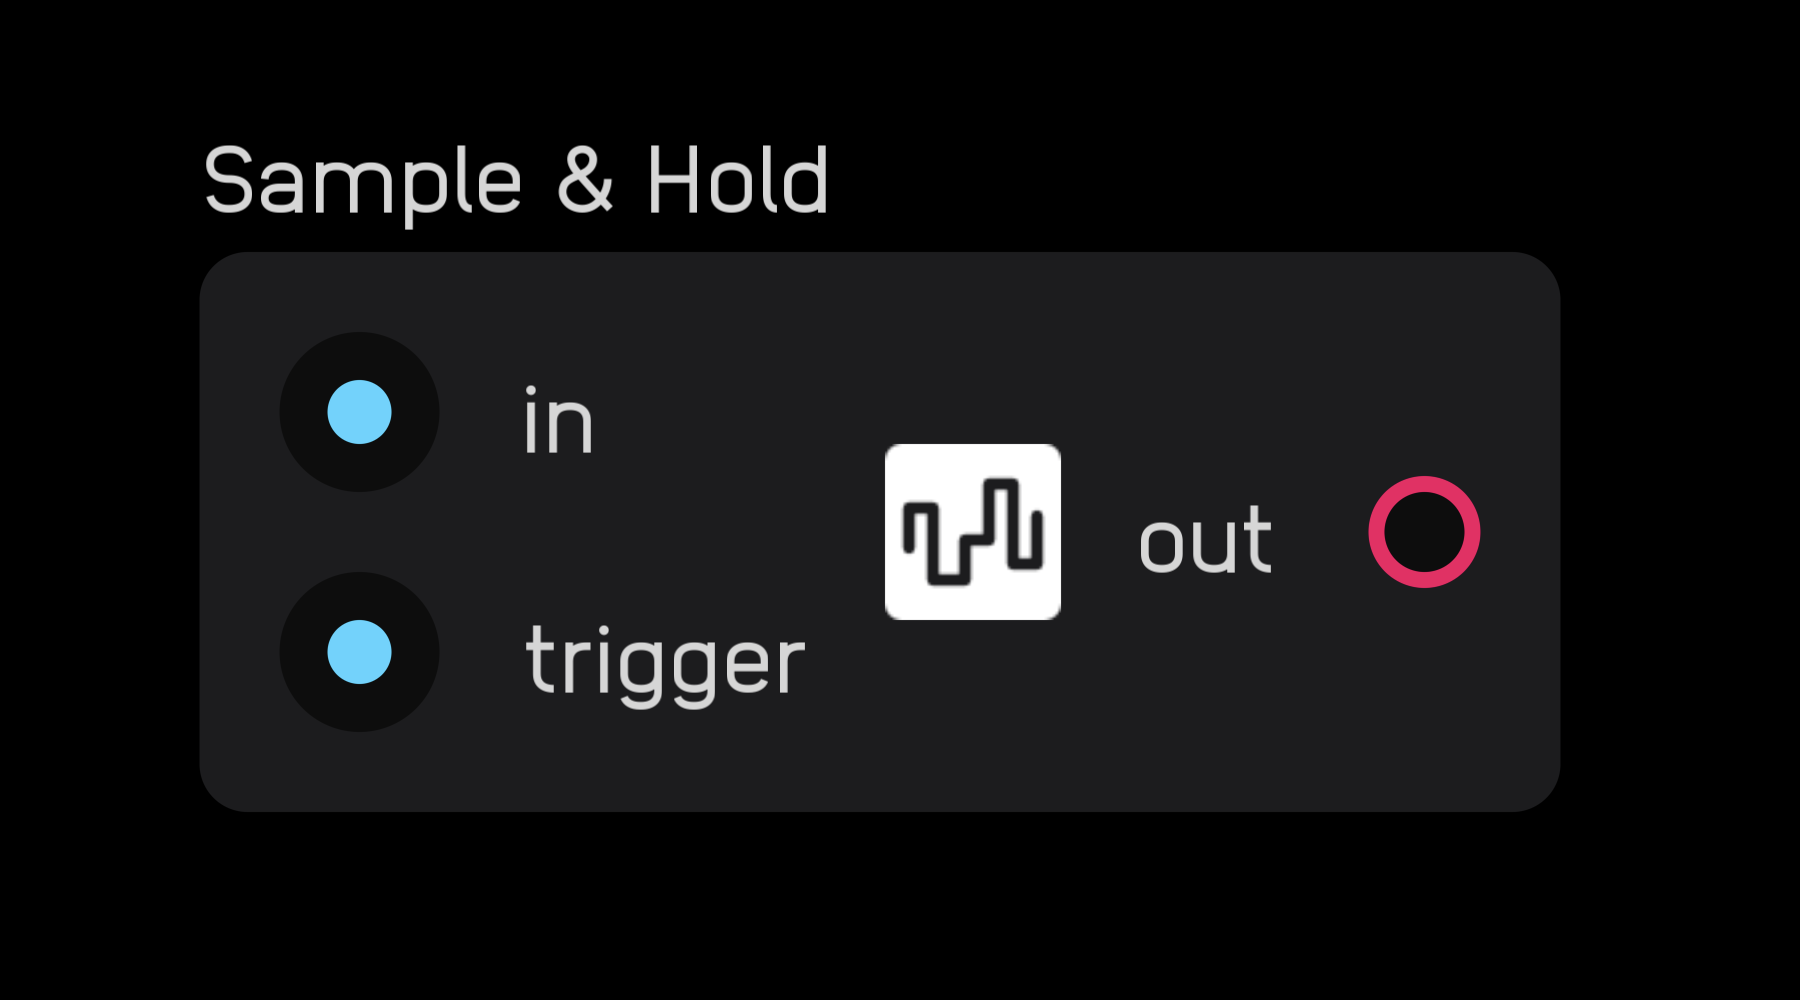
sample & hold
| in | signal |
|---|---|
in |
any |
trigger |
gate |
| out | signal |
|---|---|
out |
any |
| exposable | ❌ |
|---|---|
description
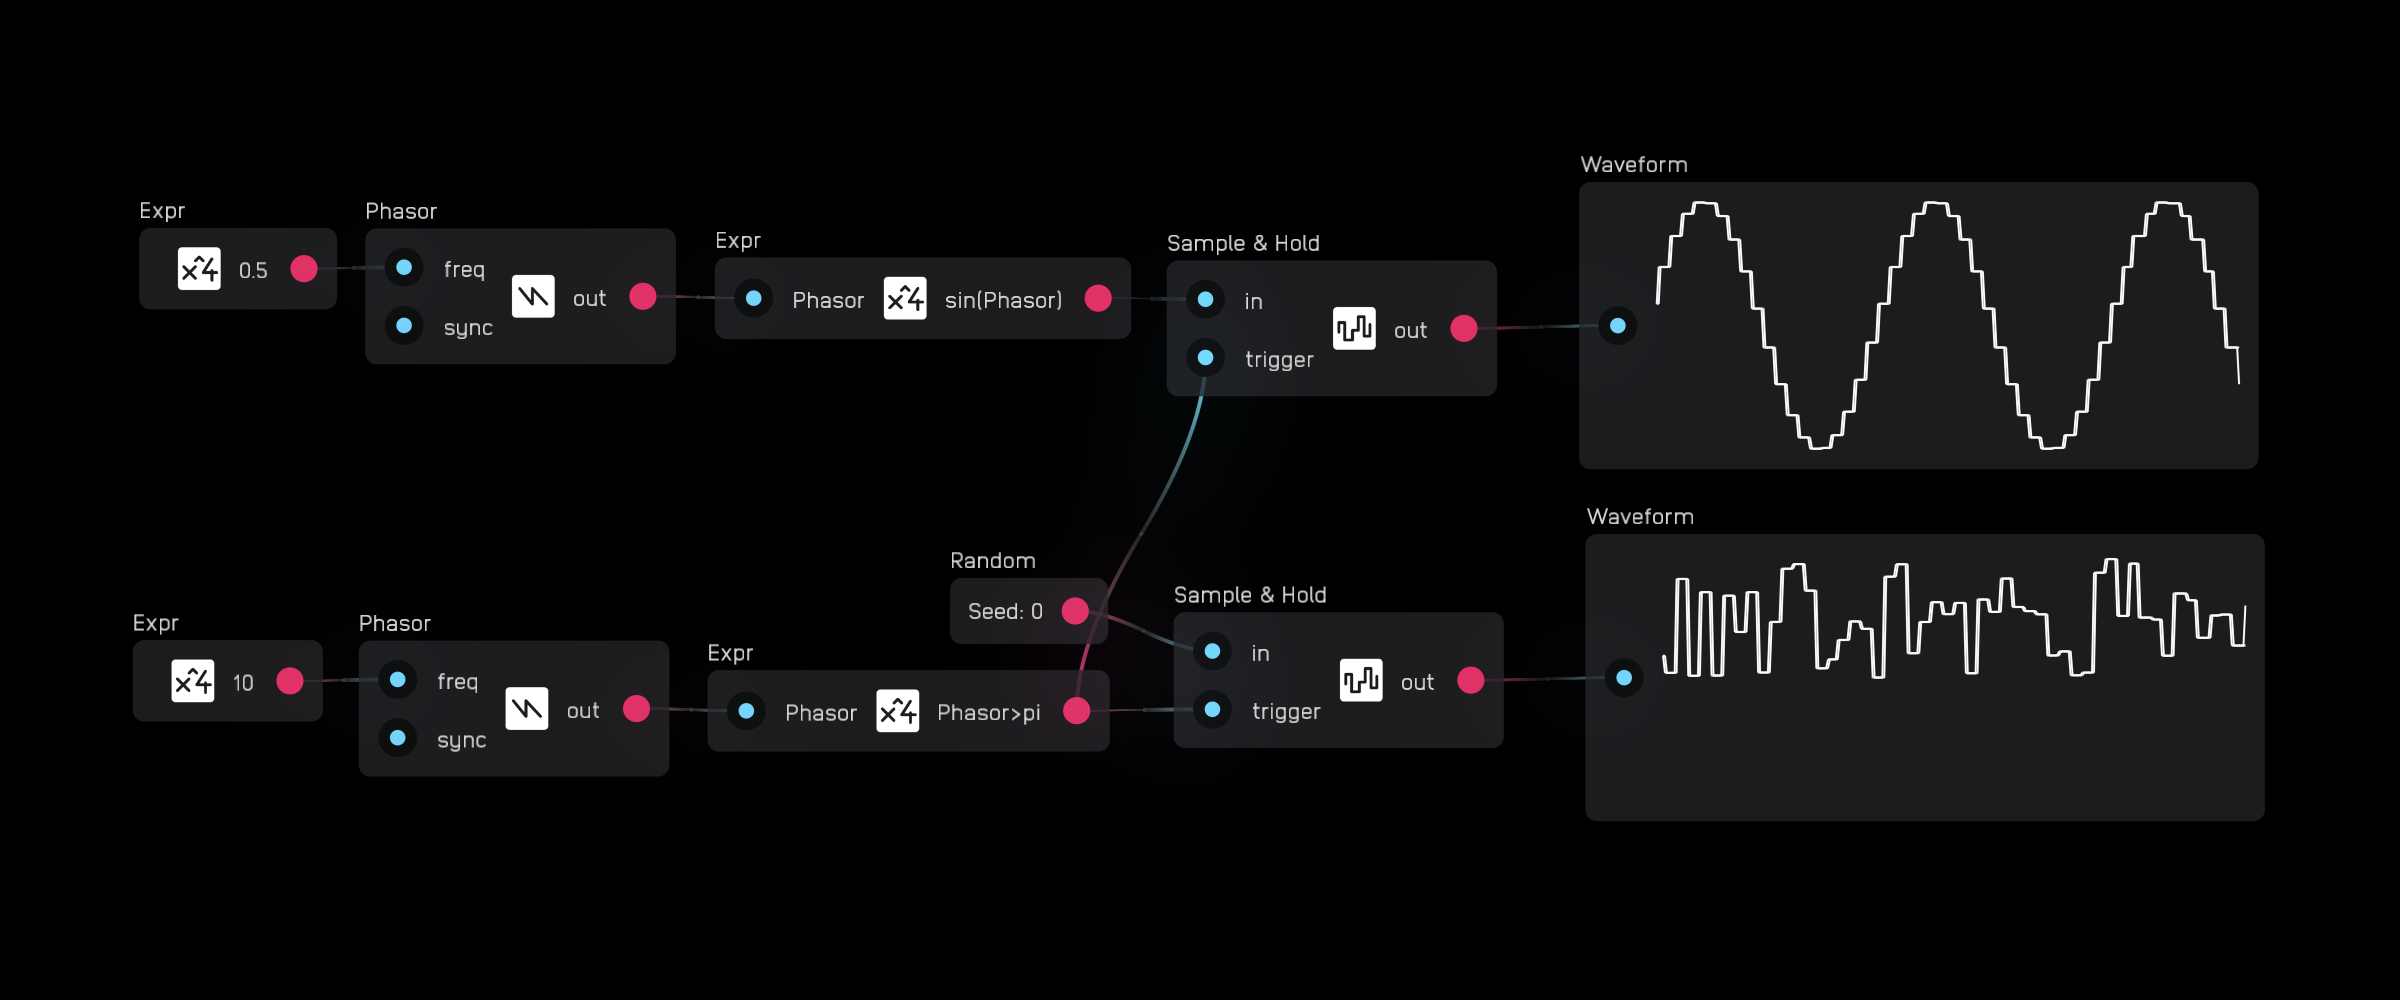
The sample & hold node will sample a value at its input on the rising edge of a gate signal at the trigger input and hold that value at its output until the trigger input is gated again.
You can think of it like a single-sample memory node.
In the inspector panel you can select the Save Data checkbox to save the held value in between patch loads.
In the example below, on the top, a phasor-based sine generator is being sampled at 10Hz, and underneath, the sample & hold node is sampling random values produced by a random node.
adsr
| in | signal |
|---|---|
gate |
gate |
a |
seconds |
d |
seconds |
s |
mod |
r |
seconds |
| out | signal |
|---|---|
out |
mod |
| exposable | ❌ |
|---|---|
description
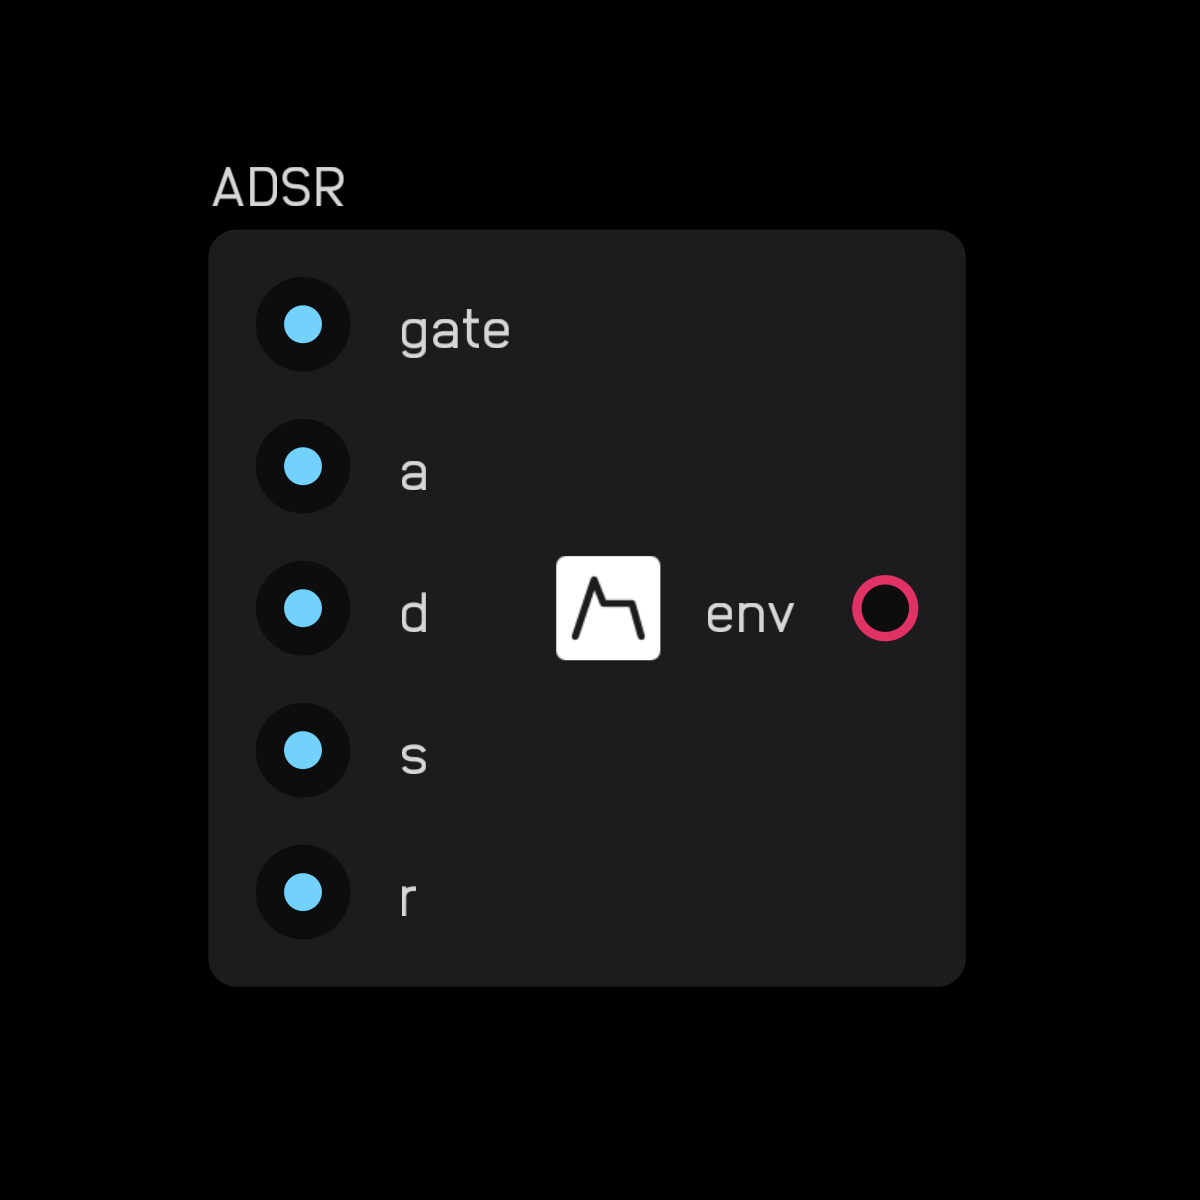
The adsr node outputs an envelope when the gate input is held high.
The a input is the attack time, d is decay time, s is sustain level, and r is release time.
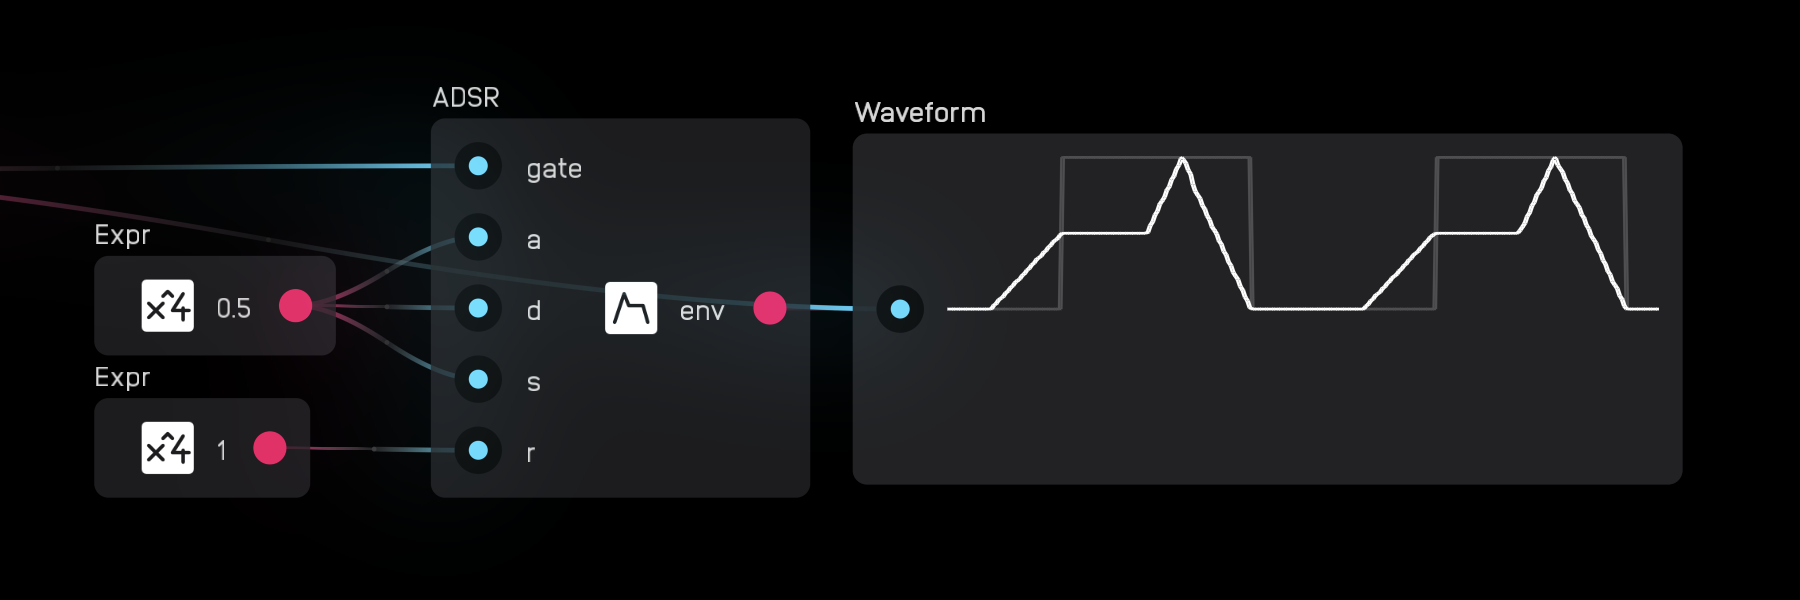
As long as the gate input is held high, the output of the envelope node increases from 0 to gate height over a seconds, decreases to the s level over d seconds, then once the gate goes low, decreases from the s level back to 0 over r seconds.
Below you can see the envelope node going through its full cycle superimposed on the incoming gate signal.
module
description
The module nodes important elements for creating modules and submodules.
- The
modulenode encases nodes into amoduleorsubmodule. - The
inputandoutputnodes allow signals to flow into and out ofmodulesandsubmodules. - The
knob,xy pad,slider,toggle, andtouch padare all elements you can interact with that you can set up to control what's going inside amodule.
module

| exposable | ✅ |
|---|---|
description
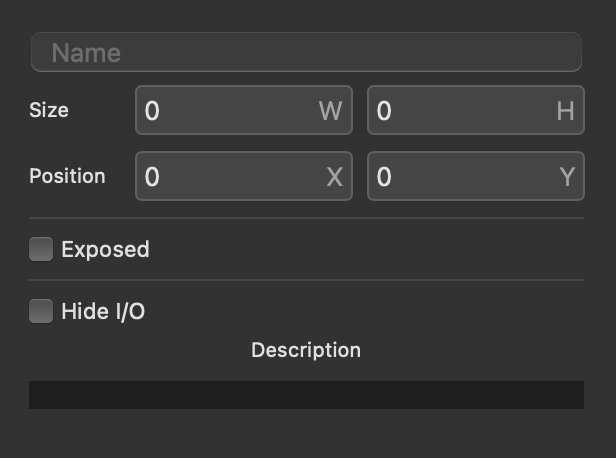
The module node lets you encase nodes inside of a UI.
In the inspector panel, you have options to name the module, define its size, whether or not it is exposed, when it is exposed if it should hide its inputs and outputs, and a field to enter a description of what it does.
Exposed elements within a module node will appear automatically on the UI. You can move them around by clicking or tapping the lock icon to enter Edit Modules mode.
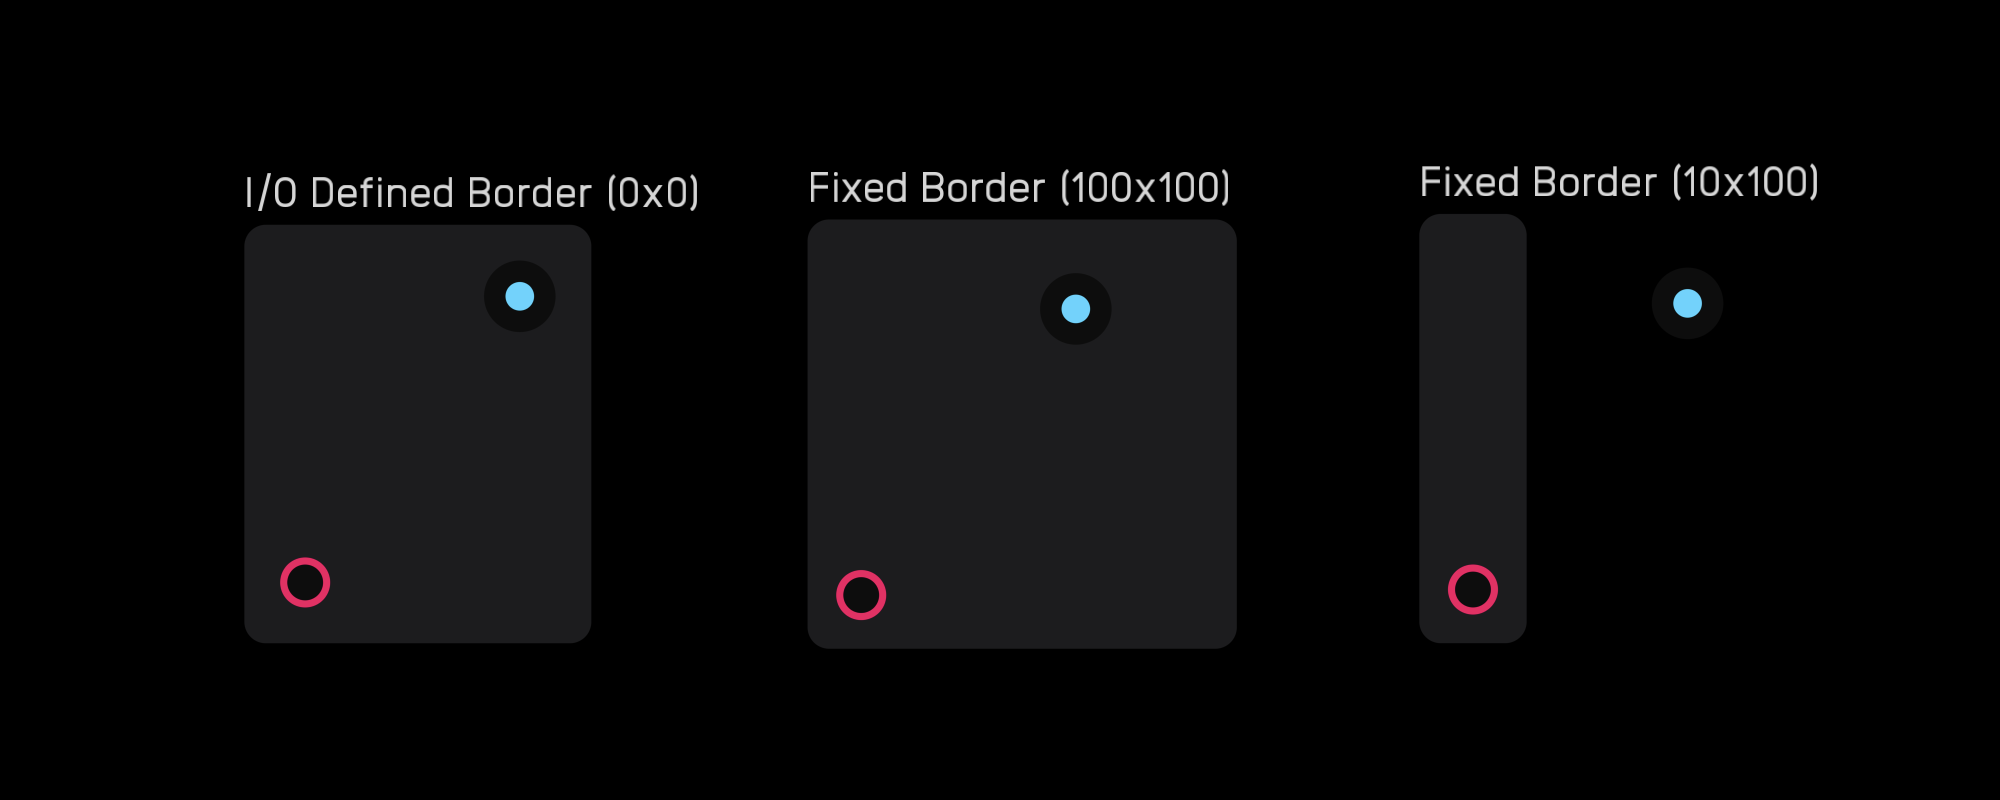
You can either define an explicit size for the module node, or let the UI elements determine the size. In the example below, the first module has a dimension of 0x0 and the size of the module is determined by where the input and output nodes are placed. In the second example, the module has a fixed size of 200x200 and the output can be placed wherever without shrinking the size of the module. In the third example, you can see how with a fixed size, you can even put UI elements outside of modules, which can be useful for both creative and practical purposes.
There are two classes of things you can create with the module nodes: modules and submodules.
The difference between them is that modules are meant to be interacted with while submodules are like custom nodes used to create modules. Below you can see some modules on the left and submodules on the right.
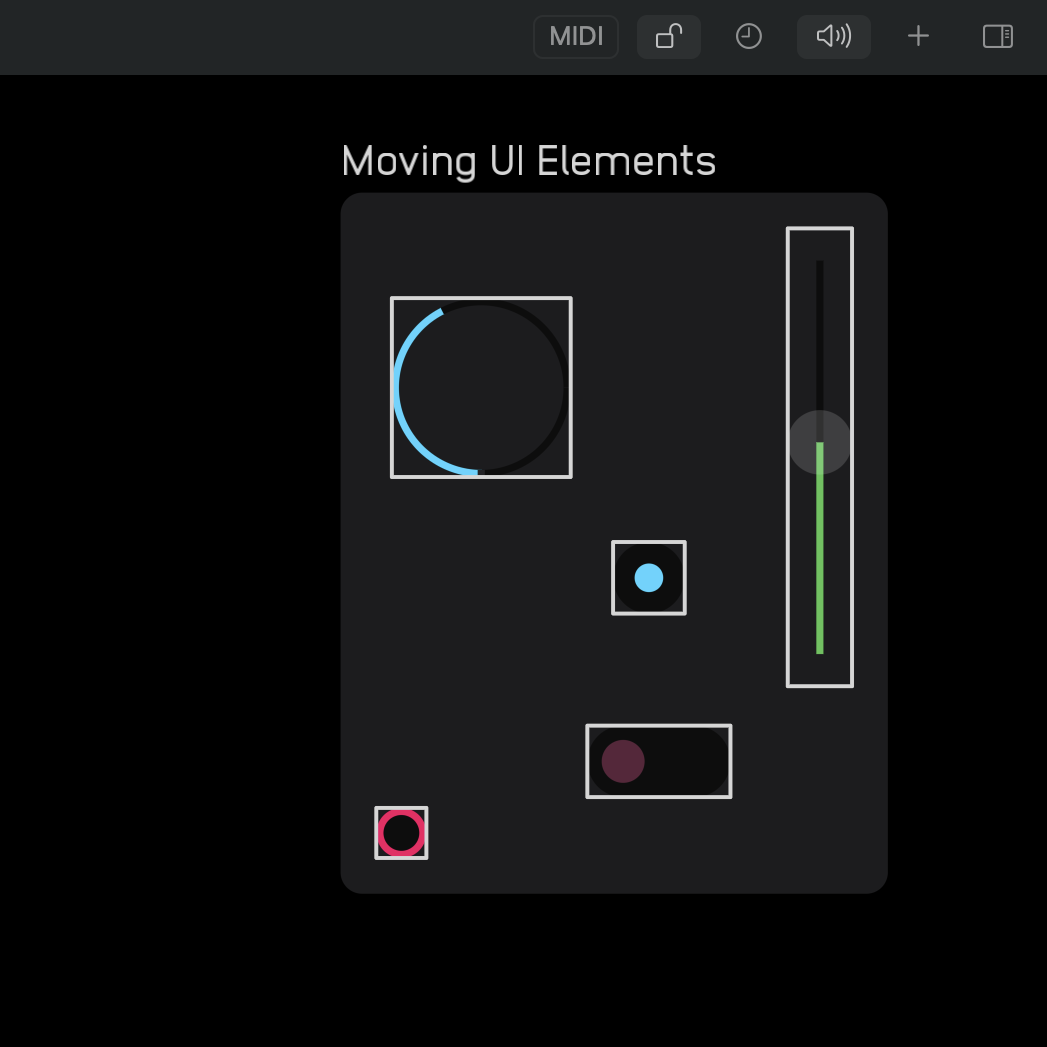
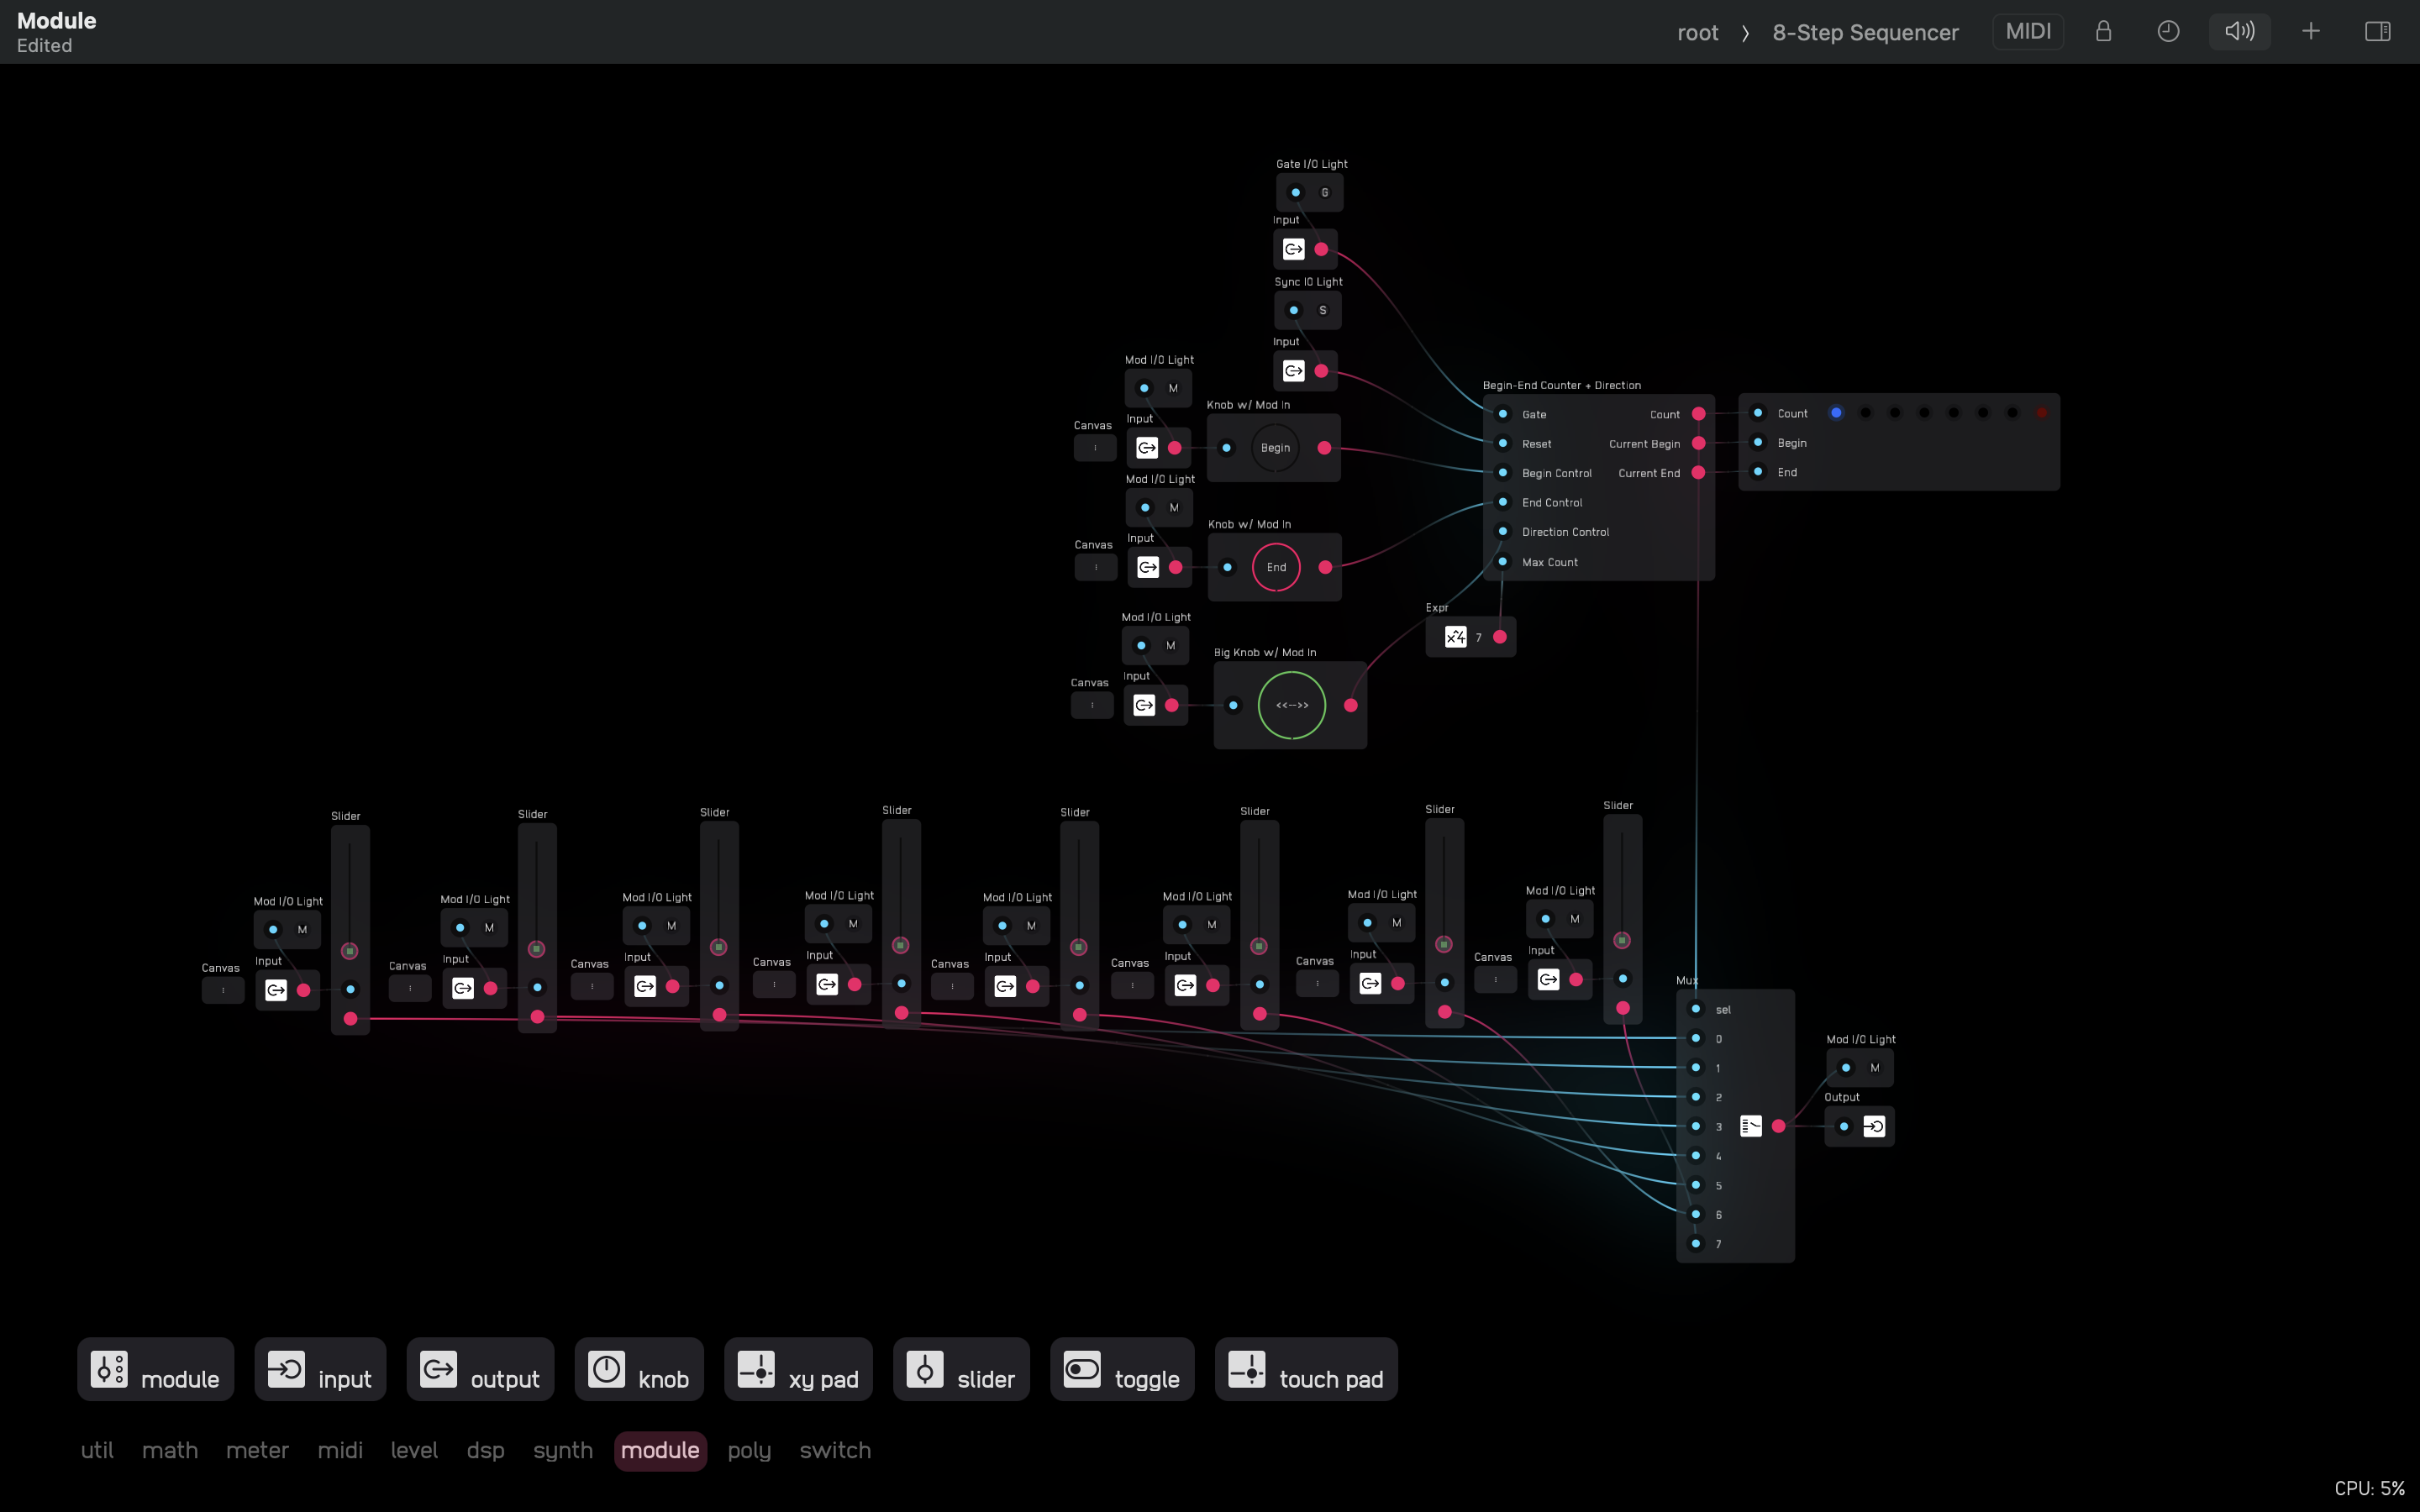
You can open any module and see how it works inside. This is the interior of the 8-Step Sequencer which has in itself a Begin-End Counter + Direction submodule in the top right. You can also see in the top right of the menu bar a directory showing root > 8-Step Sequencer. This means we are inside of the sequencer.
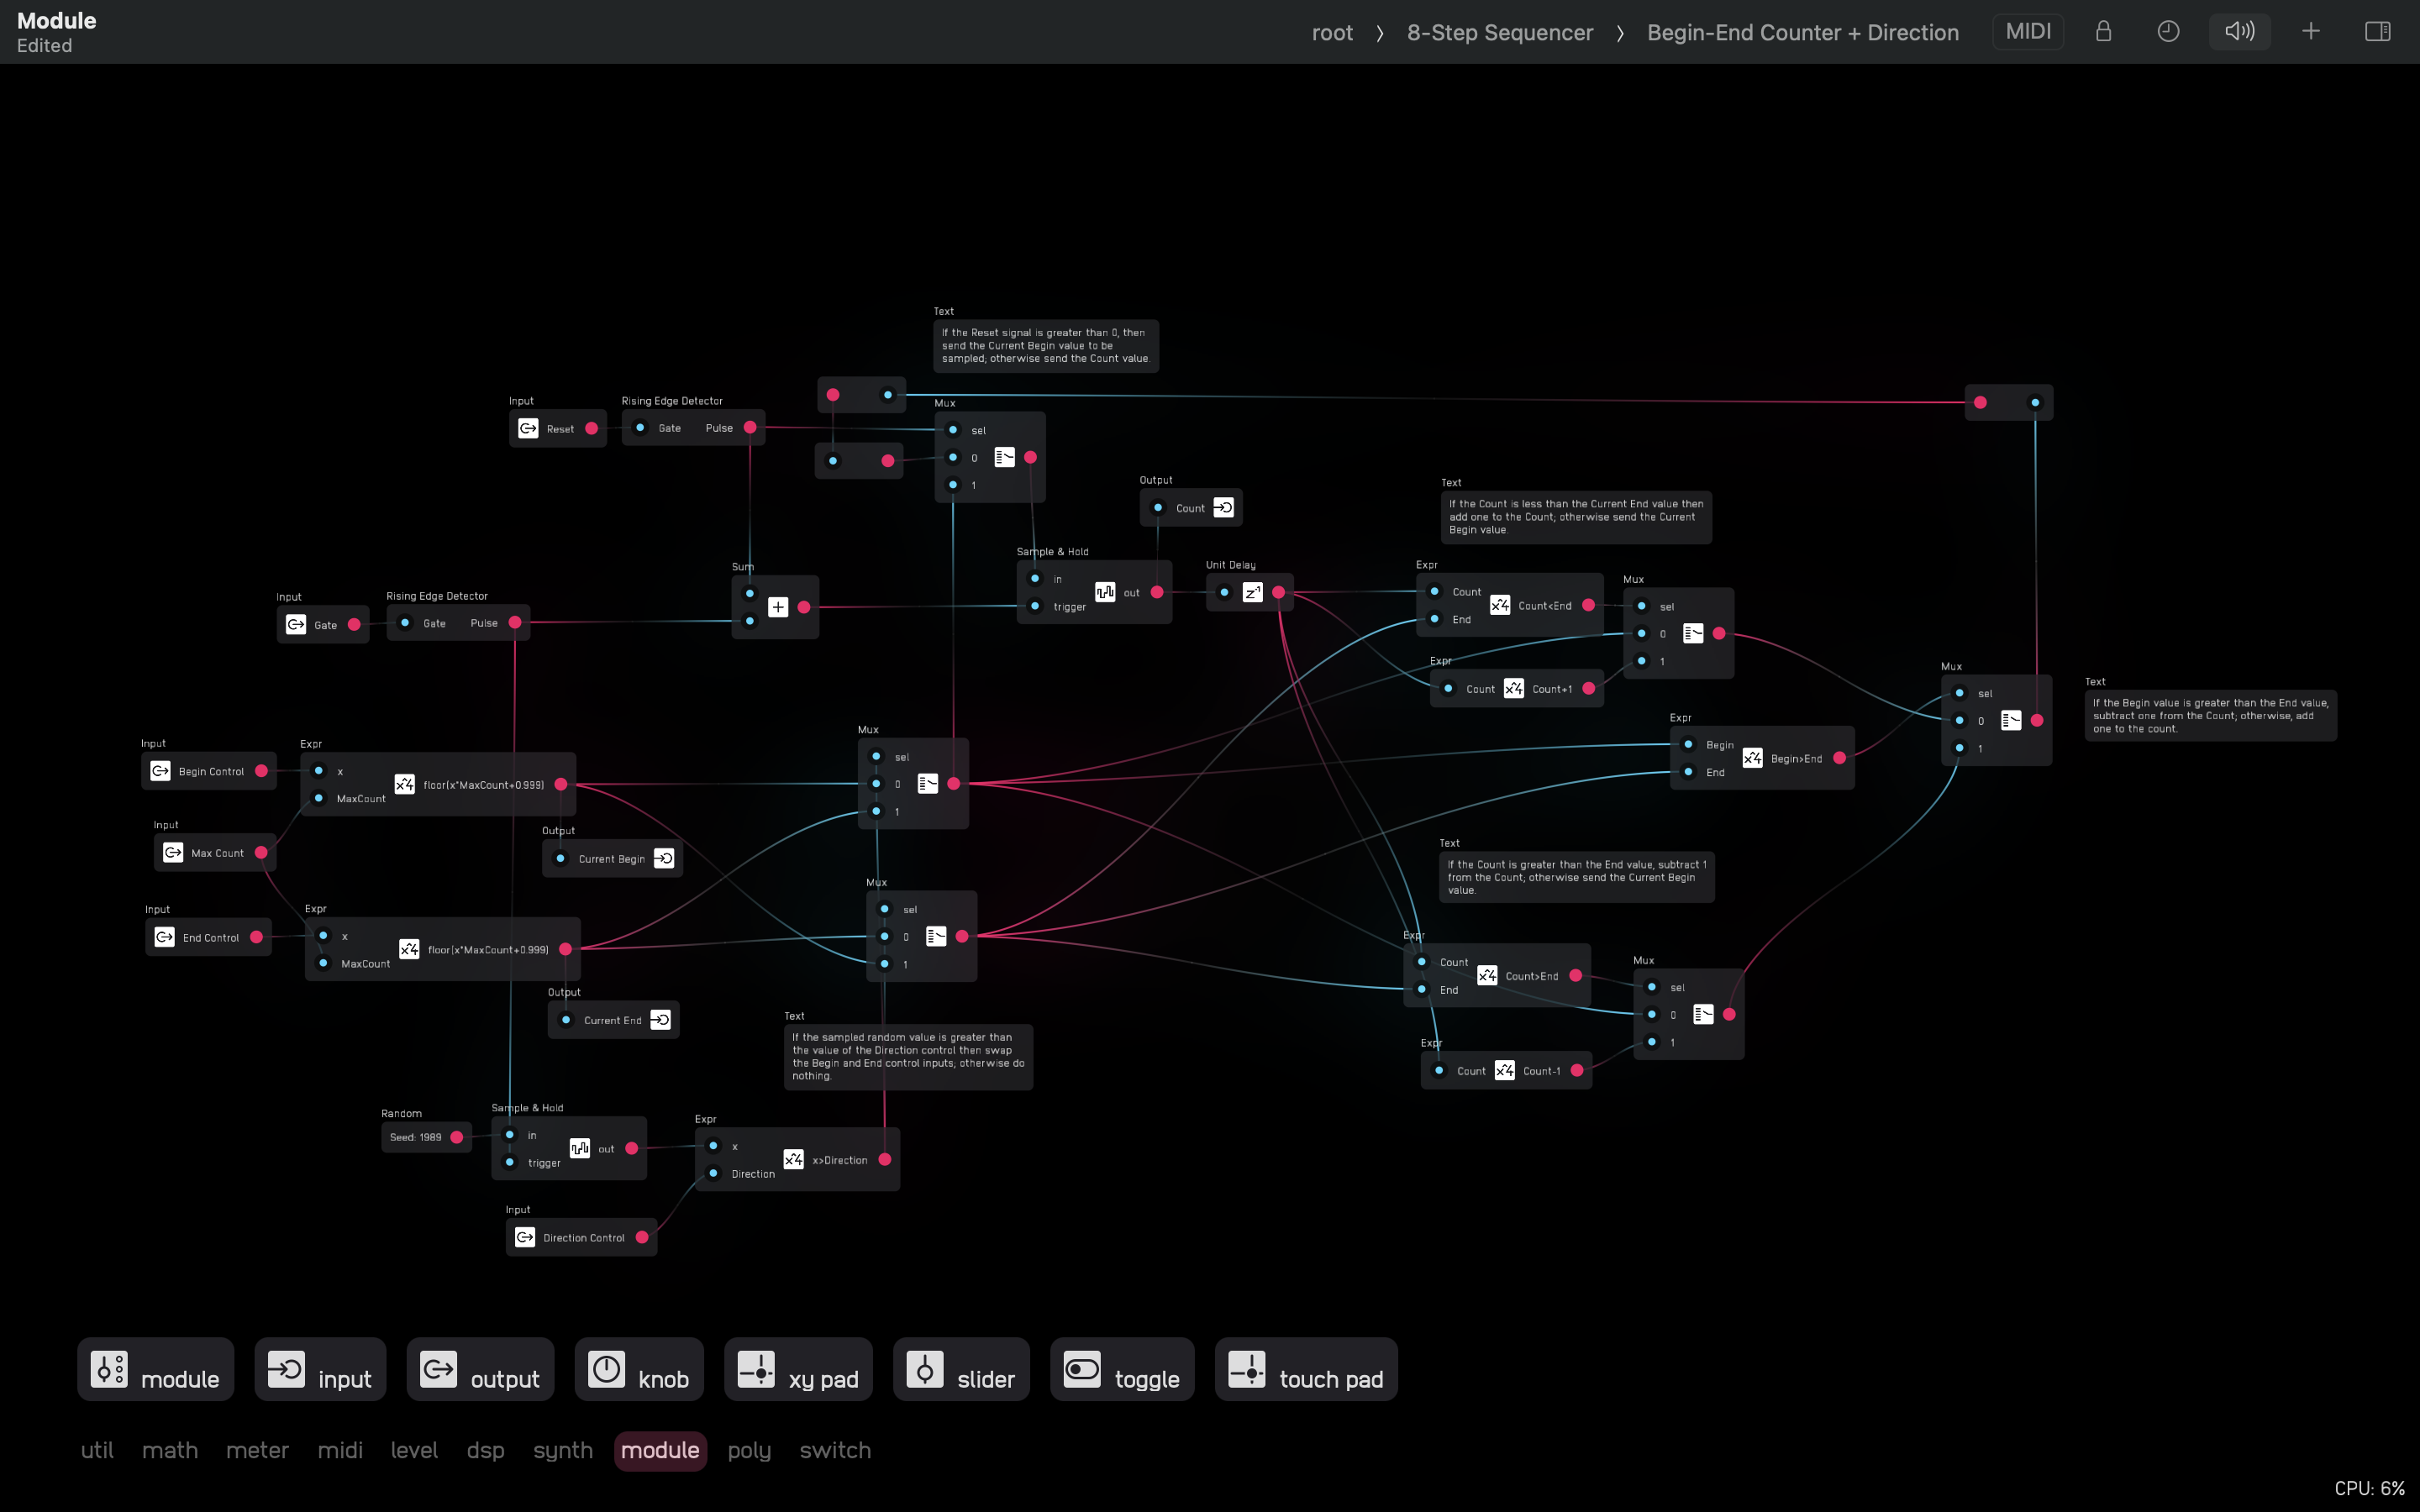
Below is the inside of the Begin-End Counter + Direction submodule that is inside of the 8-Step Sequencer. Notice that the directory now reads root > 8-Step Sequencer > Begin-End Counter + Direction.
There is no limit to the number of module nodes you can nest in one another, though it is rare to need more than 5 levels.
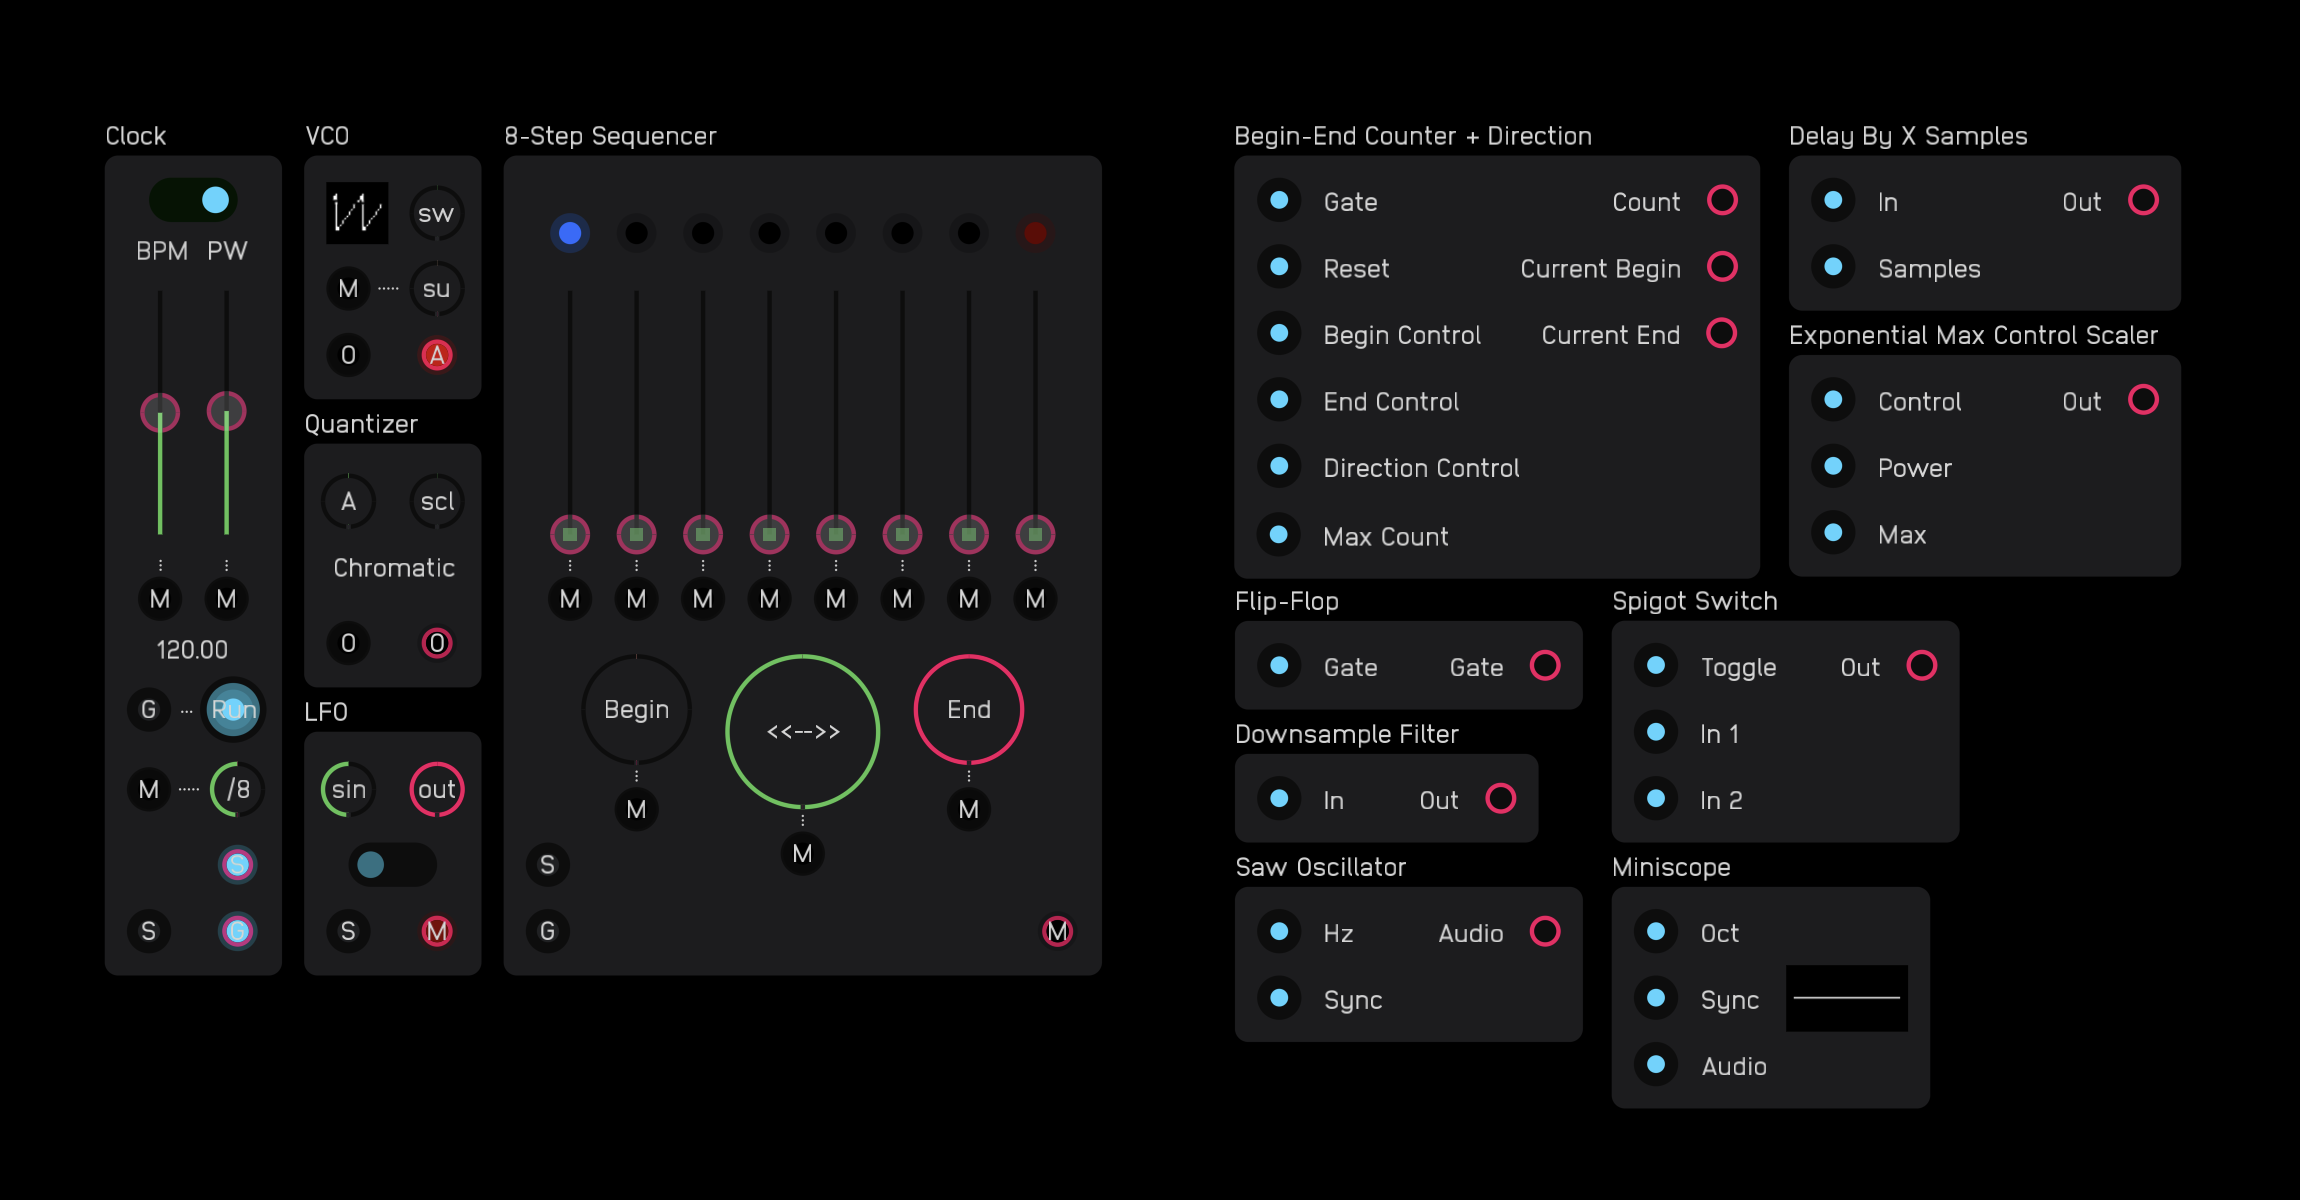
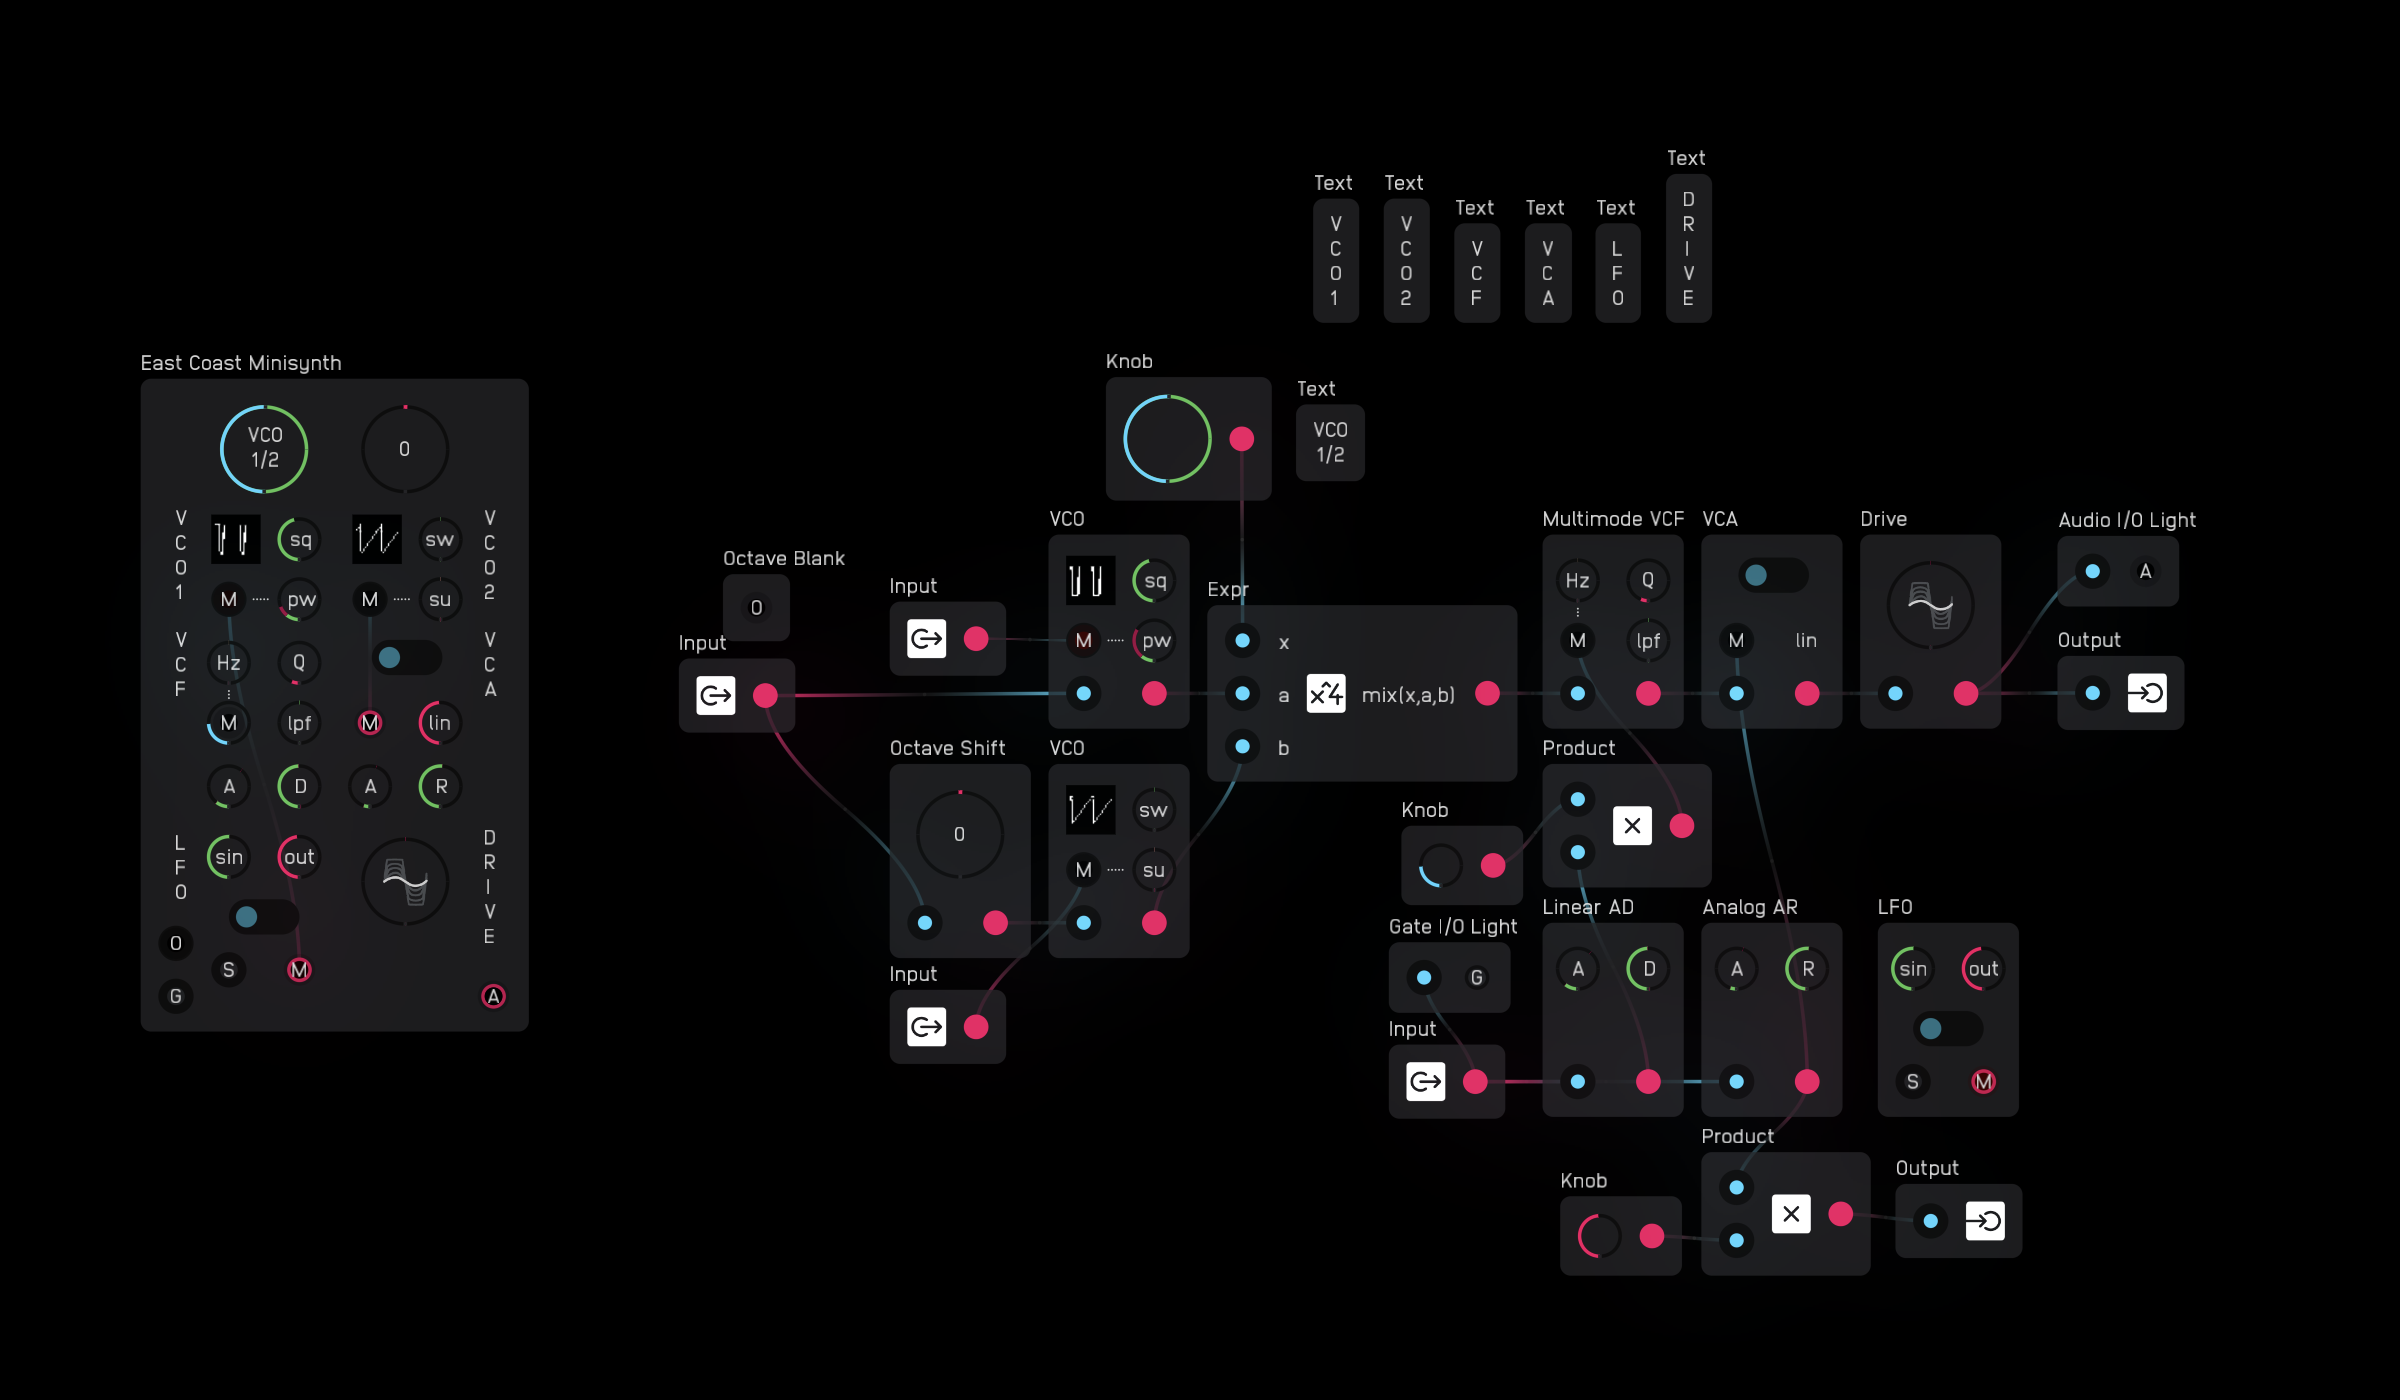
Modules themselves can also be exposed to the UI of module nodes. This means you can create synthesizers from individual module elements. Below is a screenshot of a synthesizer module on the left made mostly of other modules and a few extra nodes that you see on the right.
input
| out | signal |
|---|---|
out |
any |
| exposable | ✅ automatic |
|---|---|
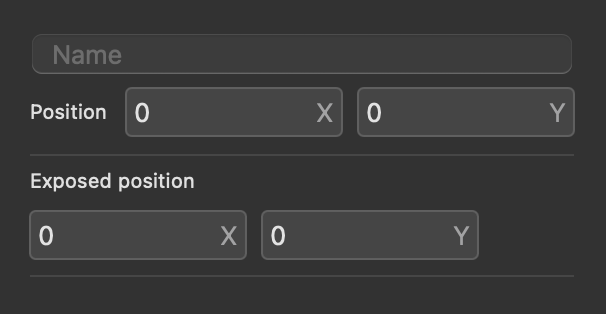
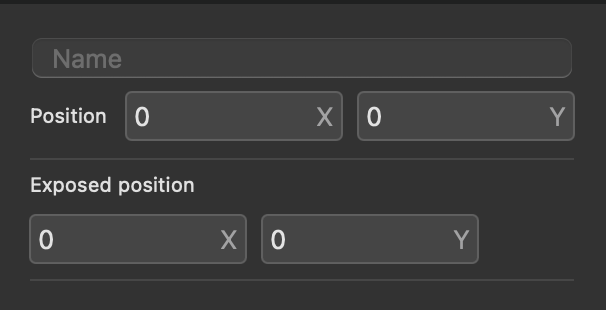
description
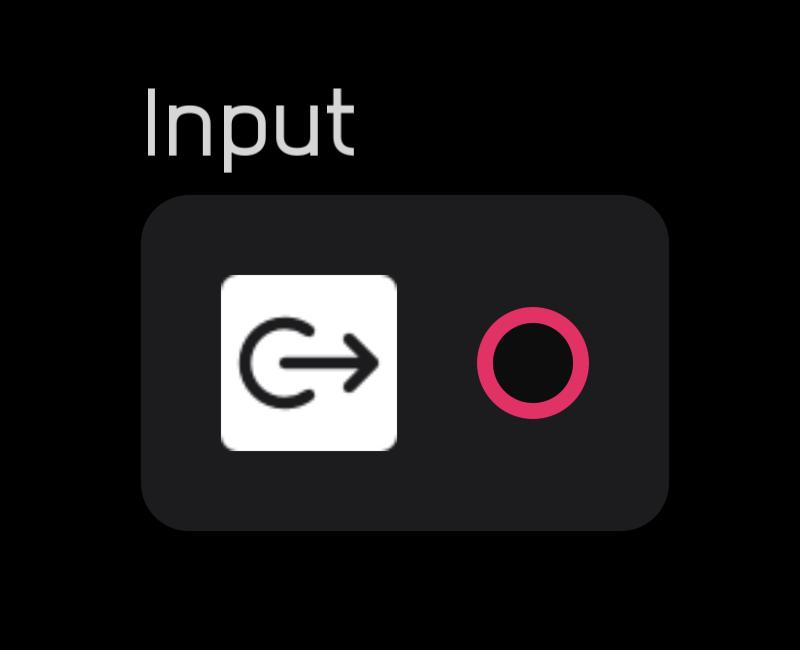
The input node is used to get signals into a module node. It must be placed inside the module node.
It can be renamed in the inspector panel.
output
| in | signal |
|---|---|
in |
any |
| exposable | ✅ automatic |
|---|---|
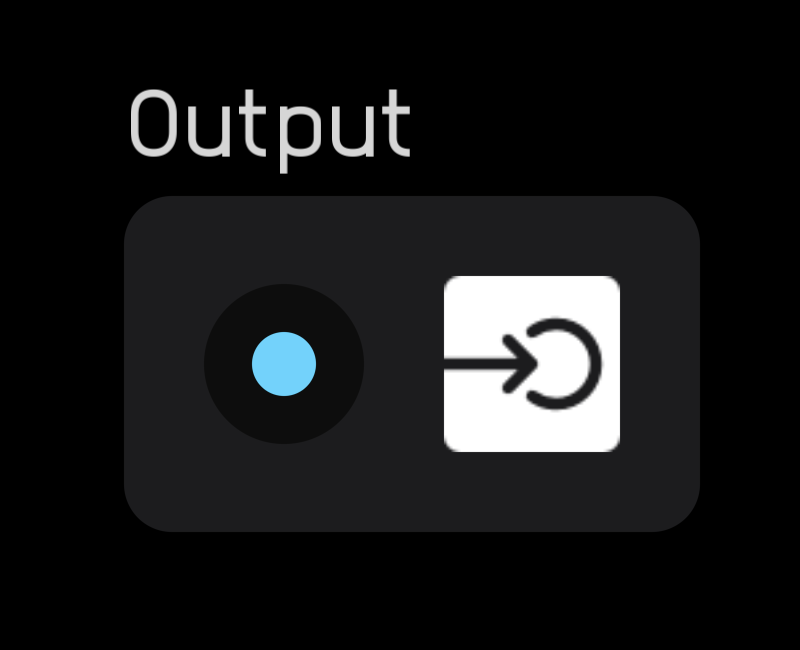
description
The output node is used to get signals out of a module node. It must be placed inside the module node.
It can be renamed in the inspector panel.
knob
| out | signal |
|---|---|
out |
mod |
| control | description |
|---|---|
knob |
move with up/down or left/right motion |
| exposable | ✅ automatic |
|---|---|
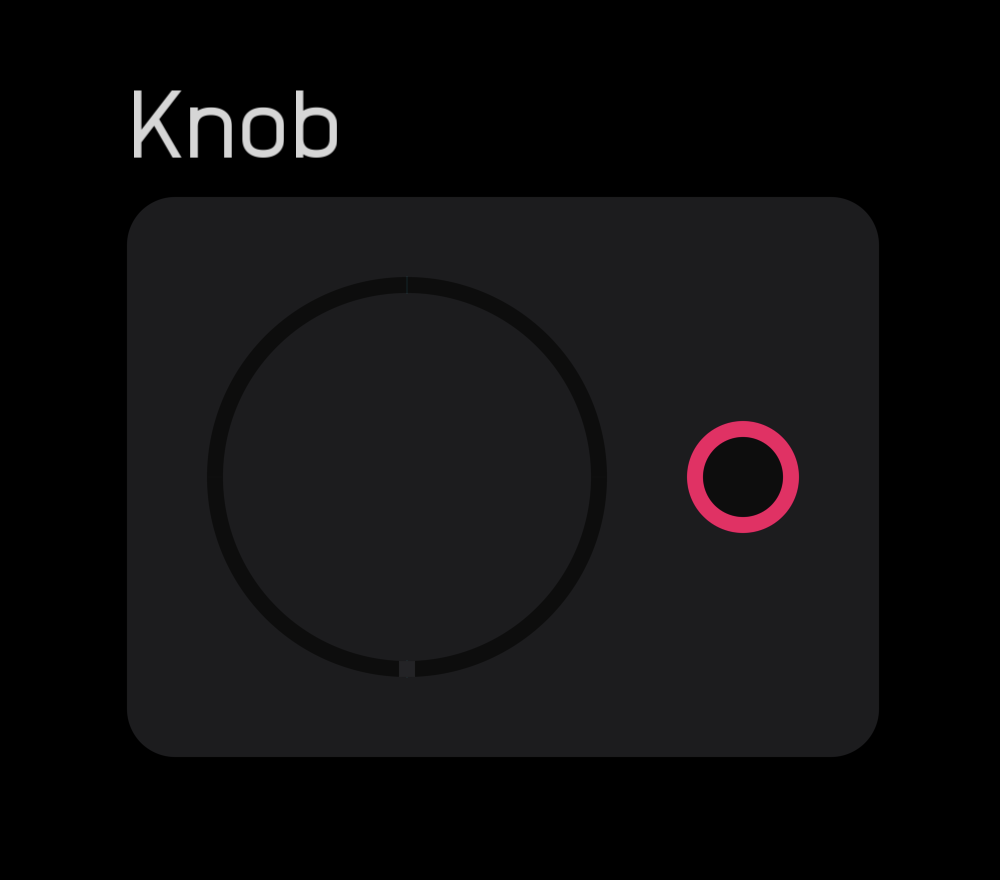
description
The knob node is used to modify other nodes. It outputs a 0 to 1 mod signal. This signal can be scaled and shaped by expr, mapper, and spline nodes.
There are several options for the knob node in the inspector panel. You can directly set the Value, change the Style, Icon, color, and MIDI CC and Channel.
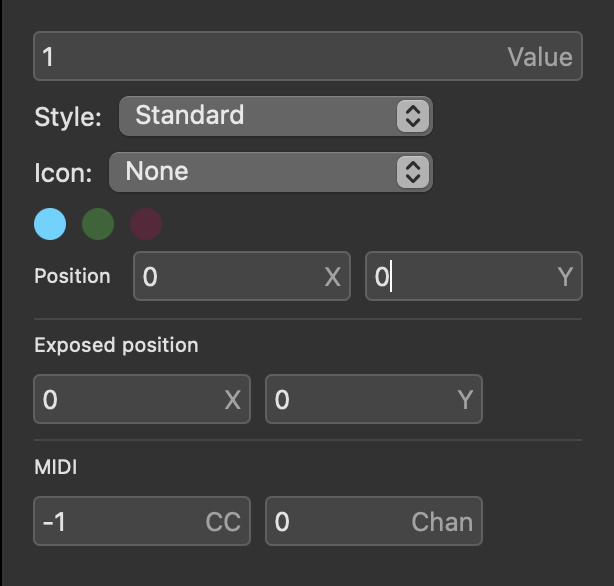
There are six Style options for the knob node that change its shape: Standard, Mini, Large, Drive, Mix, and Bipolar. The three color options are blue, green, and red.
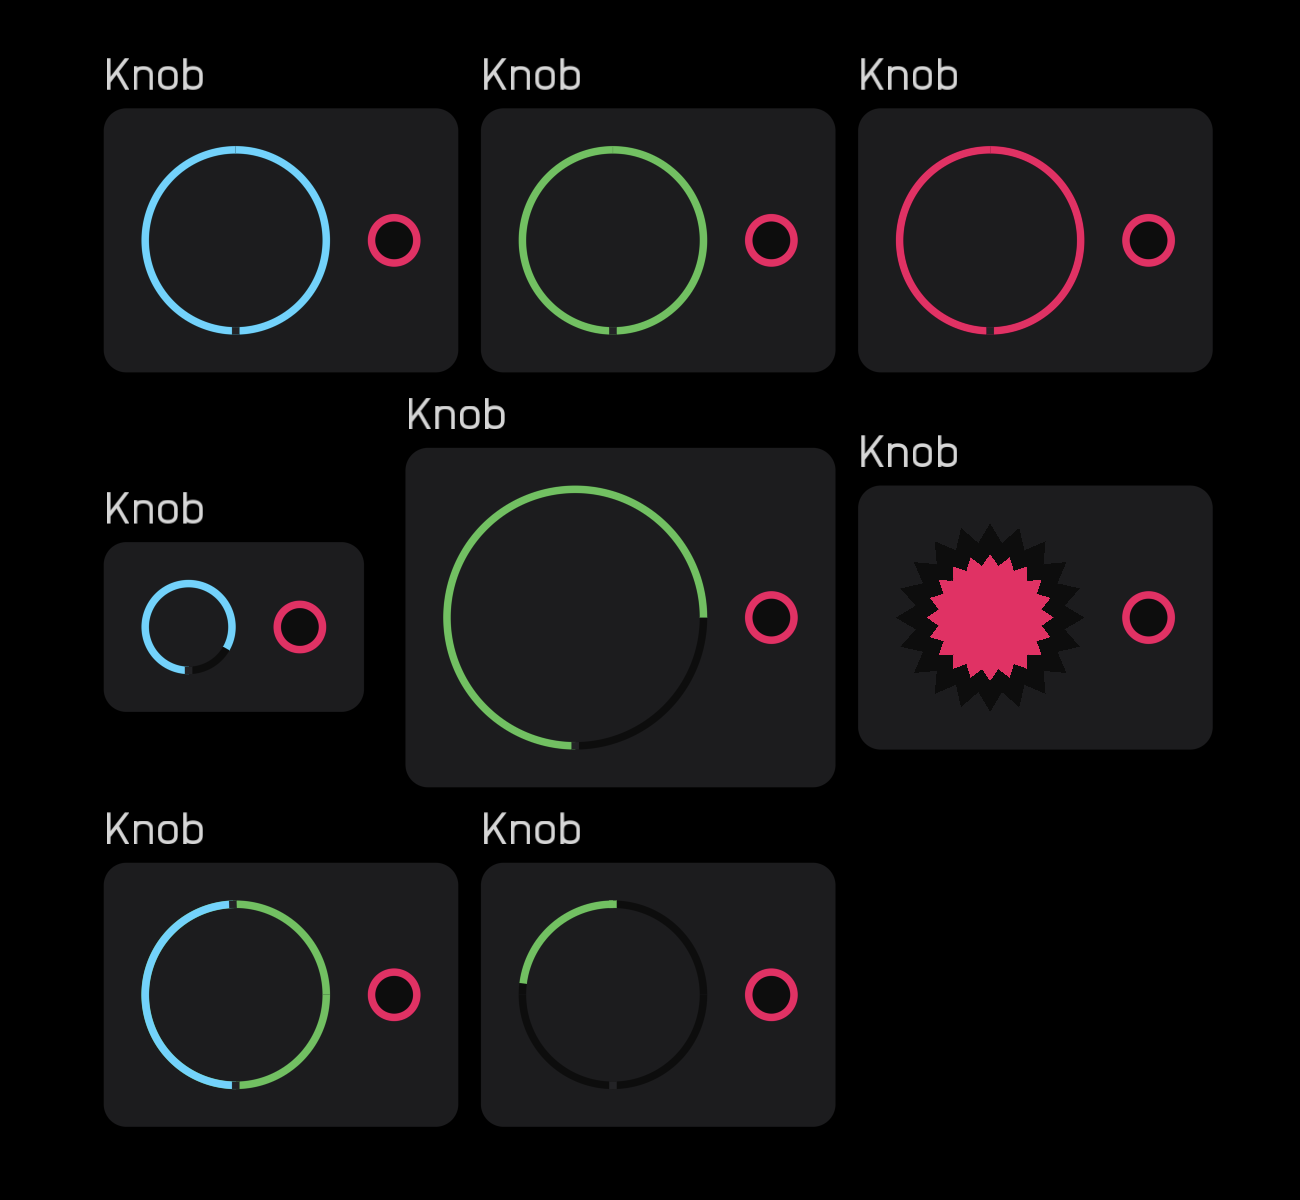
You can also select one of 16 animated Icon options: Cutoff, Res, Drive, Freq, Level, Offset, PW, Explog, Length, Random, Density, Attack, Decay/Release, Sustain, Waves.
![]()
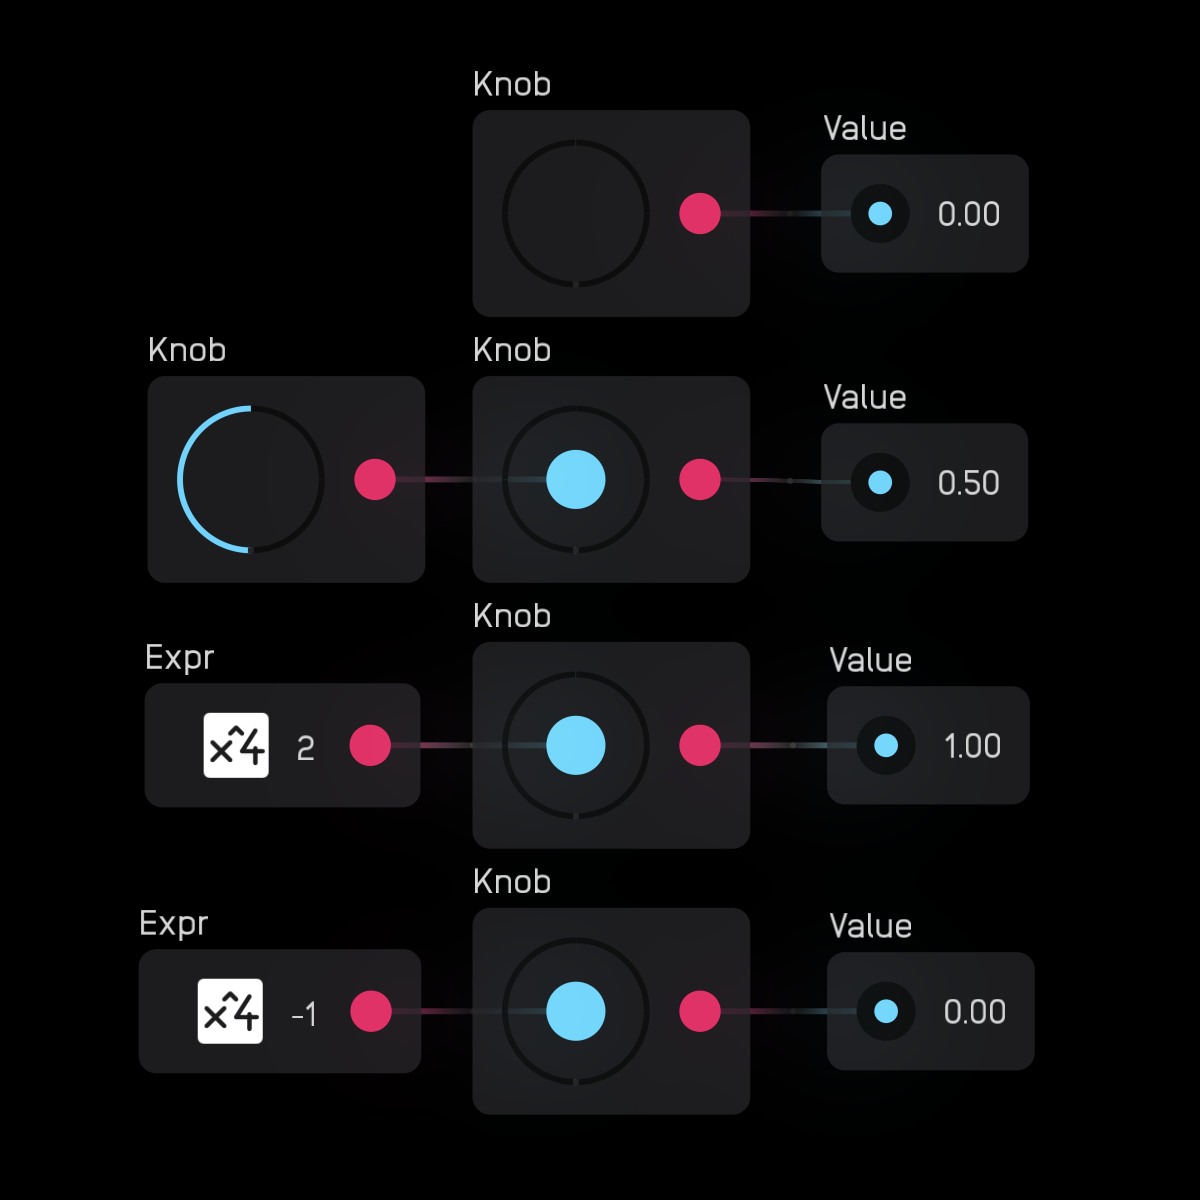
Wires can be attached directly to knobs. When a wire is attached to a knob, a blue circle appears at the center. The input signal of the wire will be clamped to the 0 to 1 mod signal range.
xy pad
| out | signal |
|---|---|
x |
mod |
y |
mod |
| control | description |
|---|---|
xy pad |
click or tap anywhere on field |
| exposable | ✅ |
|---|---|
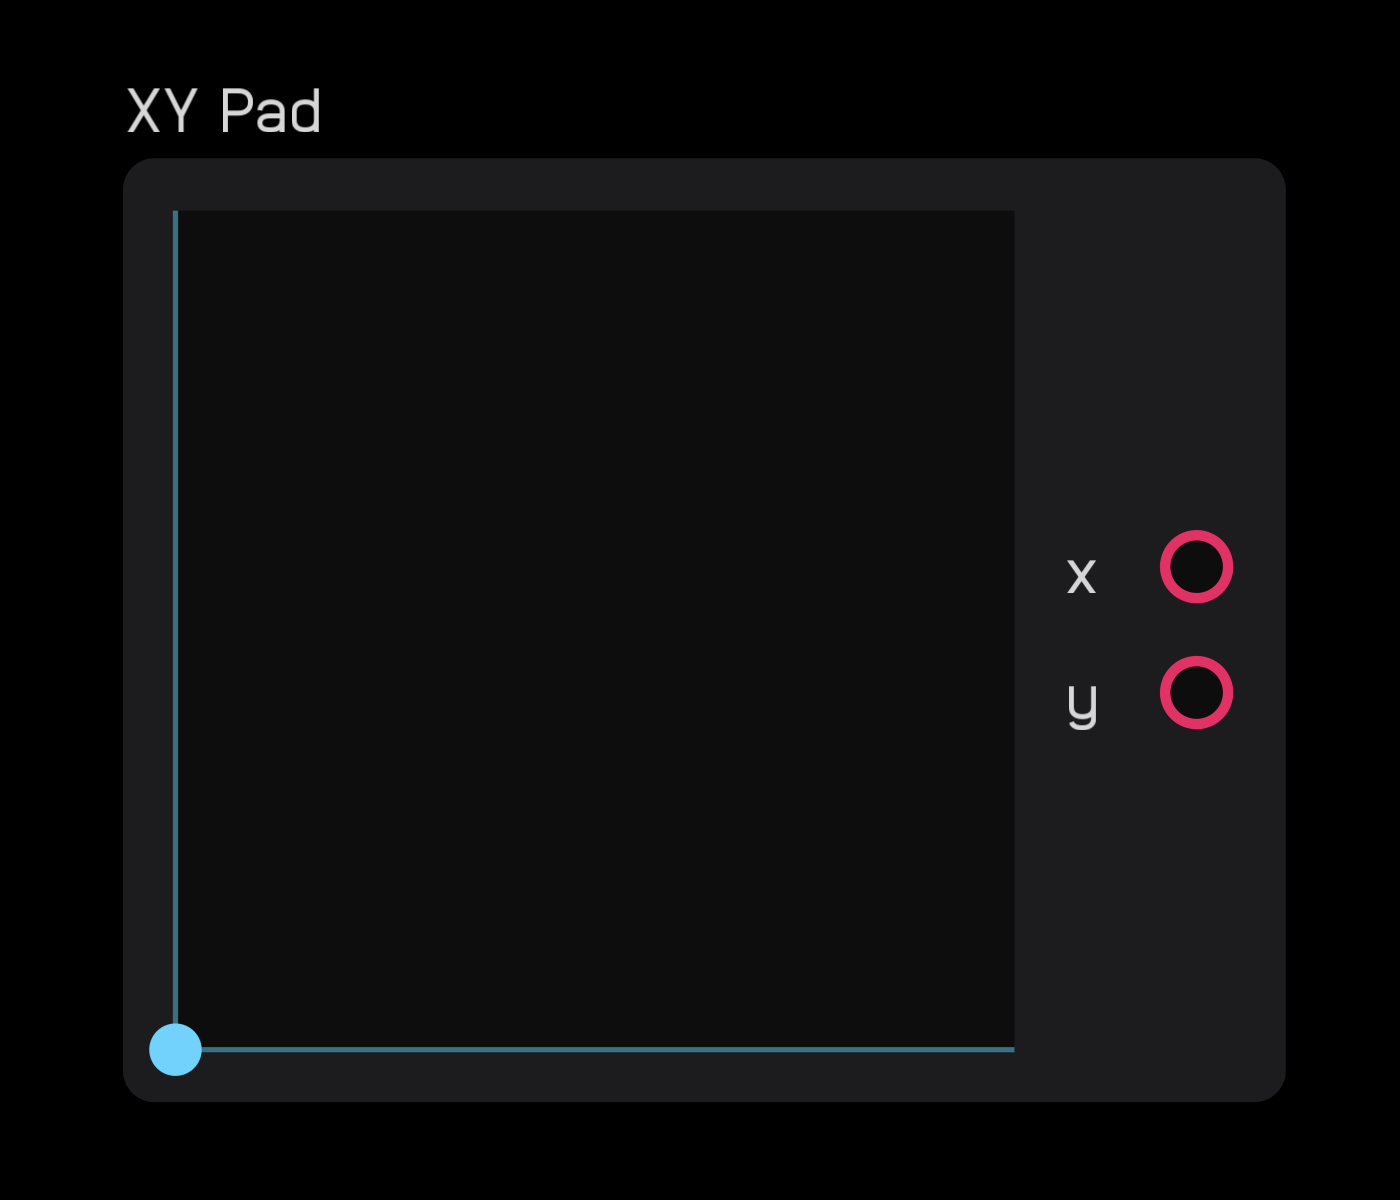
description
The xy pad node outputs two mod signals that correspond to the (x, y) coordinates of where you click or touch. This point is marked by a colored dot.
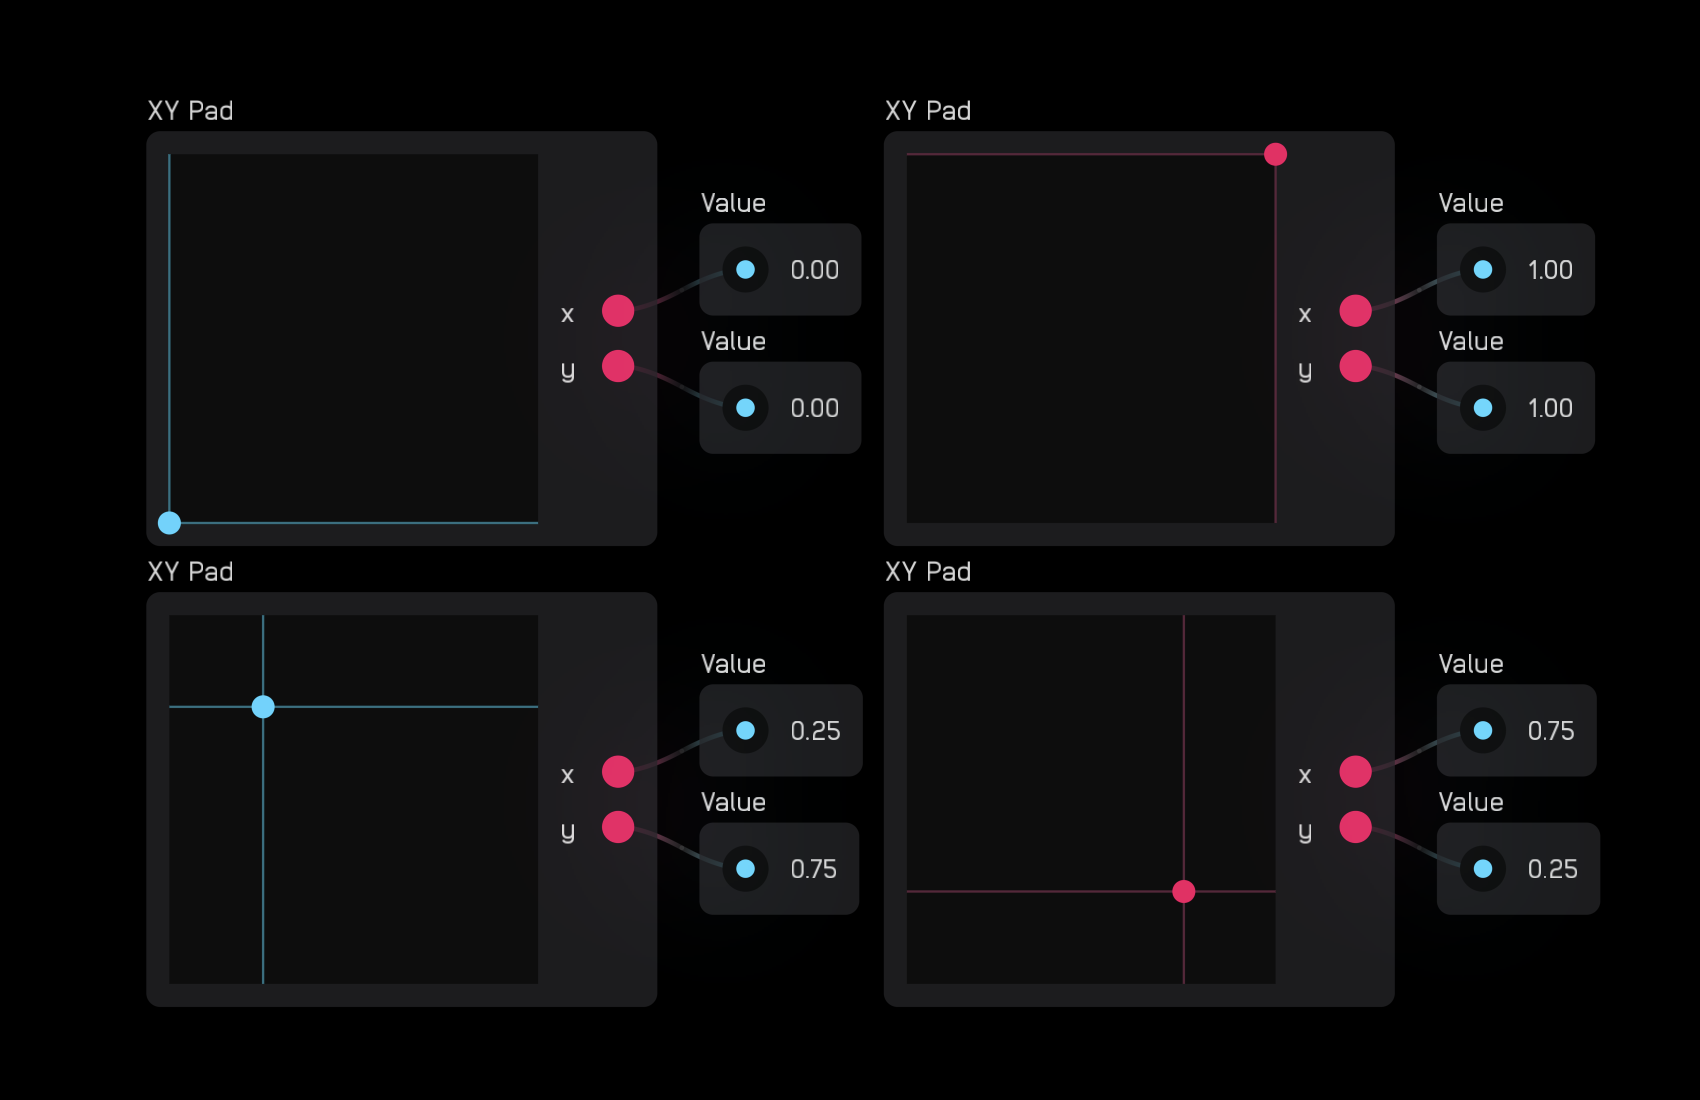
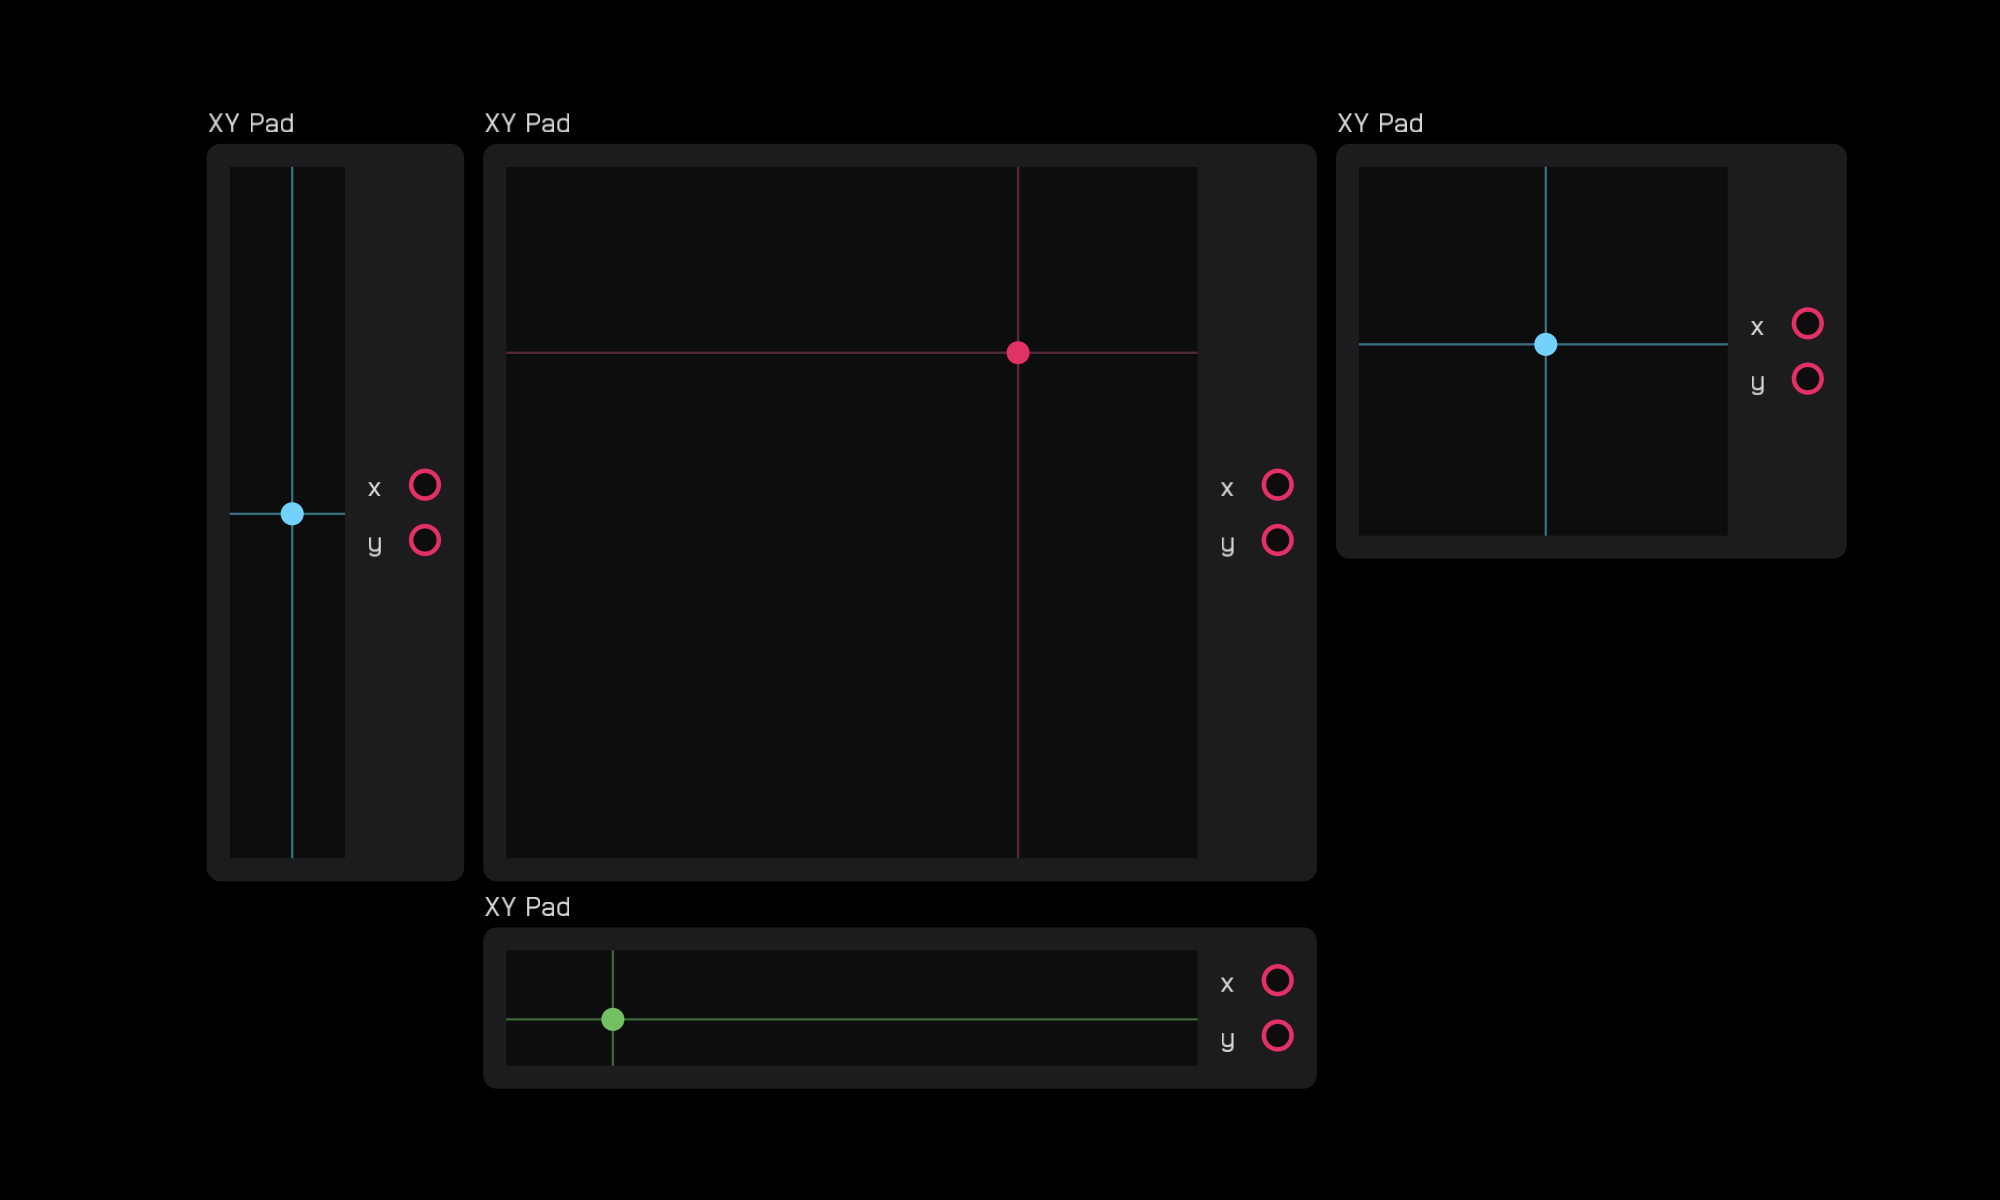
In the inspector panel you can change the Size of the node and its color.
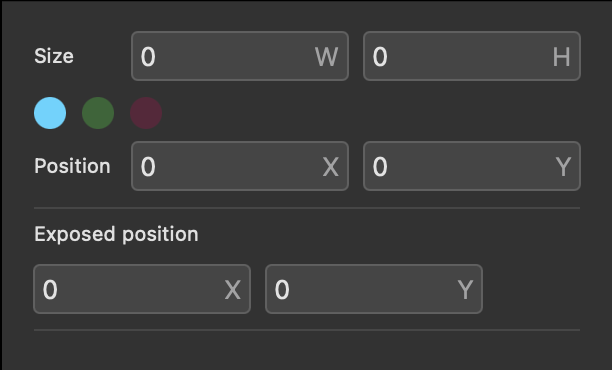
You can make the node smaller, larger, or rectangular.
slider
| out | signal |
|---|---|
out |
mod |
| control | description |
|---|---|
slider |
click or tap to move up or down |
| exposable | ✅ automatic |
|---|---|
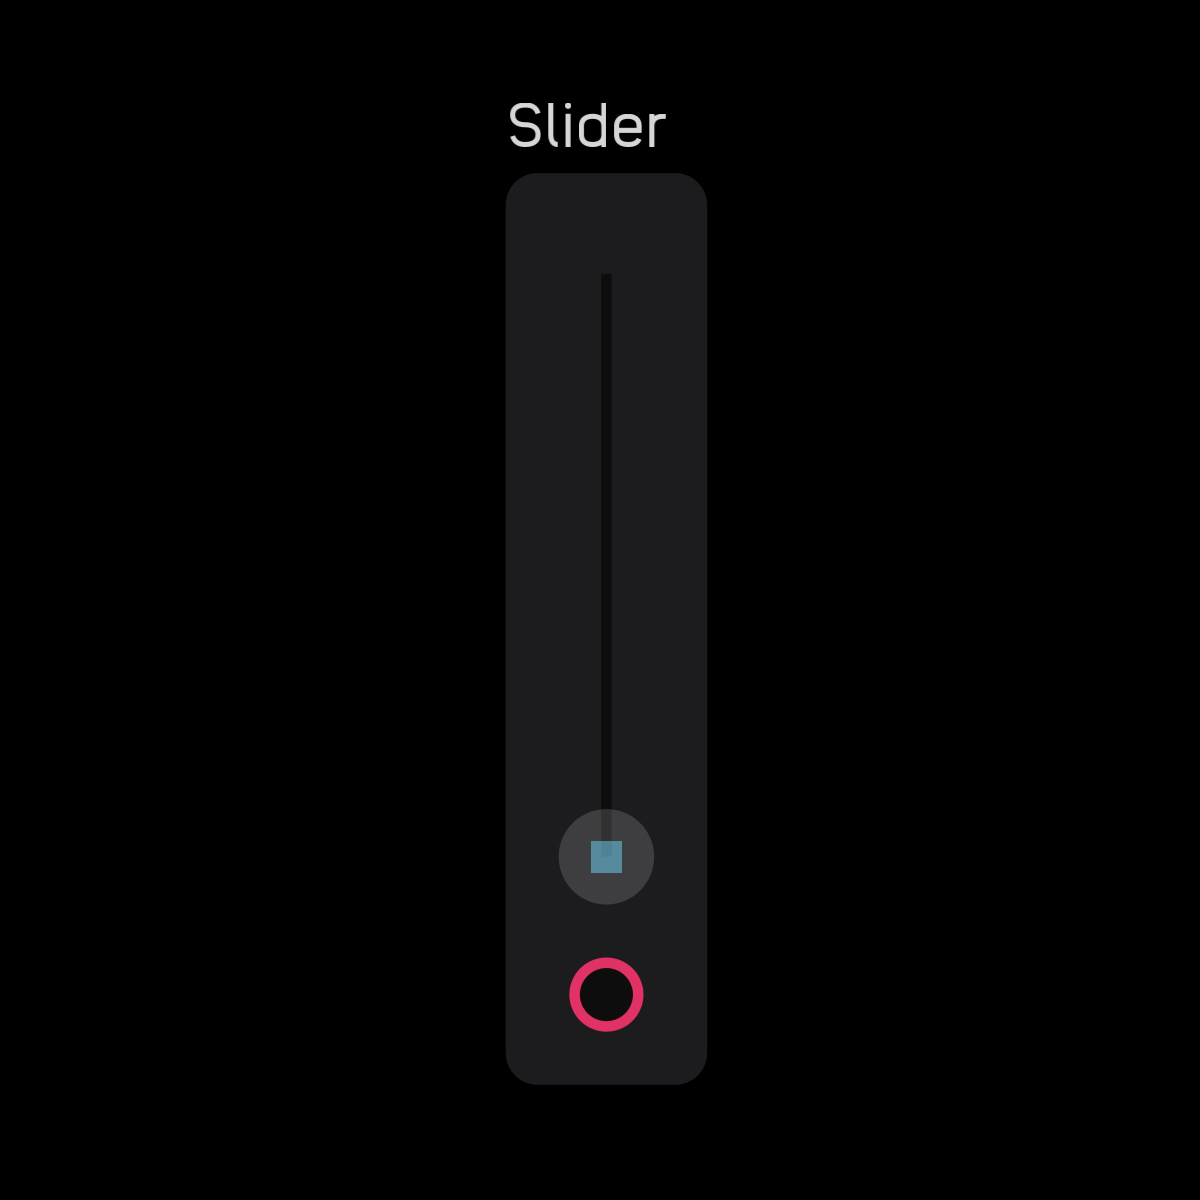
description
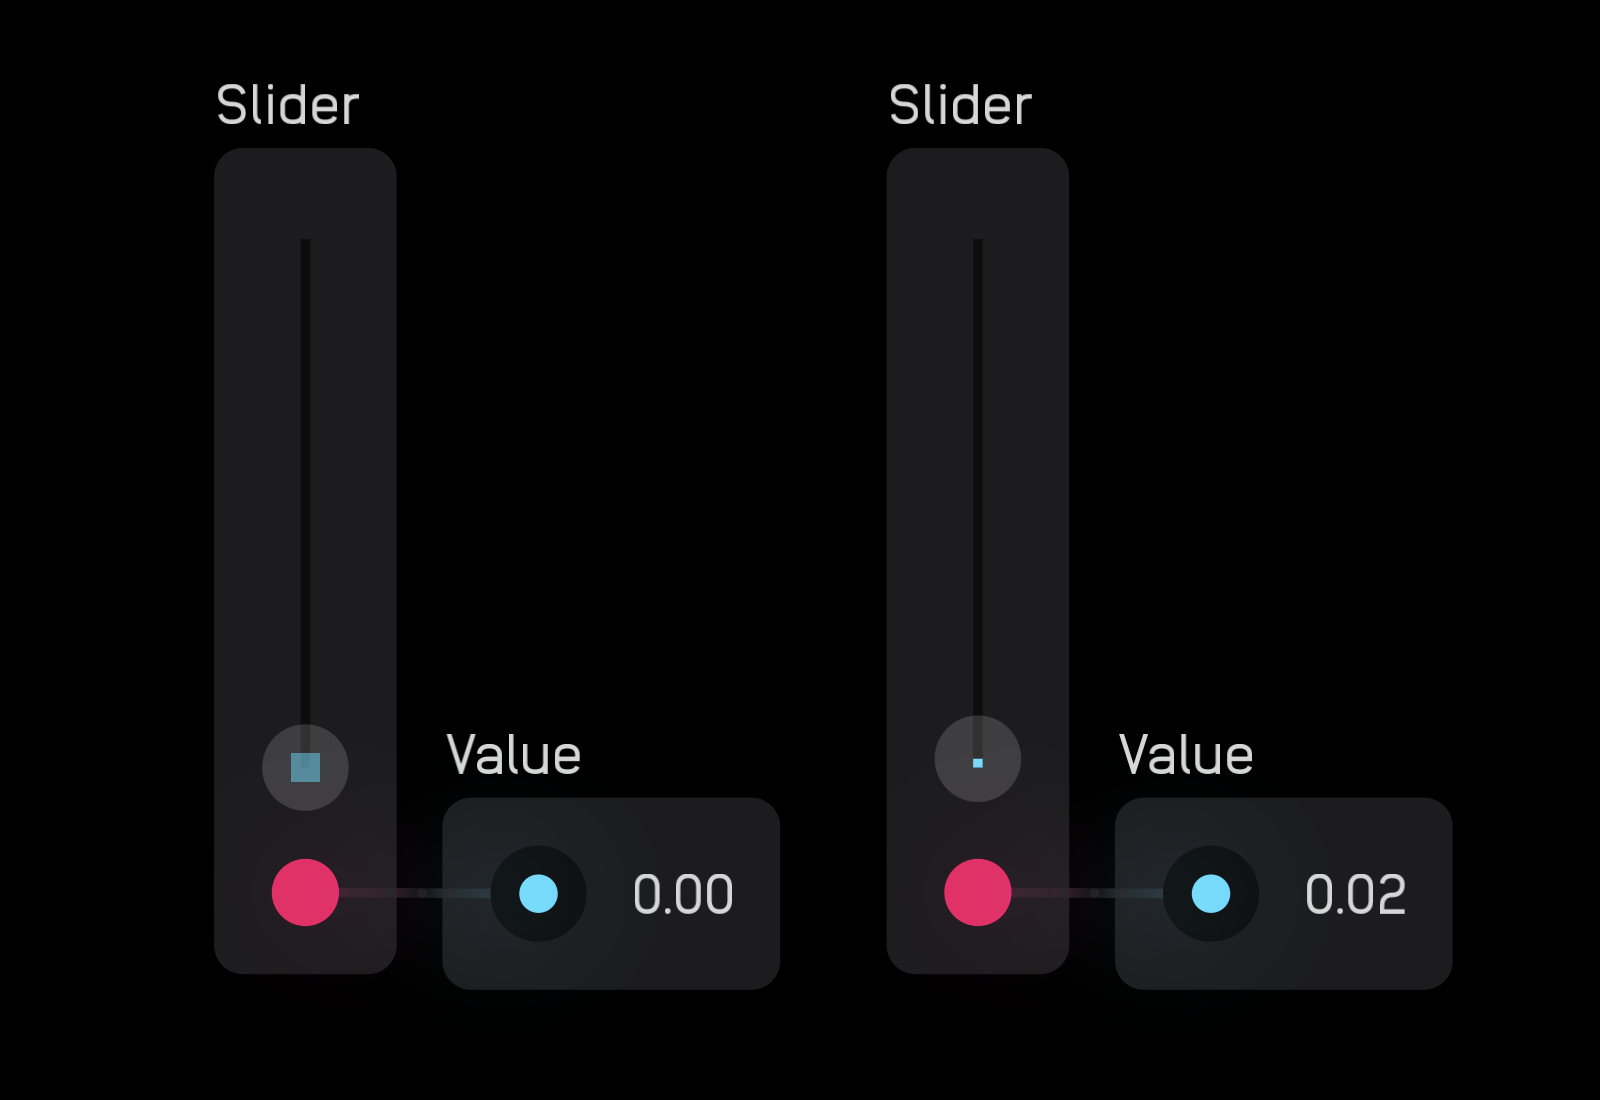
The slider node is used to modify other nodes. It outputs a 0 to 1 mod signal. This signal can be scaled and shaped by expr, mapper, and spline nodes.
When the slider node is zeroed (turned all the way down) a square appears in the center of the small circle.
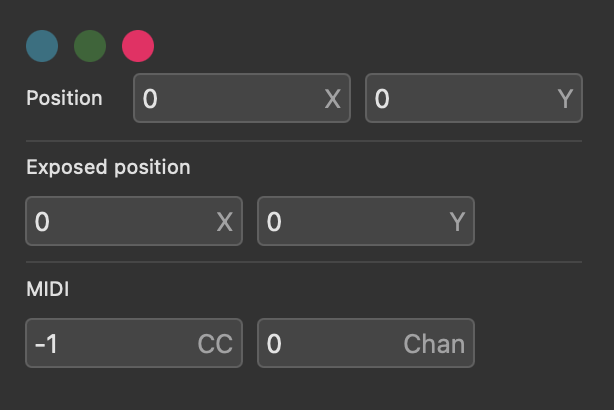
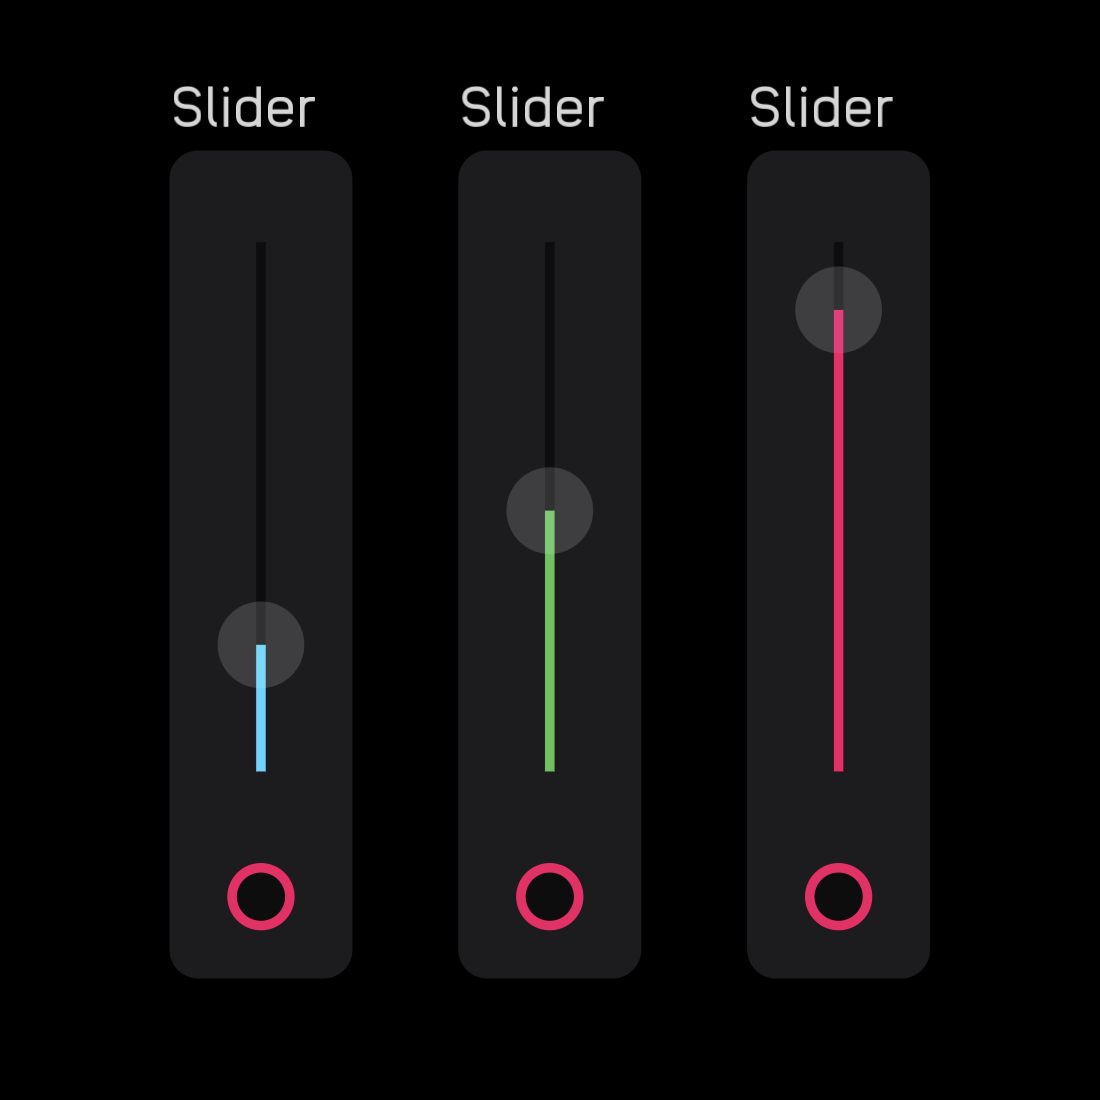
In the inspector panel you can change the color of the slider to blue, green, or red, and assign MIDI CC and Channel.
toggle
| out | signal |
|---|---|
out |
gate |
| control | description |
|---|---|
toggle switch |
click or tap to switch |
| exposable | ✅ automatic |
|---|---|
description
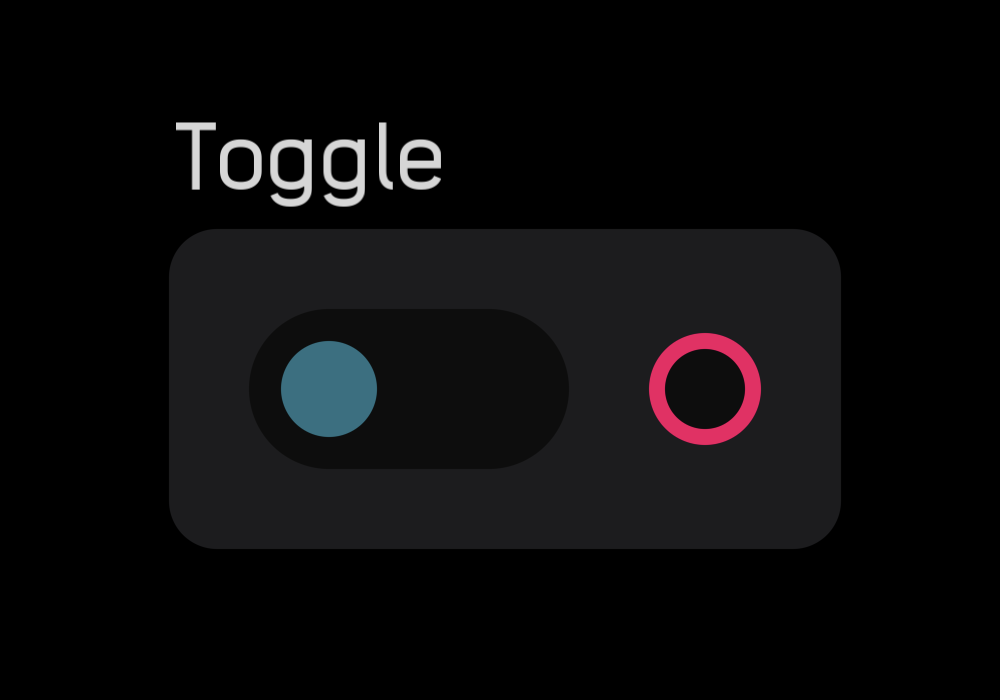
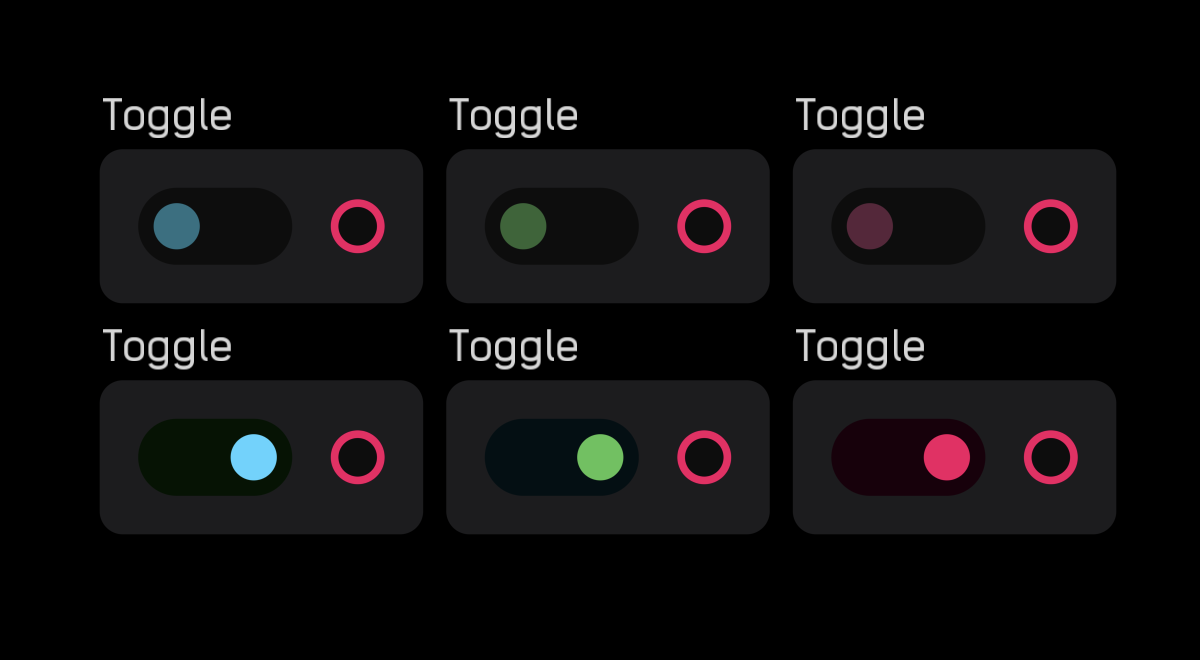
The toggle node outputs a 0 or 1 gate signal. When the switch is set to the left, the output is 0, and when it's set to the right, it is 1.
In the inspector panel you can set the color of the switch as blue, green, or red.
touch pad
| out | signal |
|---|---|
x |
mod |
y |
mod |
touch |
gate |
| control | description |
|---|---|
touch pad |
click or tap anywhere on field |
| exposable | ✅ |
|---|---|
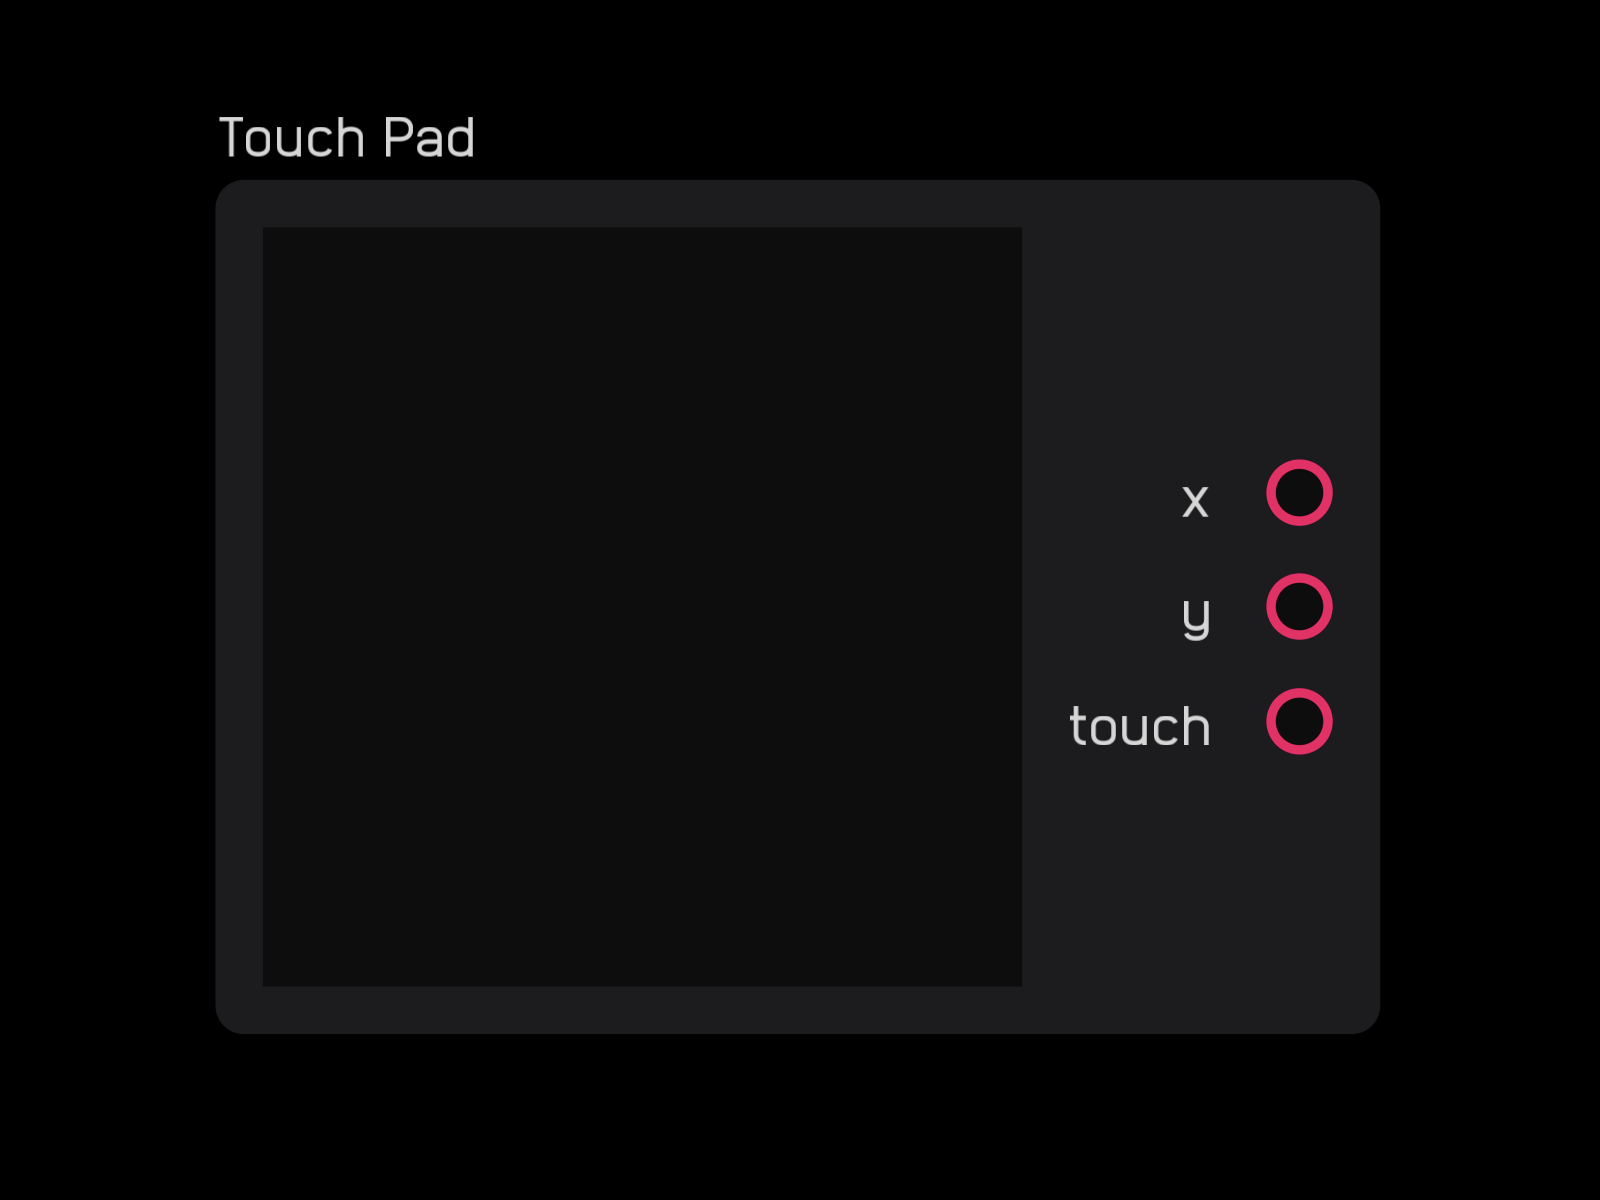
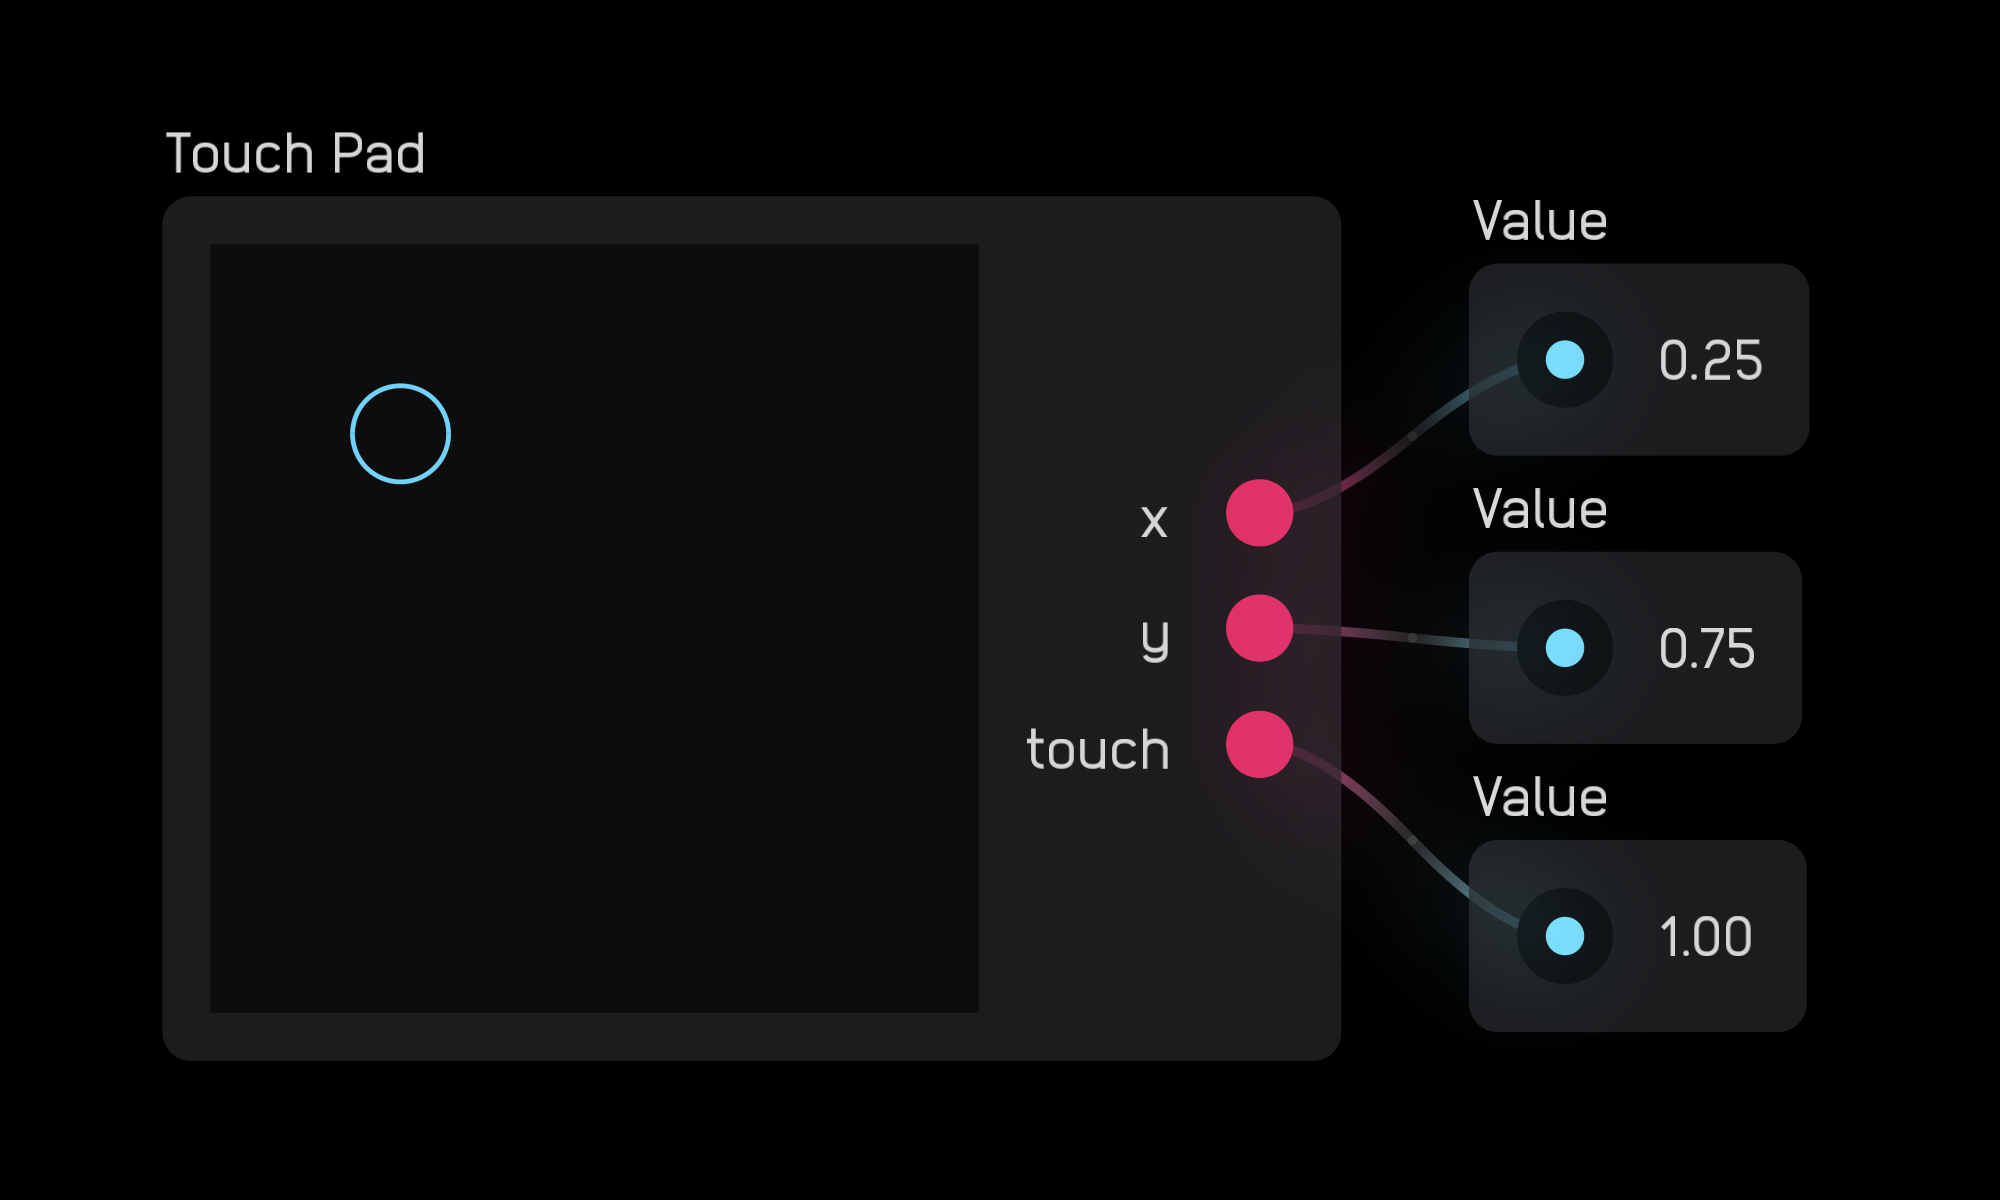
description
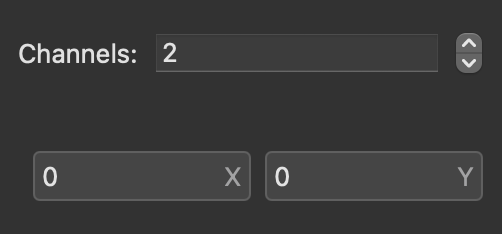
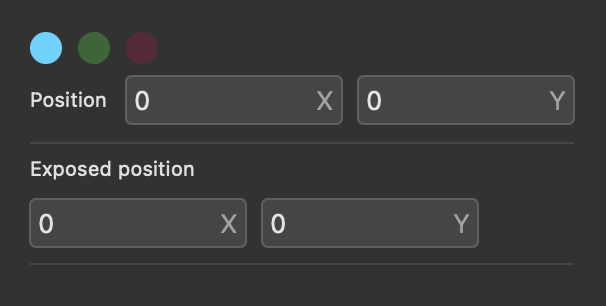
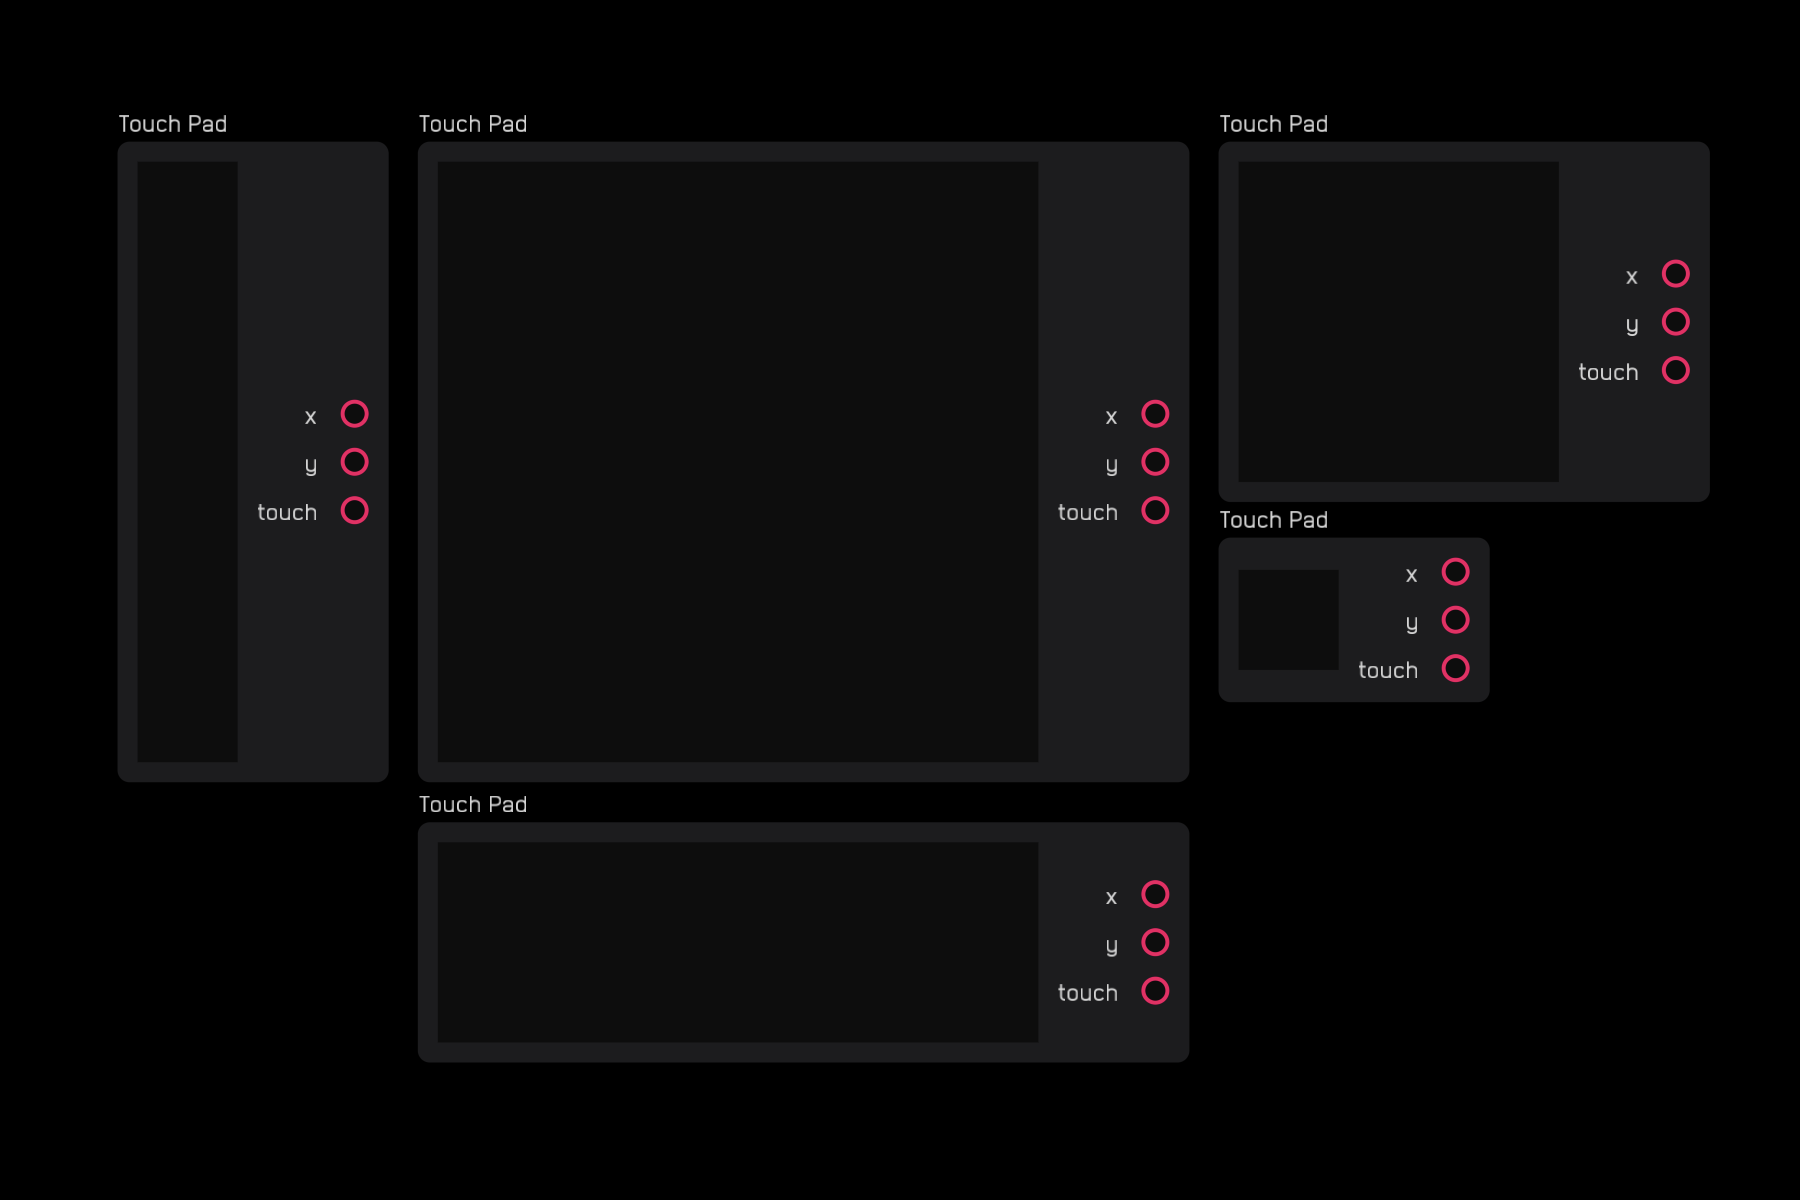
The touch pad node outputs two mod signals that correspond to the (x, y) coordinates of where you click or touch. This point is marked by a blue circle.
In the inspector panel you can change the Size of the node and the number of Channels (for iOS multitouch).
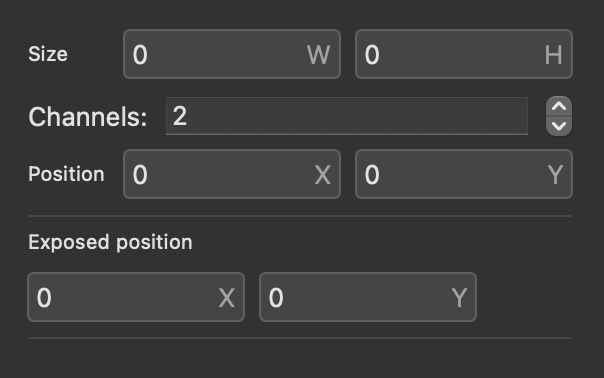
You can make the node smaller, larger, or rectangular.
poly
description
The poly nodes help create and manage polyphonic signals.
- The
combineandsplitnodes allow you to merge several mono signals together and then take them back apart. - The
poly mixnode takes a poly signal and mixes it down to a mono signal. - The
channel indexnode outputs a poly signal of integers indexed from0. - The
channel countnode outputs the current number of polyphony at its input.
combine
| in | signal |
|---|---|
0 |
any |
1 |
any |
... |
any |
| out | signal |
|---|---|
out |
any |
| exposable | ❌ |
|---|---|
description
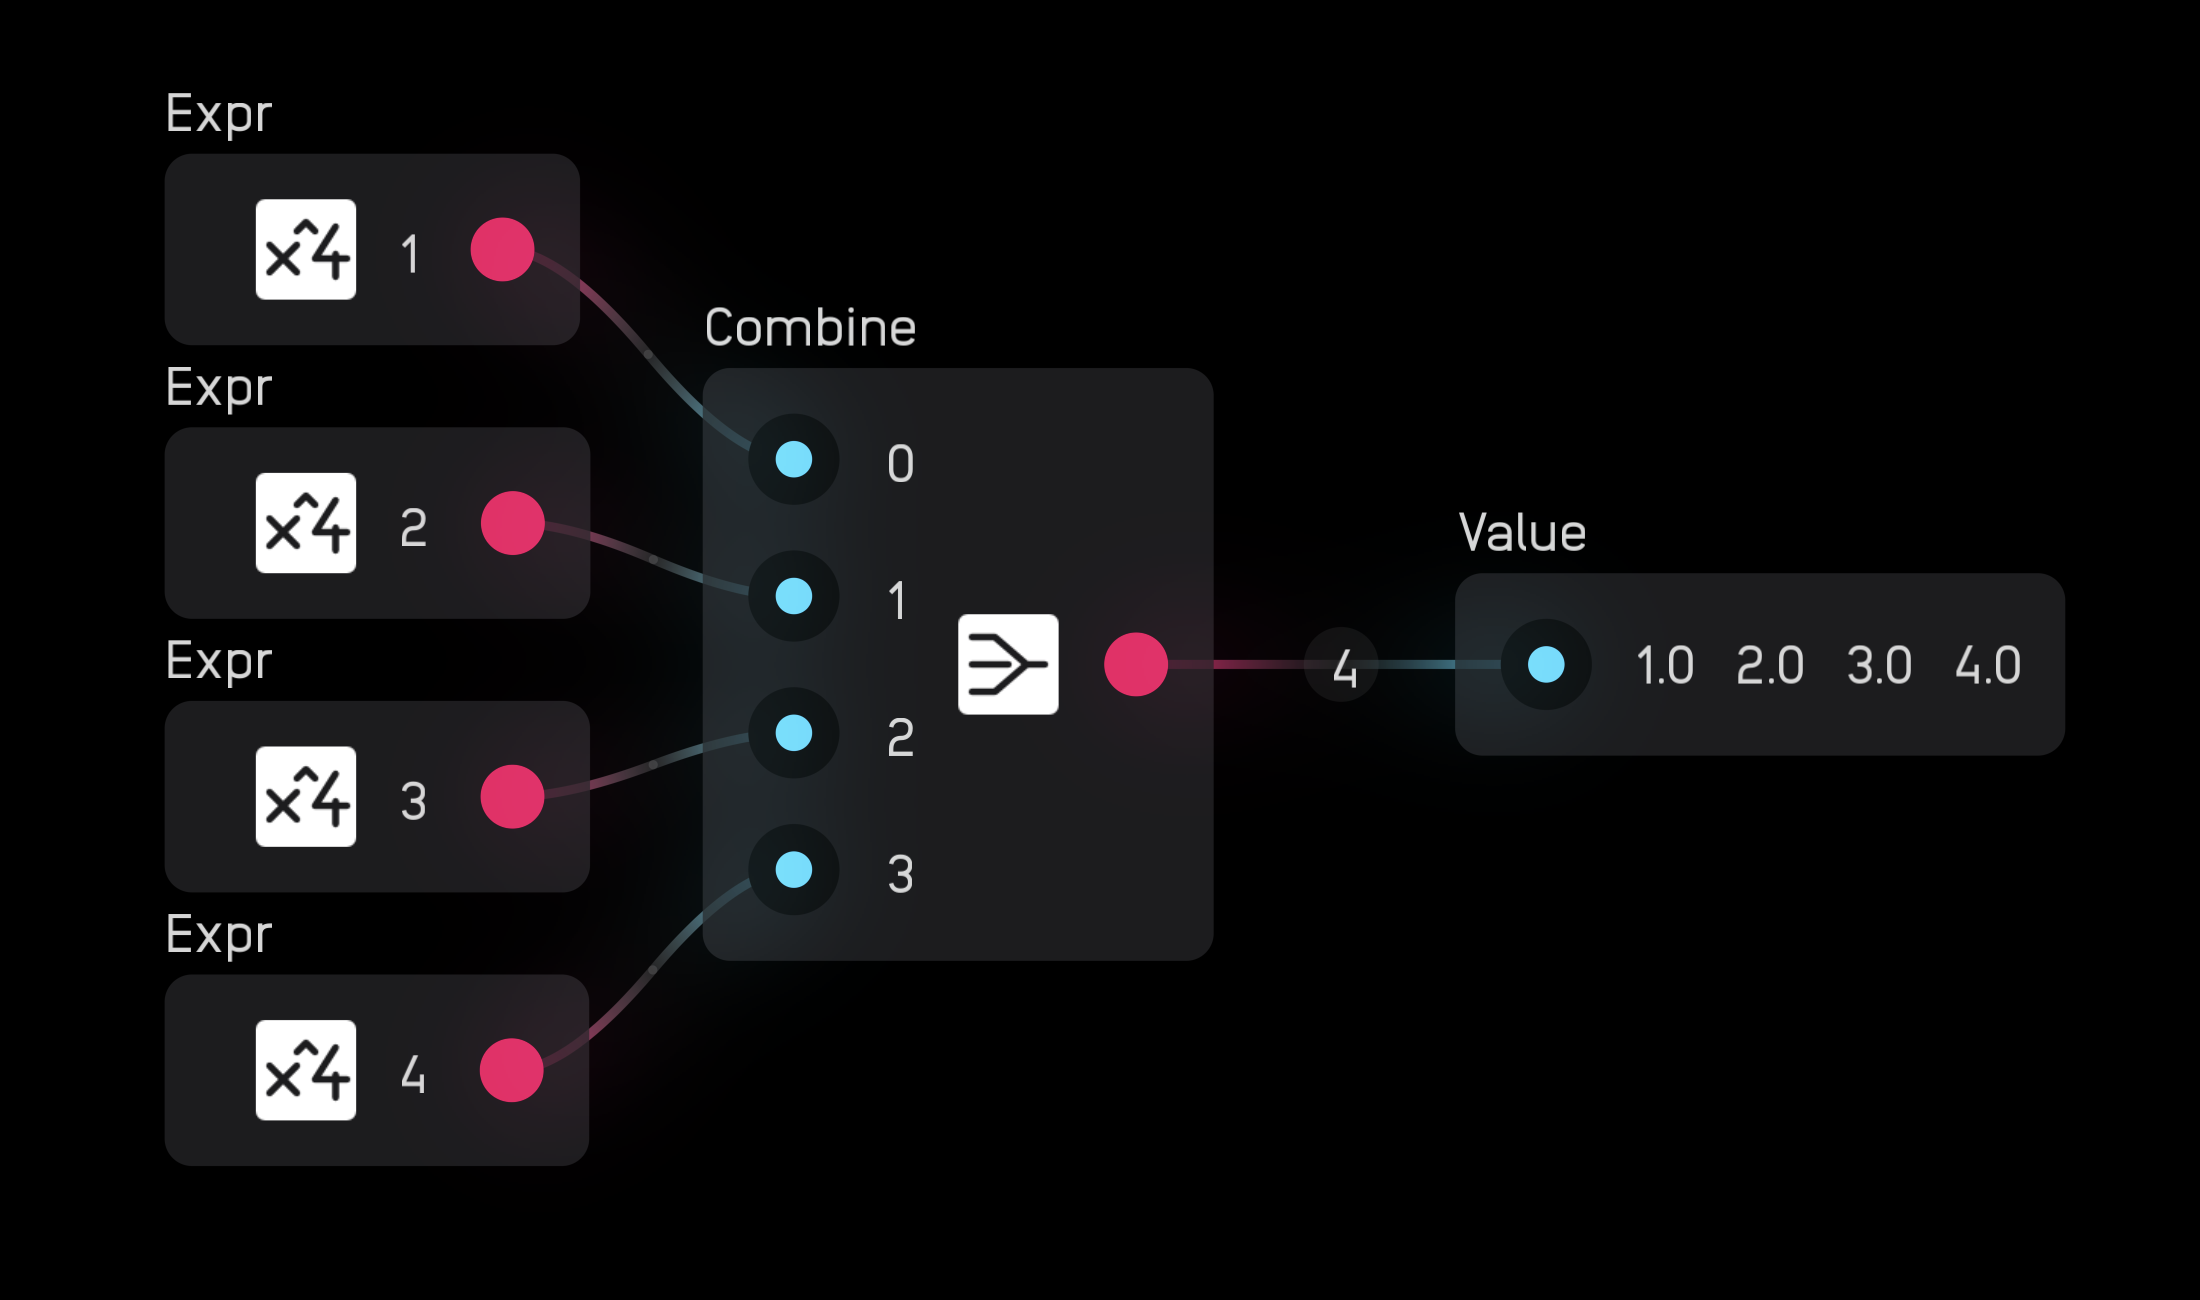
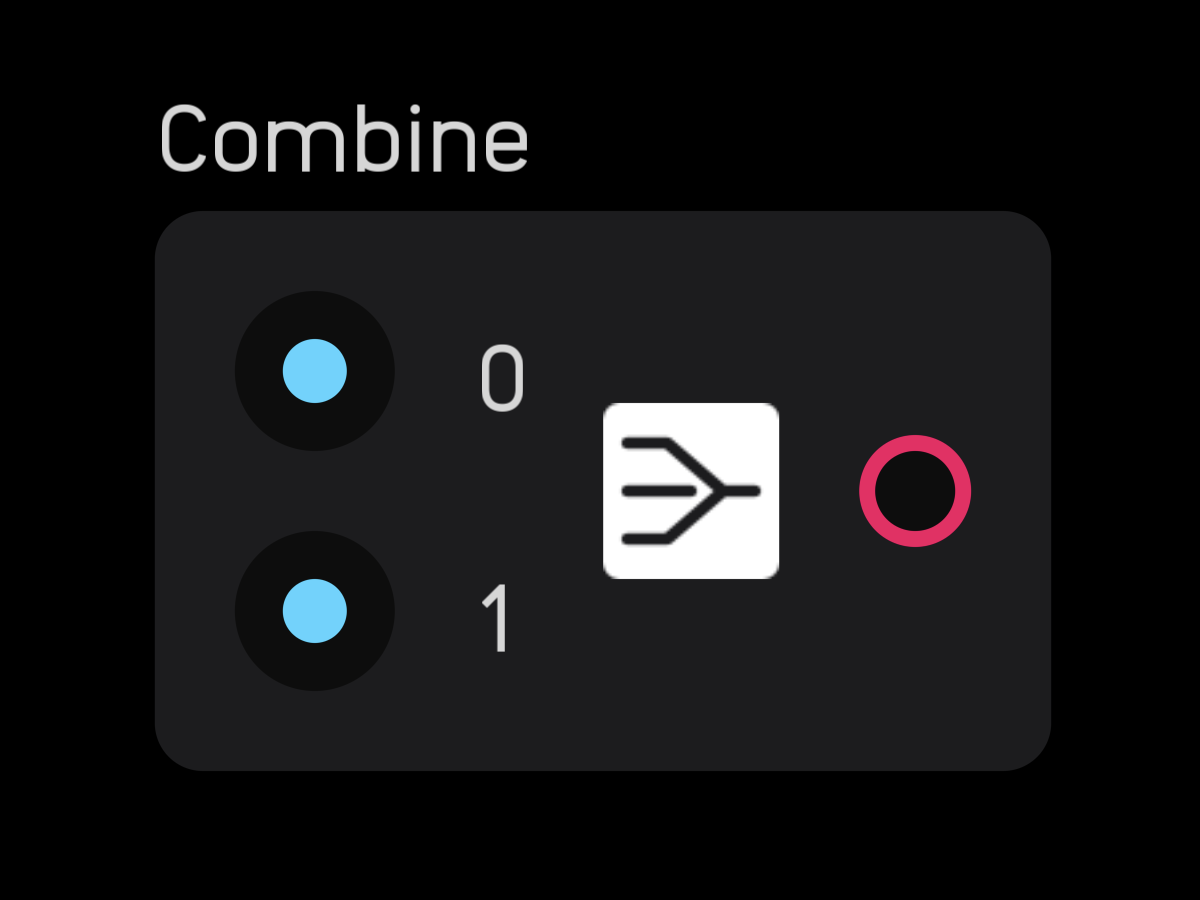
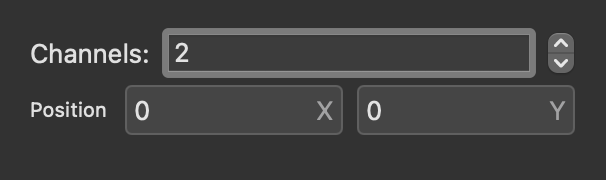
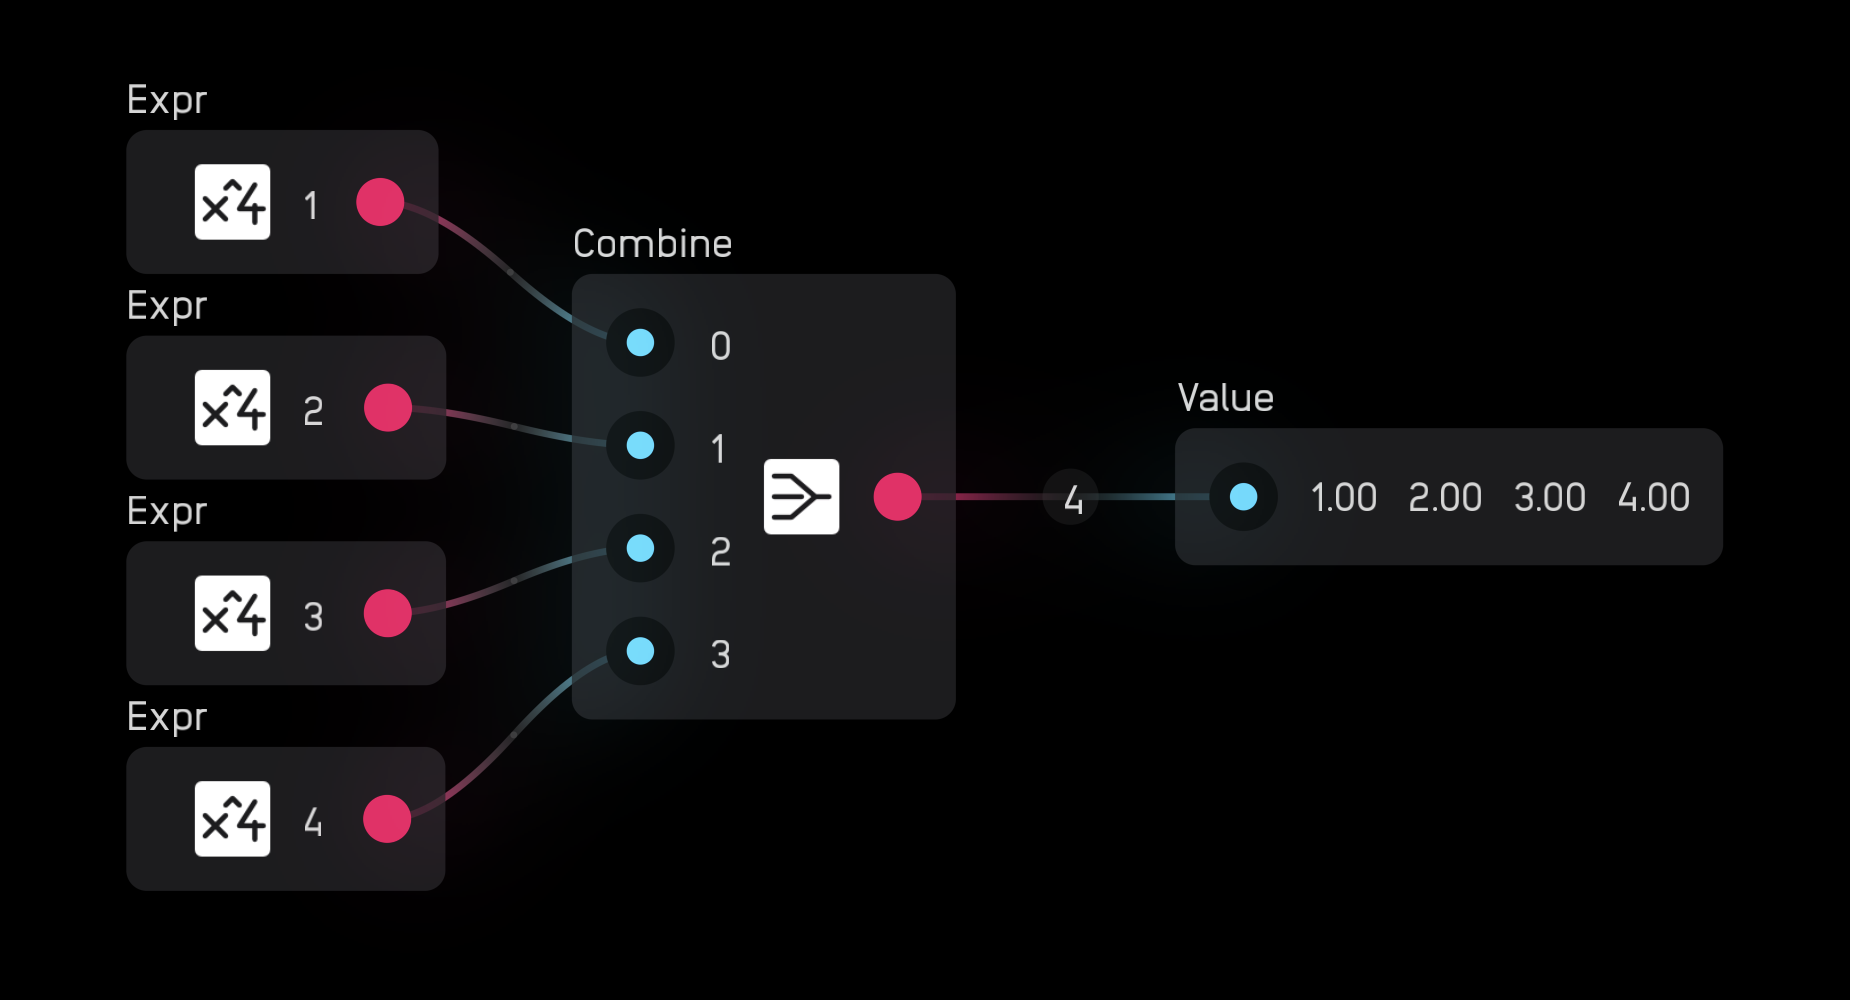
The combine node takes from 2 up to 256 mono signals and combines them into one polyphonic signal.
In the inspector panel you can set the number of channels.
split
| in | signal |
|---|---|
in |
any |
| out | signal |
|---|---|
0 |
any |
1 |
any |
... |
any |
| exposable | ❌ |
|---|---|
description
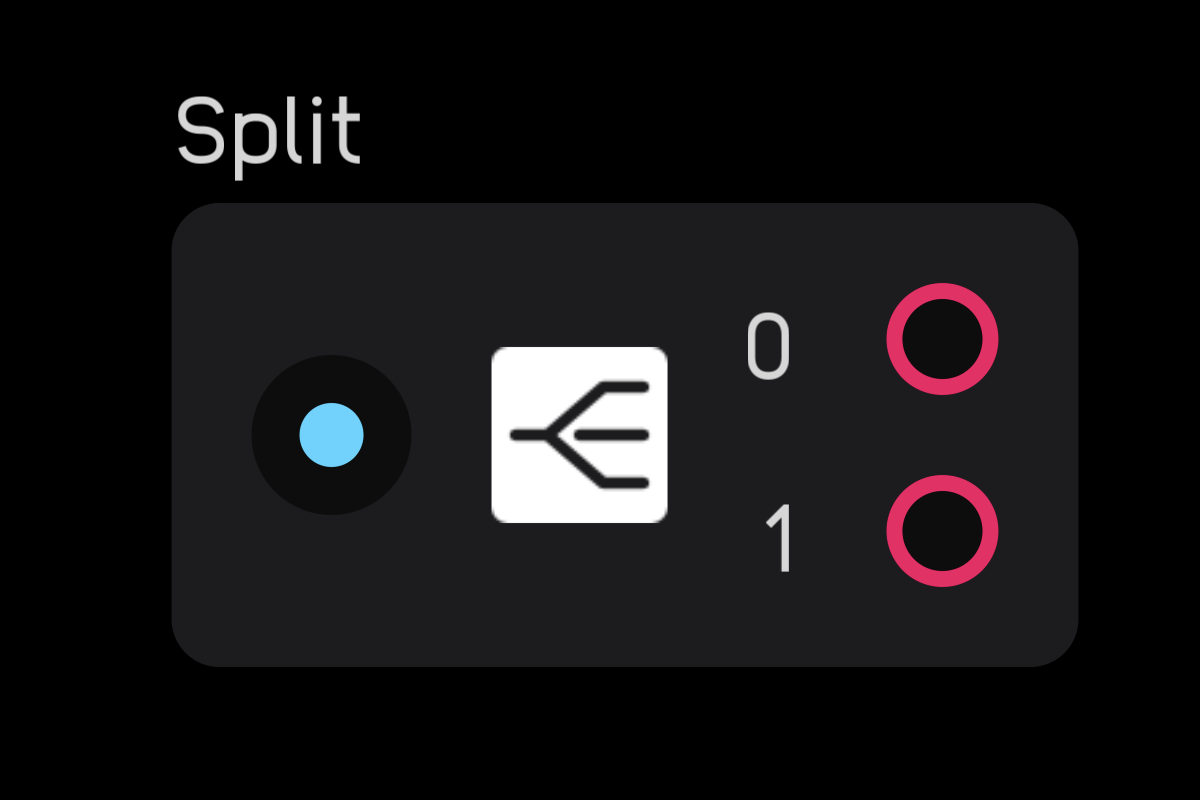
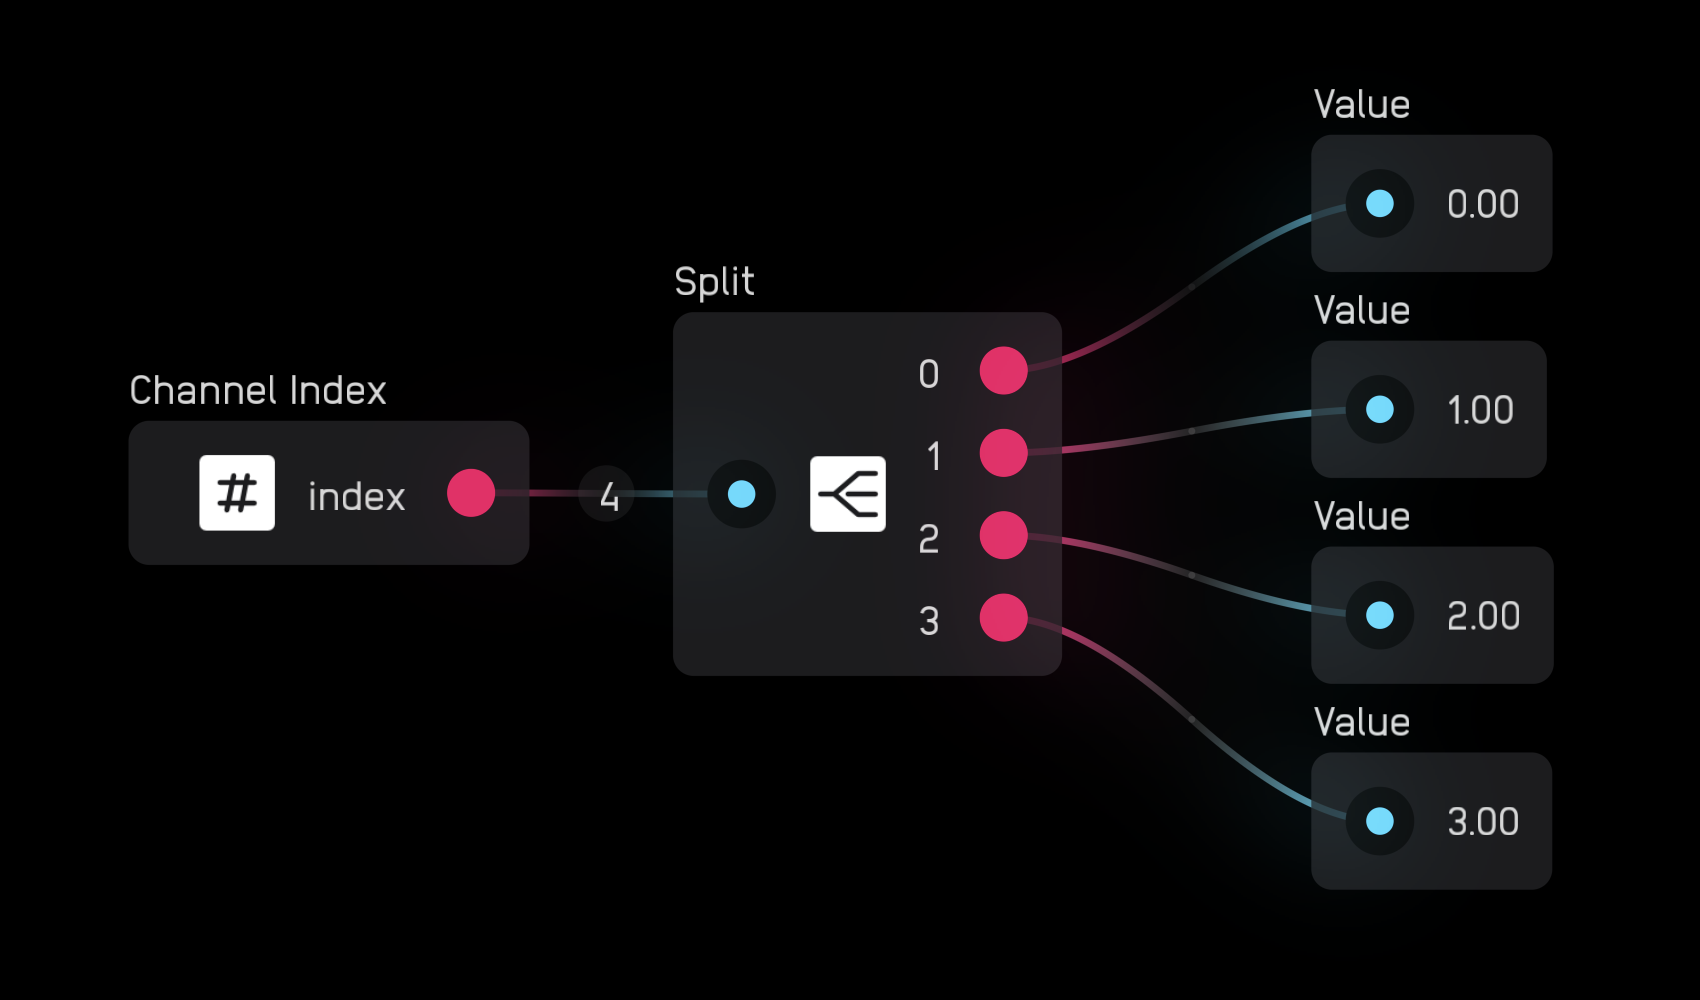
The split node takes a poly signal and splits it into 1 to 256 mono signals.
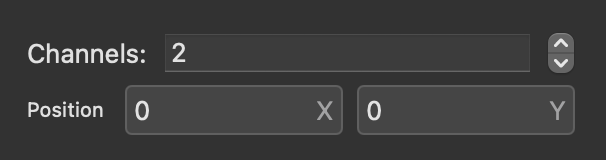
In the inspector panel you can set the number of channels.
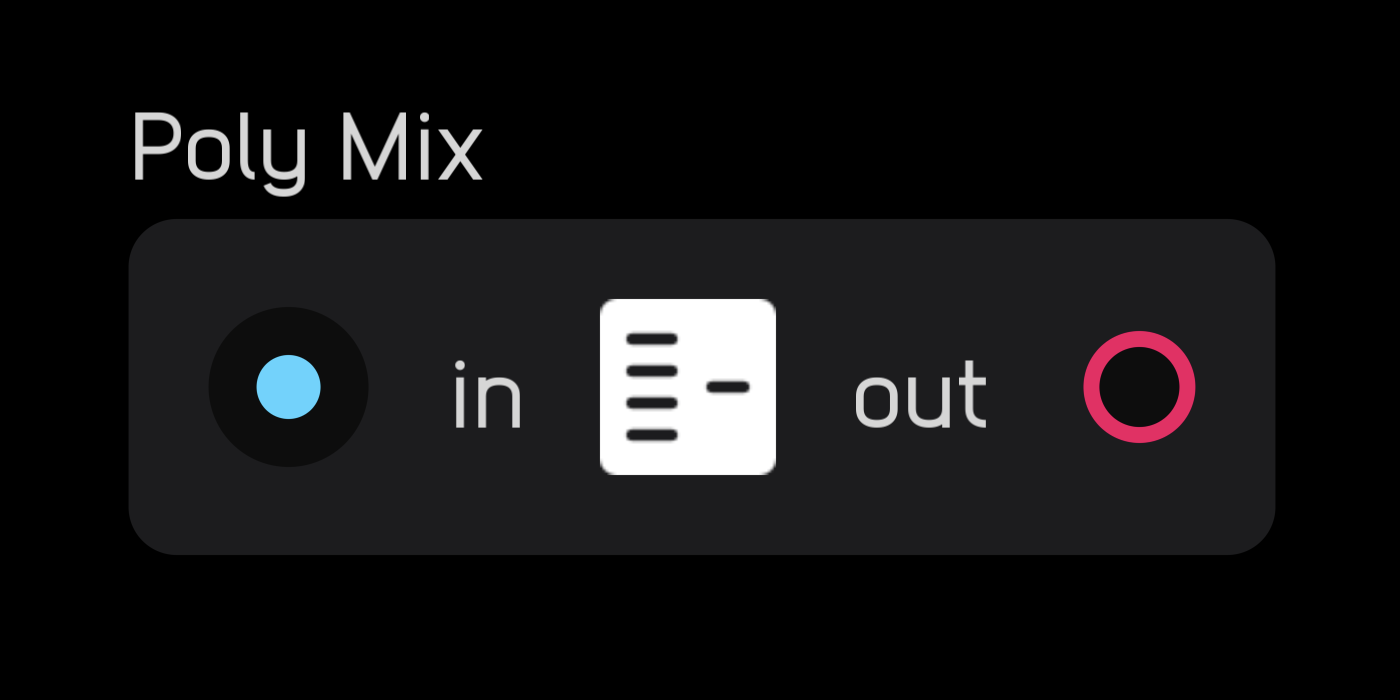
poly mix
| in | signal |
|---|---|
0 |
any |
1 |
any |
... |
any |
| out | signal |
|---|---|
out |
any |
| exposable | ❌ |
|---|---|
description
The split node takes a poly signal and splits it into 1 to 256 mono signals.
In the inspector panel you can set the number of Channels.
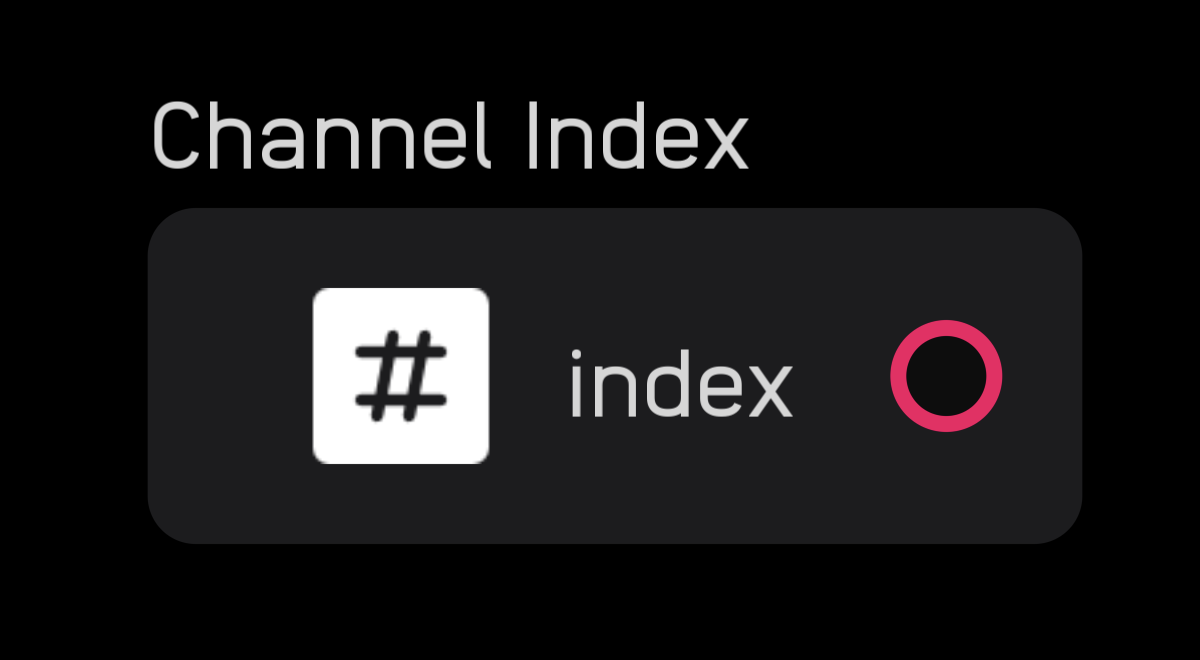
channel index
| out | signal |
|---|---|
out |
integers 1 - 256 |
| exposable | ❌ |
|---|---|
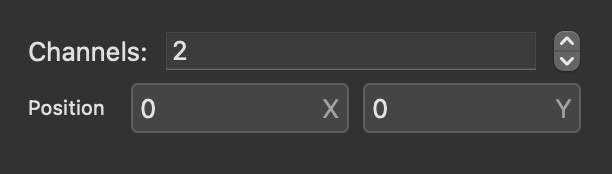
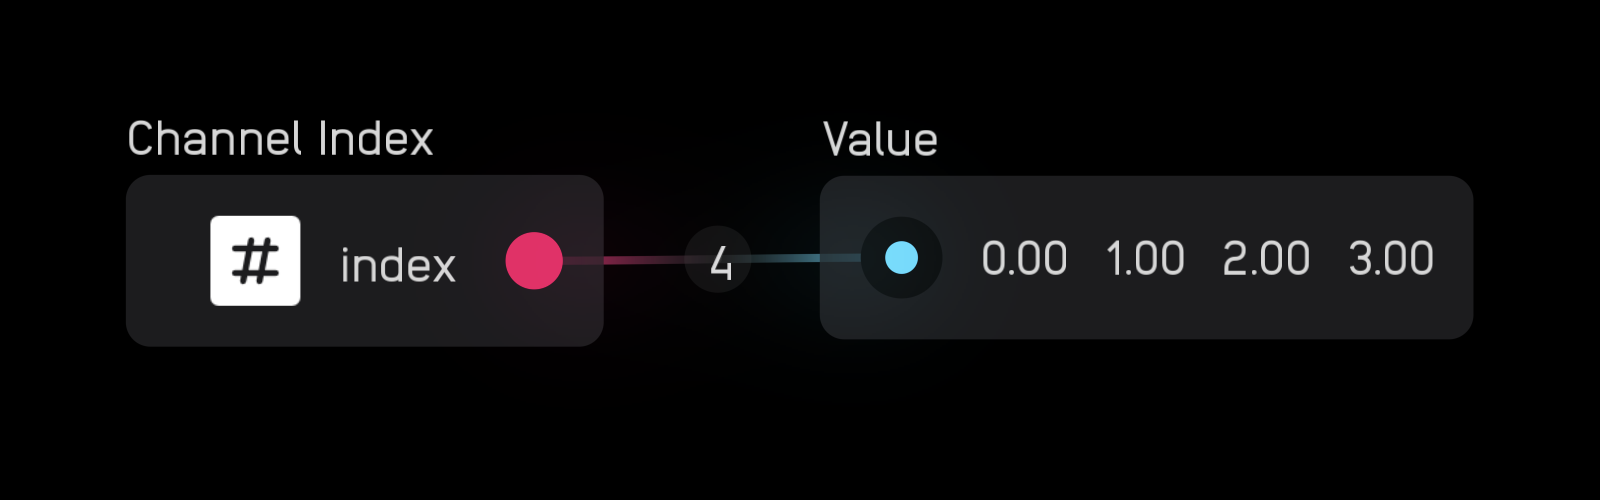
description
The channel index node creates a signal with 1 to 256 channels where each channel is an integer index number that is indexed from 0.
In the inspector panel you can set the number of Channels.
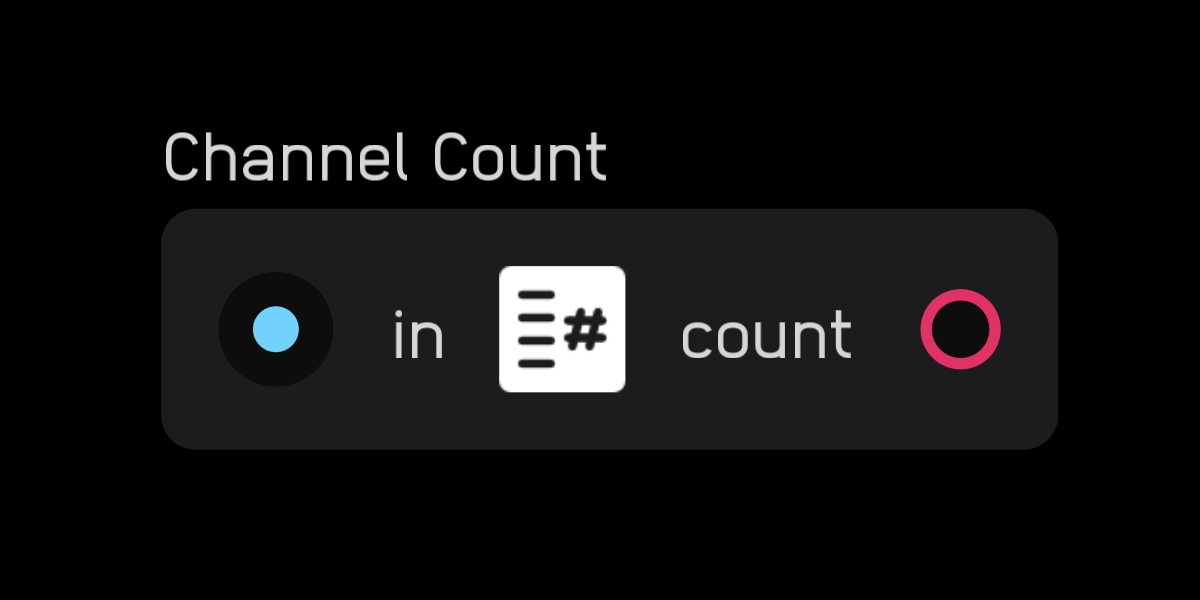
channel count
| out | signal |
|---|---|
out |
integers 1 - 256 |
| exposable | ❌ |
|---|---|
description
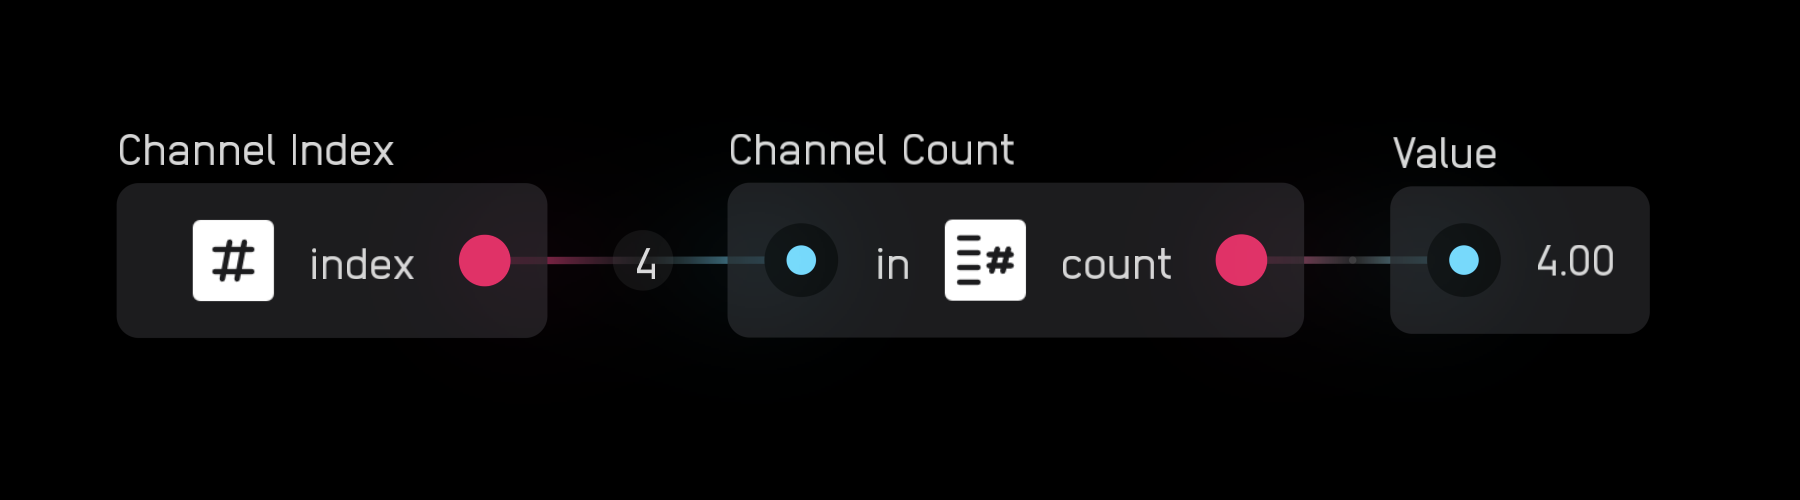
The channel count node outputs the number of channels in a signal as an integer.
switch
description
The switch nodes route signals and turn them on or off.
- The
muxnode sends one of several inputs to one output while thedemuxnode sends one input to several outputs. - The
spigotnode allows you to turn off a section of a patch to prevent it from wasting CPU time when not needed.
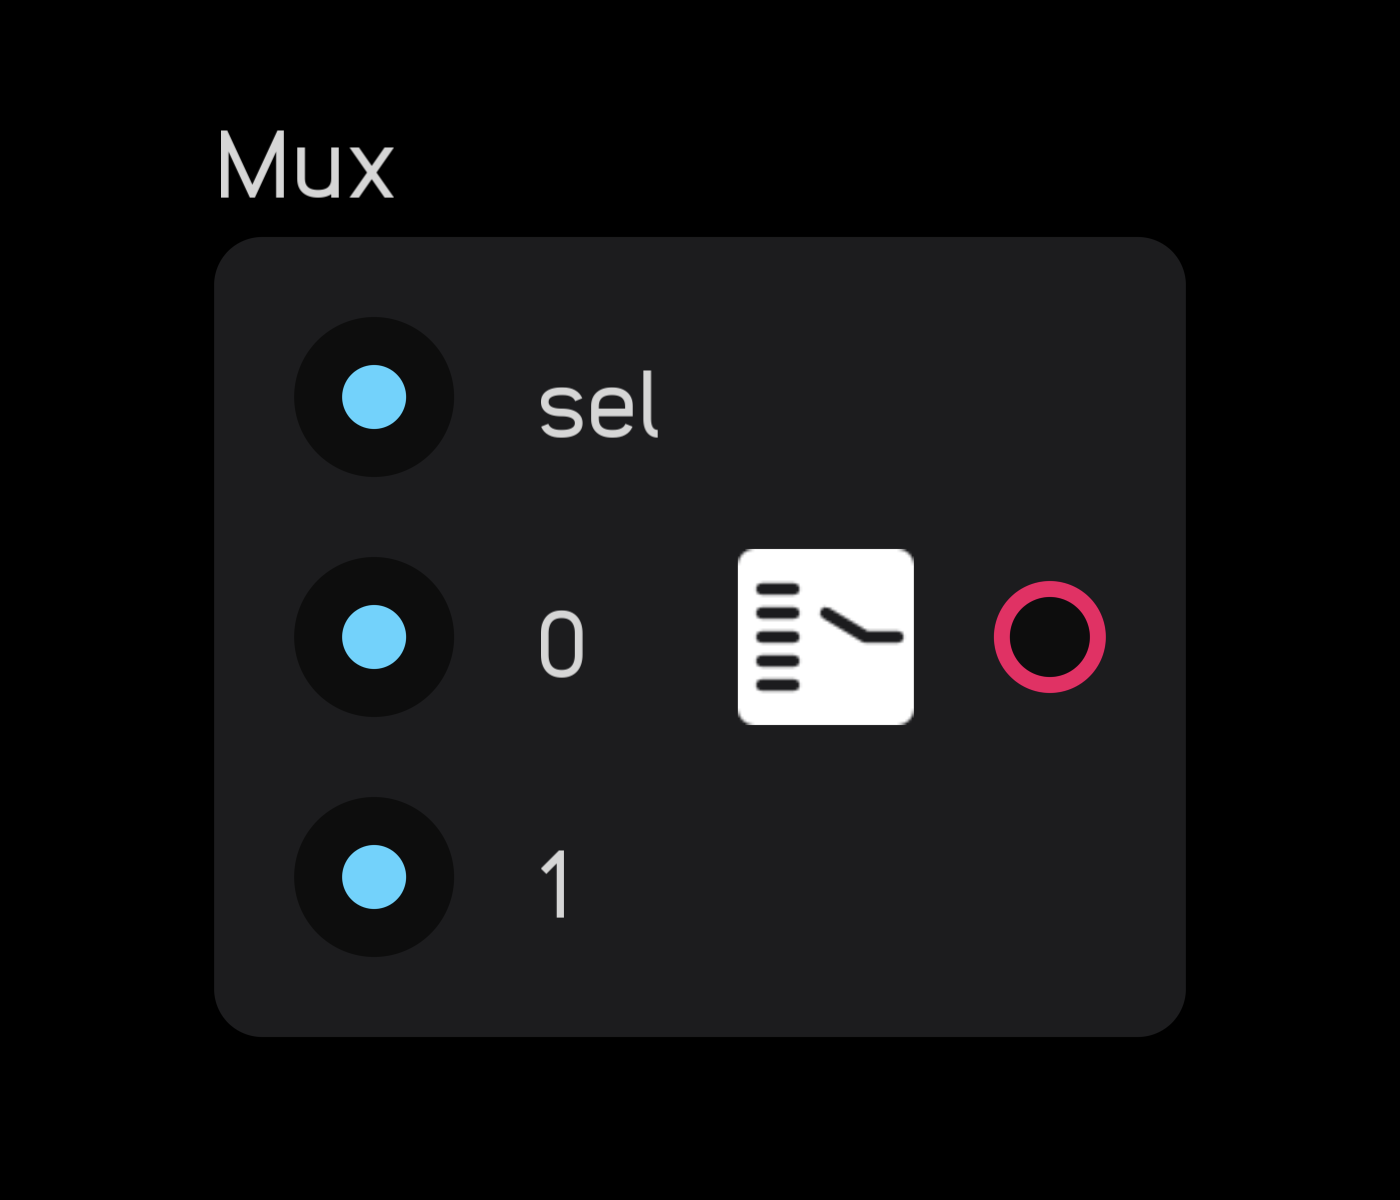
mux
| in | signal |
|---|---|
sel |
any |
0 |
any |
1 |
any |
... |
any |
| out | signal |
|---|---|
out |
any |
| exposable | ❌ |
|---|---|
description
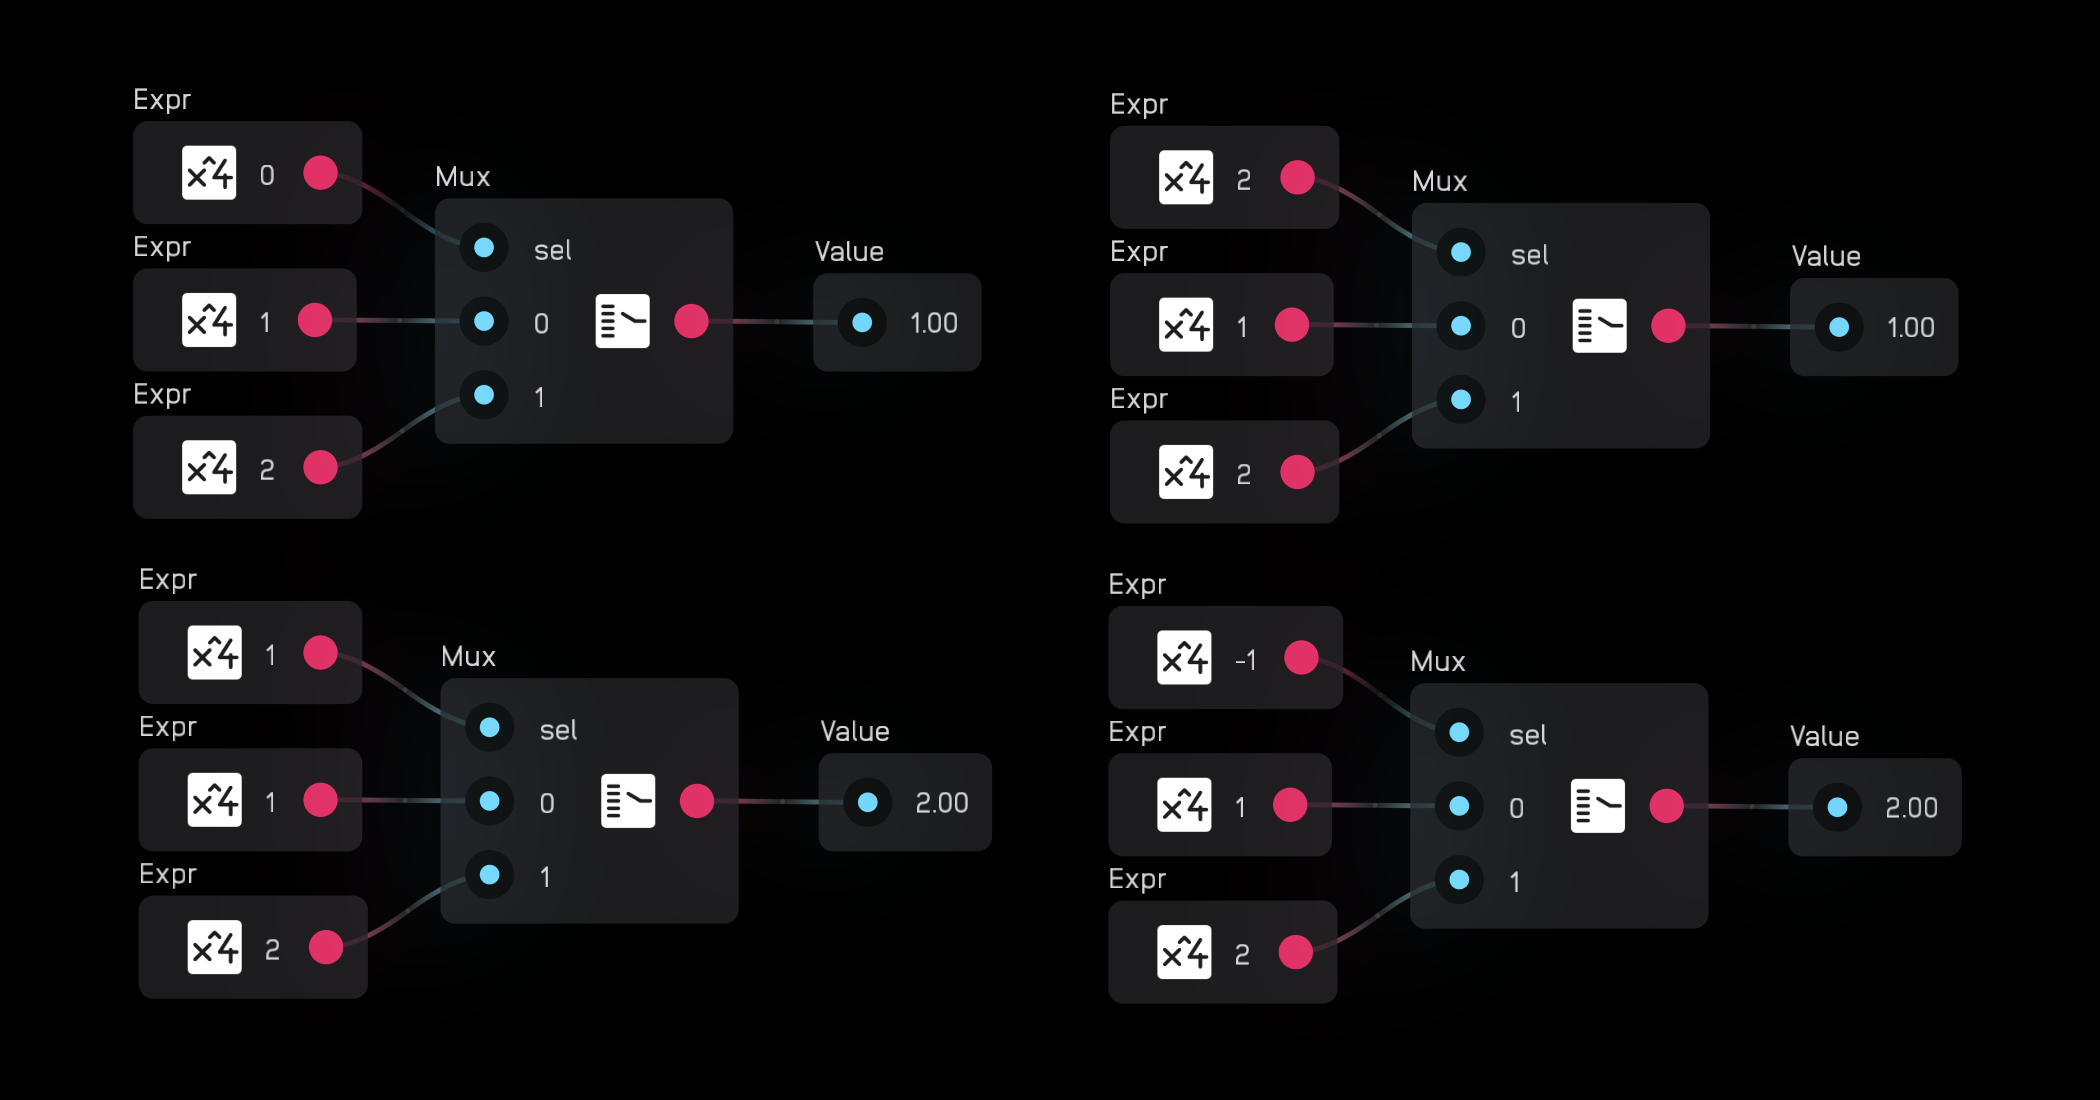
The mux node routes one of 2 to 256 inputs to a single output according to the sel value, which is indexed from 0.
In the inspector panel you can set the number of inputs.

When the sel value is equal to or greater than 0 but less than 1, then the 0 input is sent to the output. When the sel value is equal to or greater than 1 but less than 2, then the 1 input is sent to the output, and so on.
If the sel value exceeds the number of inputs, then it will wrap around to the beginning. That means a mux node with 2 inputs and a sel value of 2 will send the 0 input to the output.
If the sel value is negative, the selection wraps around backwards. So a mux node with 2 inputs and a sel value of -1 will send the 1 input to the output.
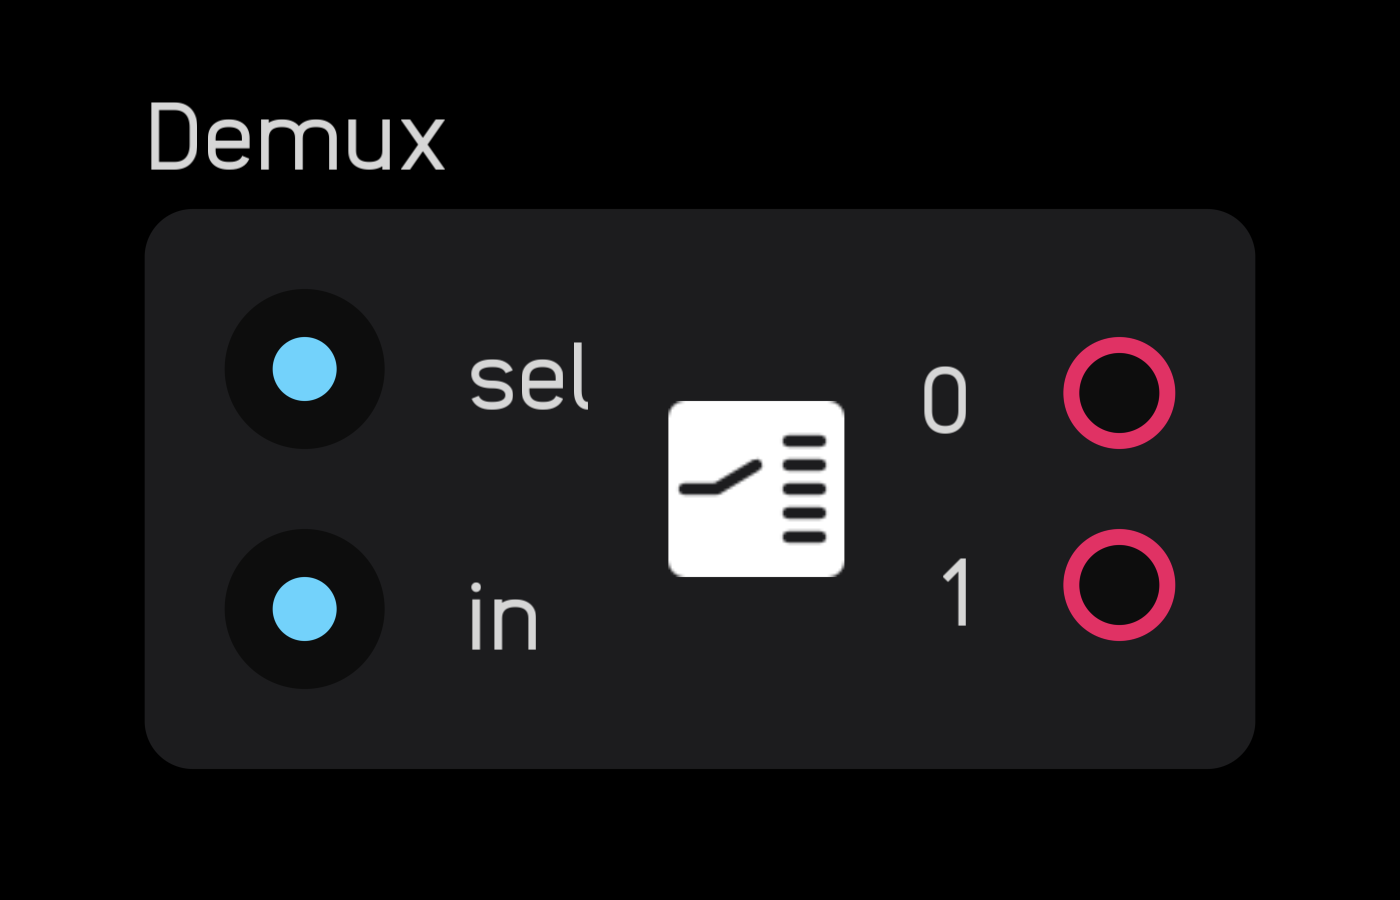
demux
| in | signal |
|---|---|
sel |
any |
in |
any |
| out | signal |
|---|---|
0 |
any |
1 |
any |
... |
any |
| exposable | ❌ |
|---|---|
description
The demux node routes one signal to 2 or up to 256 outputs according to the sel value, which is indexed from 0.
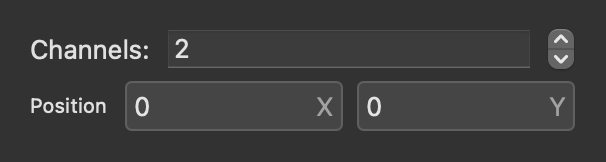
In the inspector panel you can set the number of outputs.
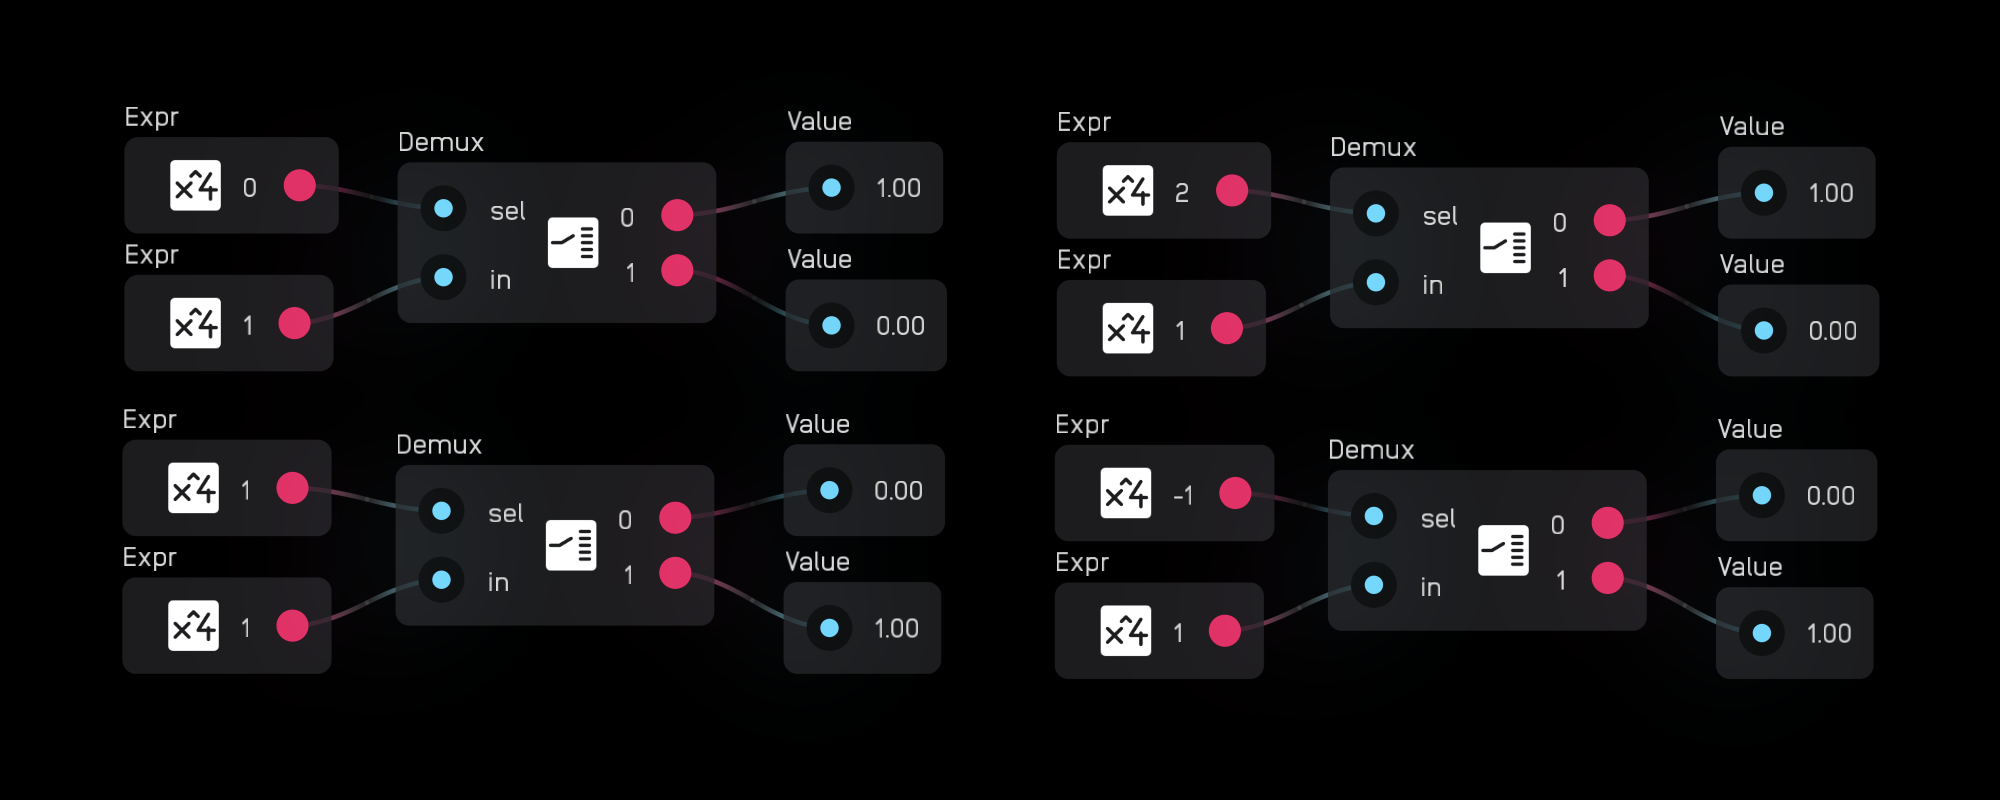
When the sel value is equal to or greater than 0 but less than 1, then the input is sent to the 0 output. When the sel value is equal to or greater than 1 but less than 2, then the input is sent to the 1 output, and so on.
If the sel value exceeds the number of outputs, then it will wrap around to the beginning. That means a demux node with 2 outputs and a sel value of 2 will send the input to the 0 output.
If the sel value is negative, the selection wraps around backwards. So a demux node with 2 inputs and a sel value of -1 will send the input to the 1 output.
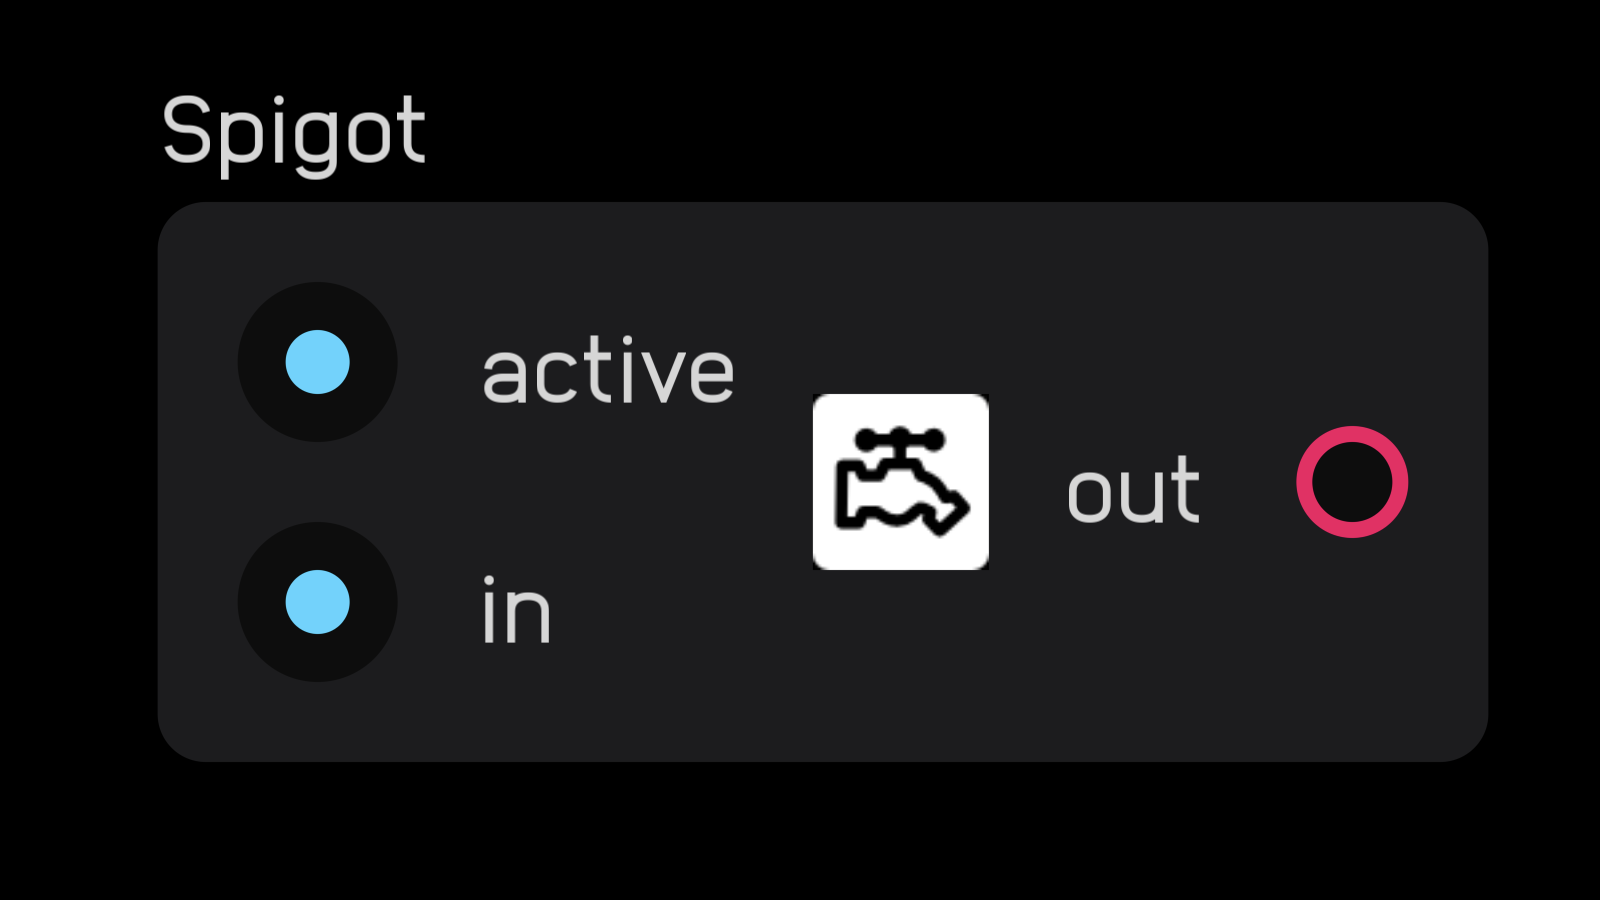
spigot
| in | signal |
|---|---|
active |
gate |
in |
any |
| out | signal |
|---|---|
out |
any |
| exposable | ❌ |
|---|---|
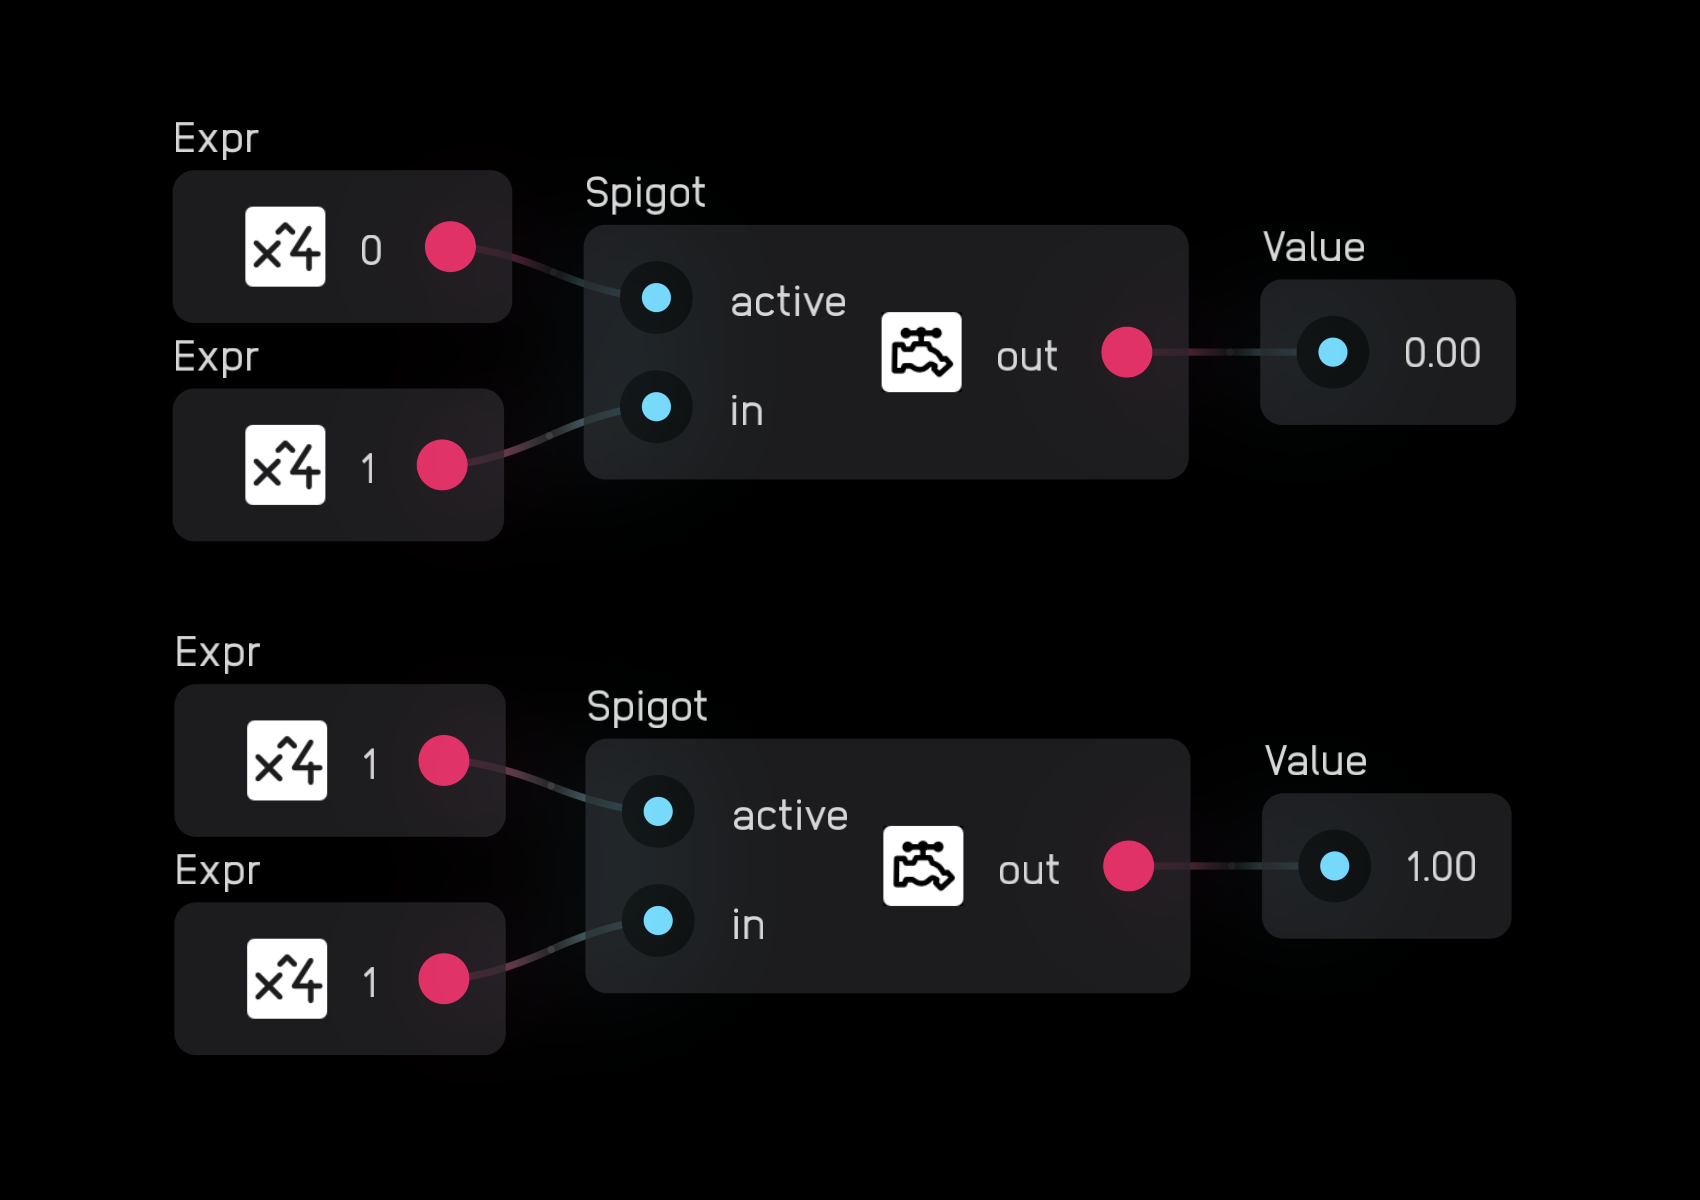
description
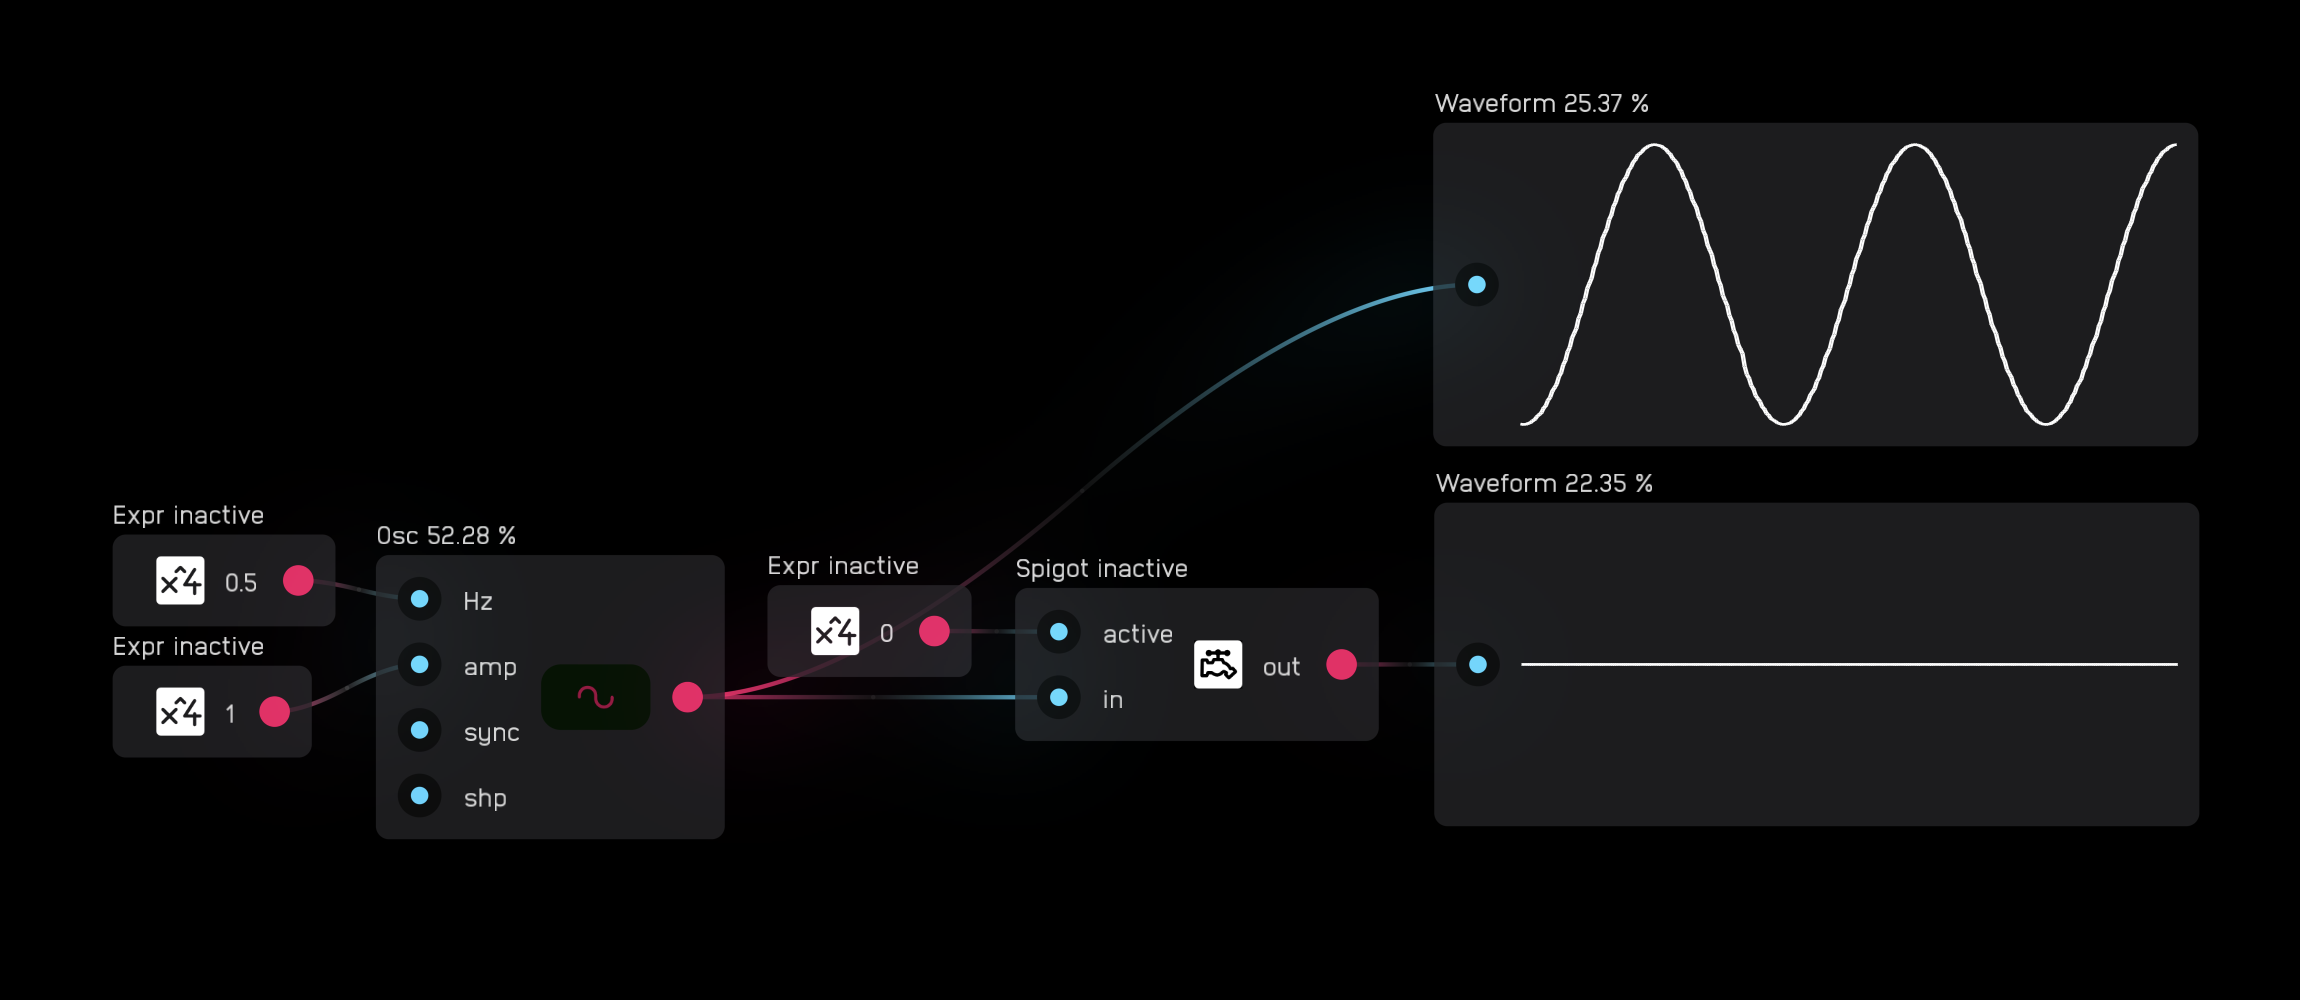
The spigot node turns off processing for all nodes to the left of it in the signal path that are not connected to some form of output like a meter or dac node.
When the active input is 0, nothing passes, and processing is halted. When the active input is high, the signal passes and everything is processed normally.
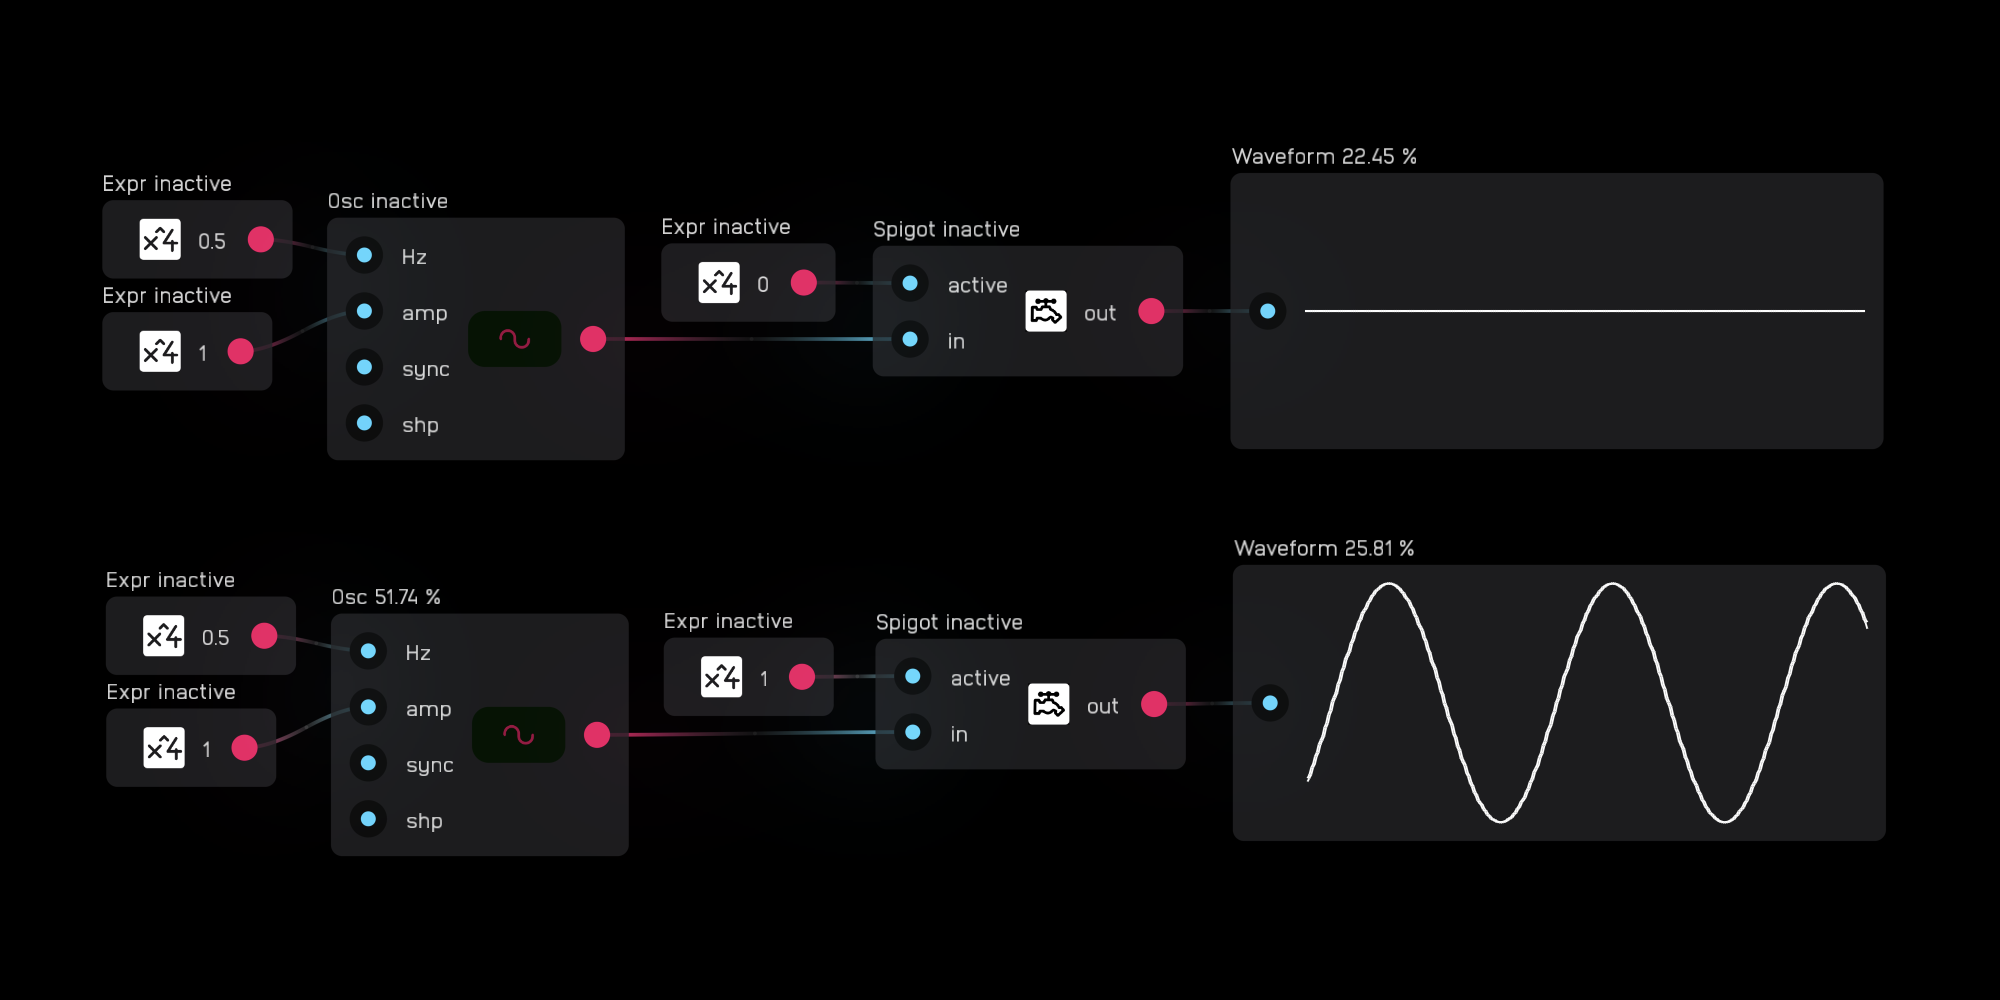
Nodes that are not processing show inactive next to their name when in timing mode. As you can see below, the first osc node is shut off by the spigot node whereas the second is not.
Beware that if you have any kind of meter or other type of terminal output node connected to a node or series of nodes that you want to turn off using a spigot node, the node will not turn off.